Featured Image: Ascher Racing Mclaren Artura Pro USB Sim Racing Wheel
The McLaren Artura Pro USB version is easily one of the more feature-rich sim racing wheels I’ve come across. Before I even begin with this article, I’ll just say that reviewing the Artura Pro is one of those reviews I’ve found quite inspiring to do. This wheel deserves an enormous amount of respect, such as its Motorsport pedigree and build quality. While the Artura Pro USB is aimed at the high-end eSports / serious hobbyist market, I think the wheel is for sim racers at any stage of their journey.
It’s a joy to work with – you can take it out of the box and just race or get deep into the technical features and configuration options.
Ascher Racing sent me this wheel to review, but I liked it so much while testing it, I bought it.
I like it, and, as a prediction, I’ll propose the Artura series wheels are candidates for the best wheels the sim racing industry produces in 2024.
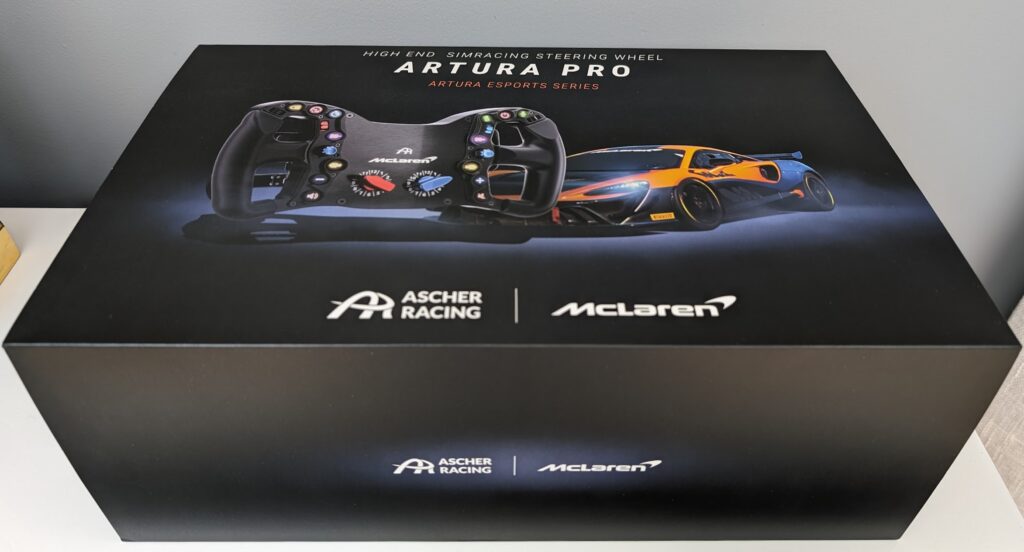
You may or may not be aware of the background on the new Artura series of wheels from Ascher Racing so I’ll bring you up to speed:
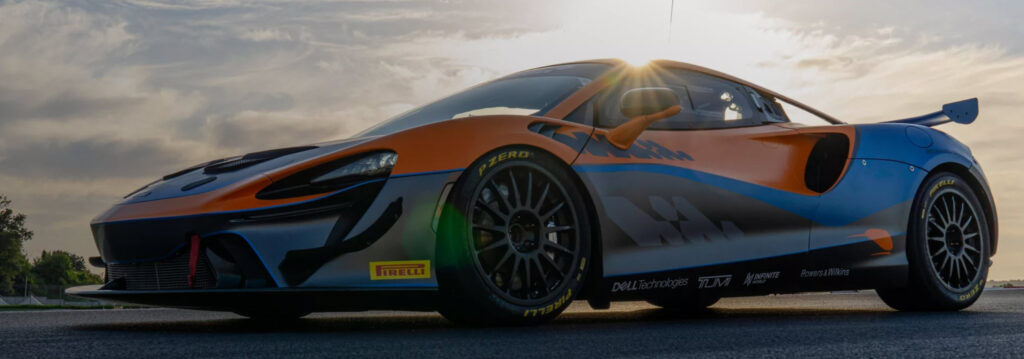
The Artura Pro is a product that bridges the Motorsport and sim racing universe. This delighted me as an AM driver myself, I love it when a wheel has a track-racing pedigree.
For the “full immersion” sim builders out there, here’s the wheel you need to build yourself an authentic replica of a McLaren cockpit:
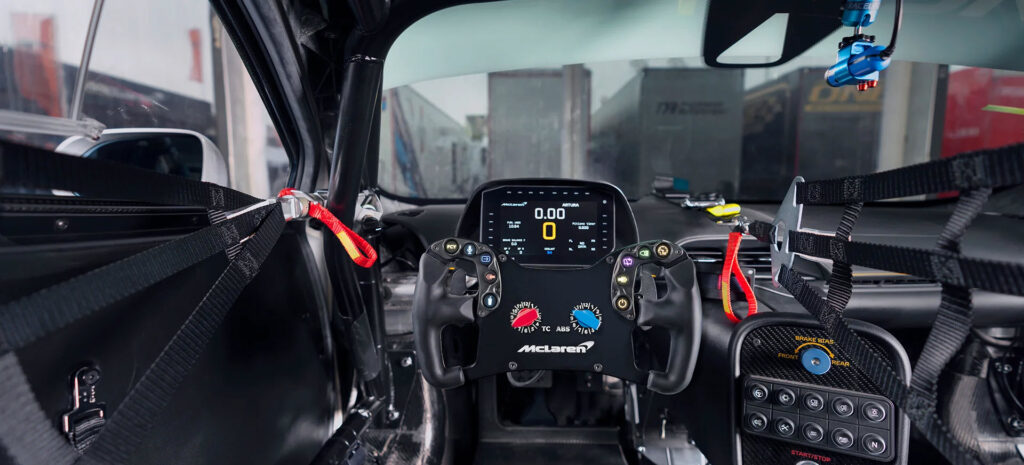
The Artura Pro is the result of a collaboration between Ascher Racing, McLaren, and Renvale, a company specializing in electronics and custom wiring solutions for the motorsports industry. My version is the Artura Pro USB variant. We’ll get to the product variations later.
It shares componentry, design, and manufacturing with the “real-world” equivalent.
This is a process that has been made possible by a partnership between Ascher Racing and McLaren.
First Impressions
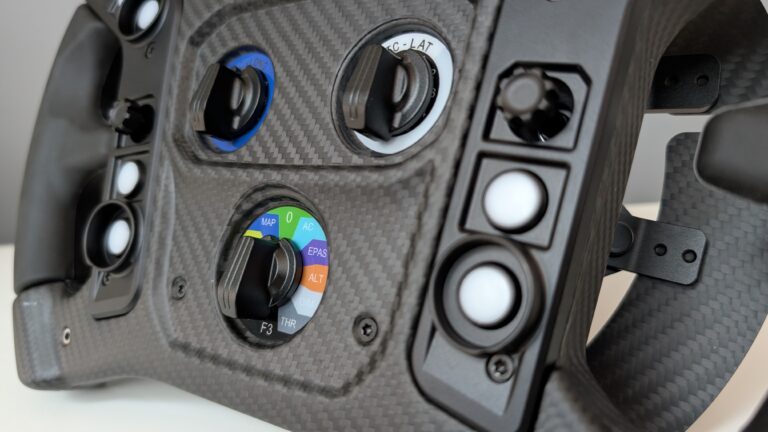
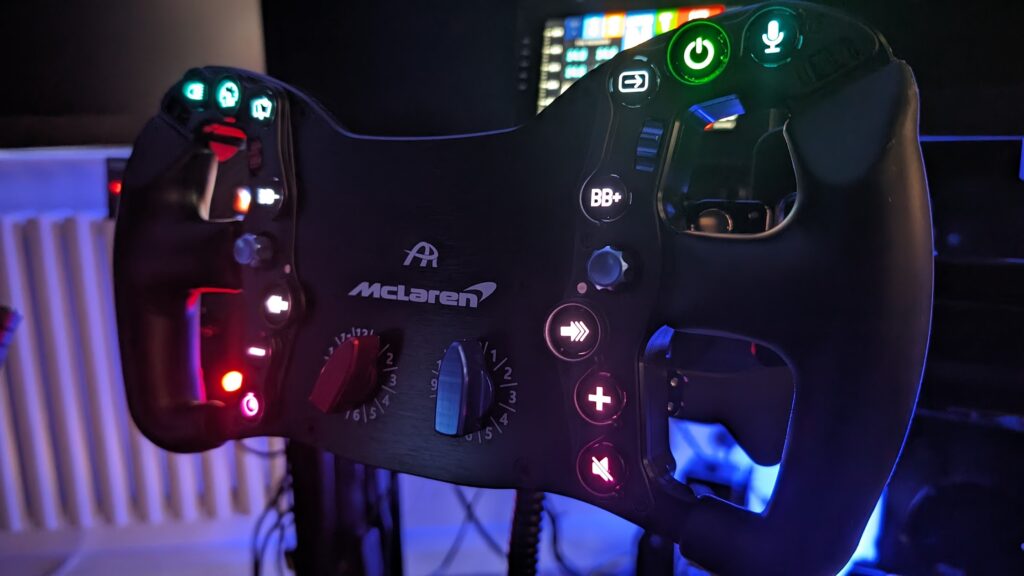
After a very trivial installation (which we’ll look at in detail later) – I took a moment to observe the wheel. The LEDs pulse through their 16 million colours, with a breathing effect to demonstrate the range of colours available – 16 million.
And the LEDs are very well done indeed. The button caps focus the lights into their icon symbols with no bleed whatsoever. The colours evolve effortlessly. It’s difficult to get a good photo of the LEDs as they’re very bright, and while this is adjustable, I want to show you just how much they “pop”.
The first time you grab the wheel (once installed), you instinctively go for the paddles. They’re a pleasant surprise. They feel smooth but purposeful. Paddles are no binary thing; the feel is always different between manufacturers.
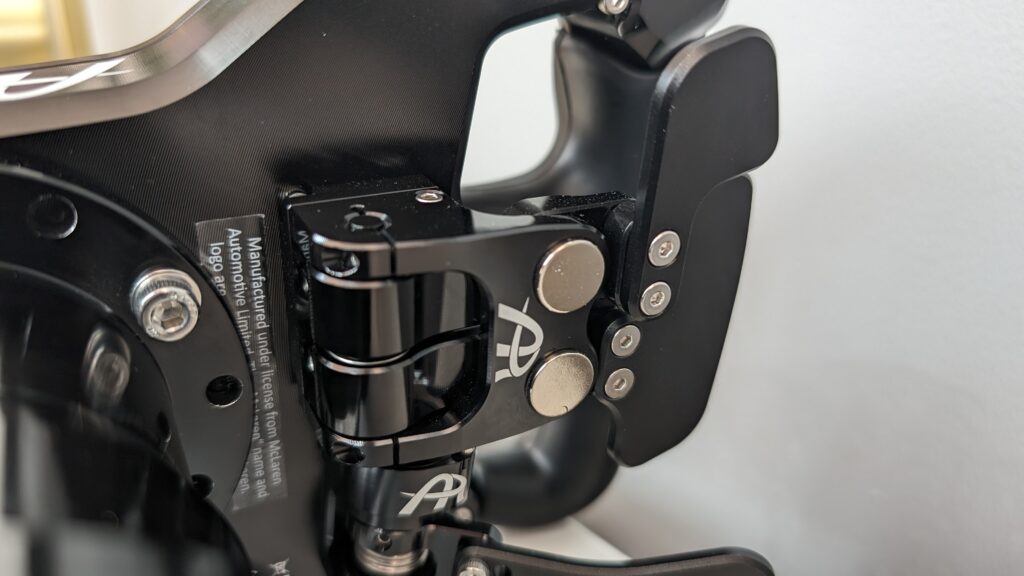
The Gen 6 paddles designed by Ascher Racing are an impressive leap forward from their predecessors. They’re difficult to describe, other than “silky smooth”, “predictable” and “sublime to work with”.
A mis-shift will be difficult – the paddles feel nicely made, with a quiet moment of action and a reasonably soft end stop. There’s certainly no metallic clacking with the Gen 6 paddle unit.
The clutch paddles have just the right amount of resistance, I’m looking forward to learning how to set the bite point here.
Unboxing and Installation
Inside the Artura Pro box is everything you need to fit your wheel:
- McLaren Artura Pro USB steering wheel
- Coiled USB cable (there were two in mine – I think this might have been a lucky accident)
- USB-C cable for Asetek wheelbase connection
- Quick-release mounting screws and washers (M5 hex bolts and washers)
- Hex keys for fitting and tools for adjustment and customisation
- Button cap removal tool
- Extra button caps with various symbols
- Sticker sheet for custom labelling
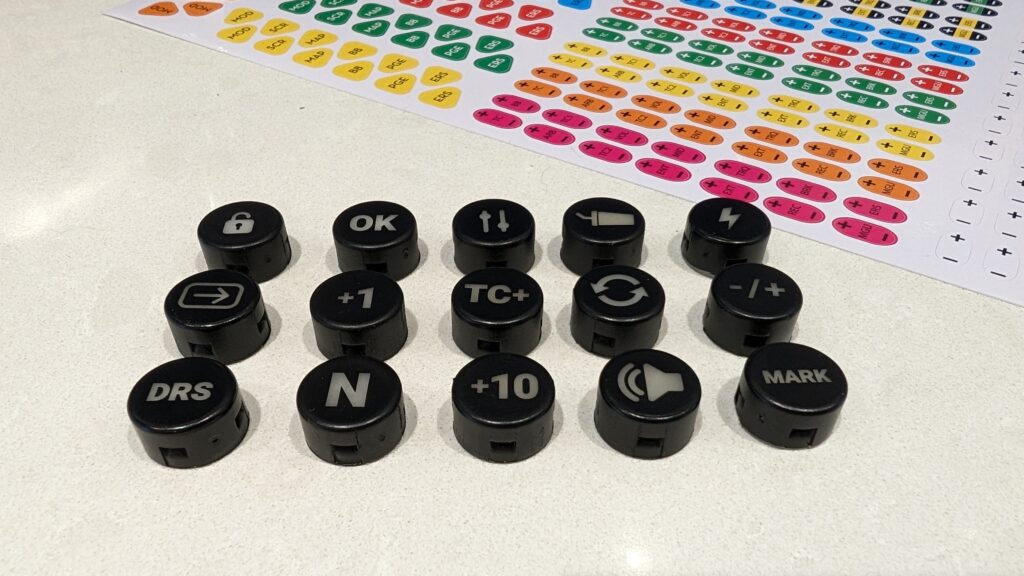
The spare button choice is plenty to match your preferred setup. You can customise the wheel if you choose, although I think the default “out of the box” setup is ideal:
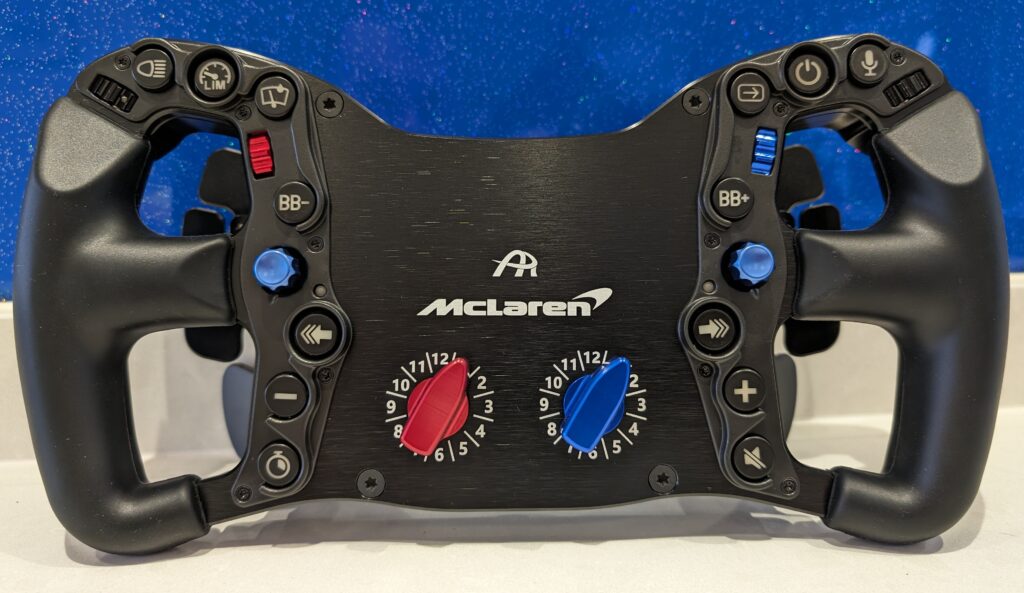
Changing a button cap is a surprisingly involved process and one you need to do with the help of the manual. All of the tools are supplied, and, in short, requires you to remove the joystick knobs and the button surrounds. The caps can be removed by levering them out with the removal tool included.
Installing a QR Hub
Installation is simple, as to be expected. The chassis has 6x70mm PCD drilled holes for M5 bolts (included).
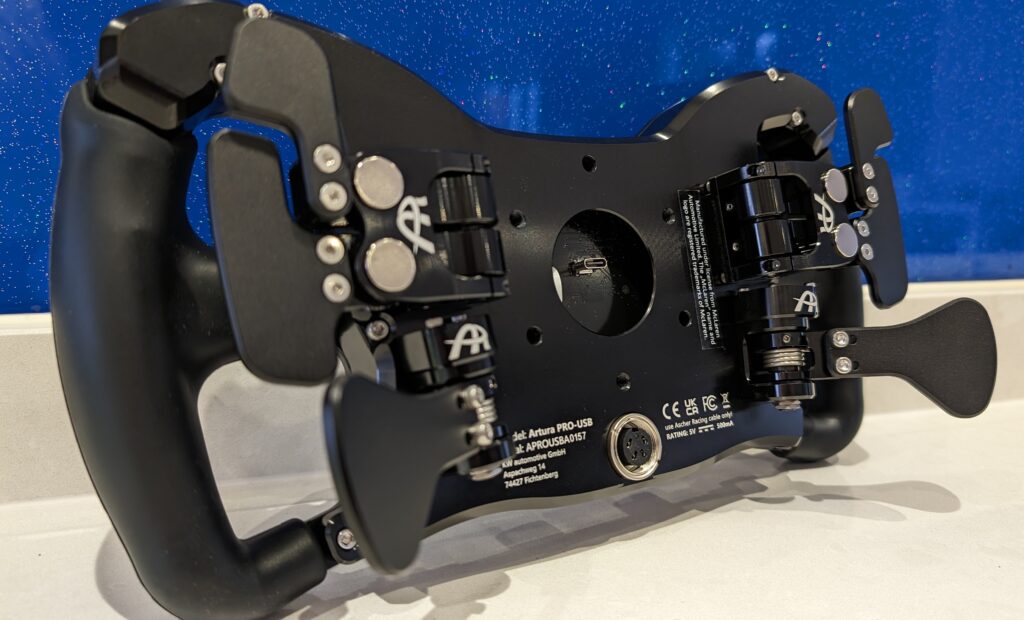
There are a few features to note on the rear of the Artura Pro USB.
First, note the mounted USB-C socket. It serves as a USB pass-through connection via a compatible QR hub. This is for Asetek wheelbases first and foremost, although I wonder if other manufacturers may adapt their QR hub designs over time. A smart innovation, and a potentially useful one indeed!
Note the machined texture of the aluminium chassis rear and Ascher Racing logos – this is an Ascher Racing wheel through and through.
The main USB socket supports a threaded cable connector. It’s decidedly heavy-duty, and the cable is far longer than other wheels are usually provided within this price range. It’s about 1.5m in length. Stretched with a little force it extends to 2m. I have a powered USB hub mounted to the left side of my cockpit. This cable is long enough to reach around the wheel hub extension and over to the USB hub with no stretching whatsoever. This is great, I can’t see an incident that would stretch the cable or pull out the USB socket.
Ascher Racing include a USB hub extension in the box, just in case you want that extra cable length. It might serve as a useful way to protect the cable, too – although I can’t fathom a scenario where this cable would ever find itself under any duress.
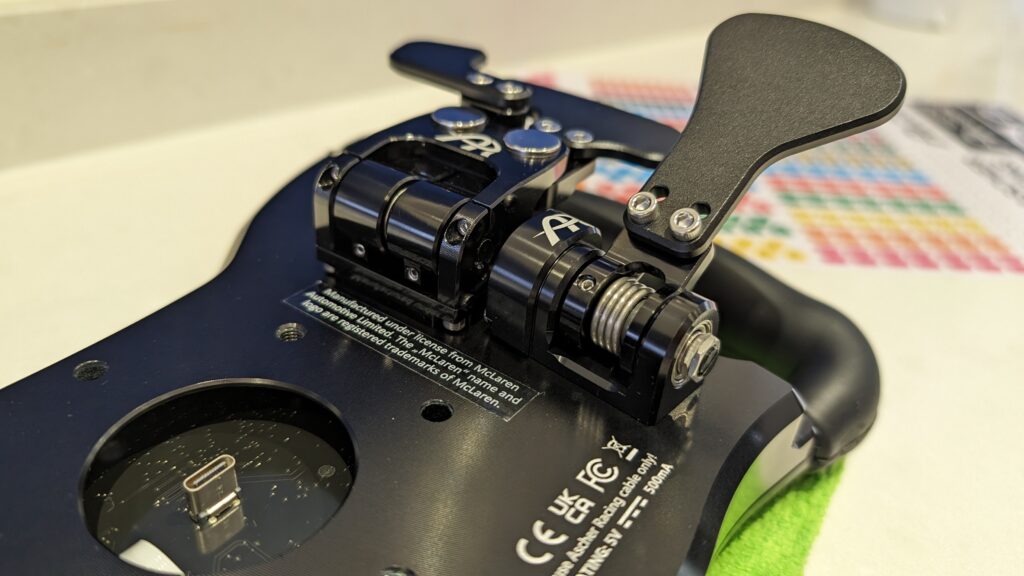
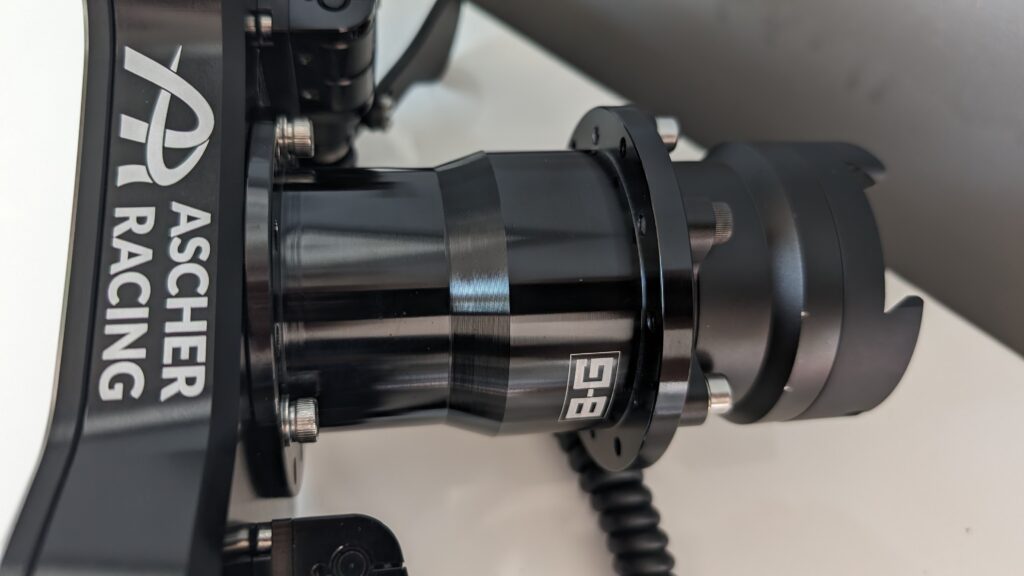
Fitting a hub is, of course, something we should all be very familiar with. If you’re yet to fit one, rest assured that Ascher Racing has supplied the Hex keys and M5 bolts you’ll need to mount your hub. I always use a Simucube SQR hub with a BG racing extension, of which I have several to choose from.
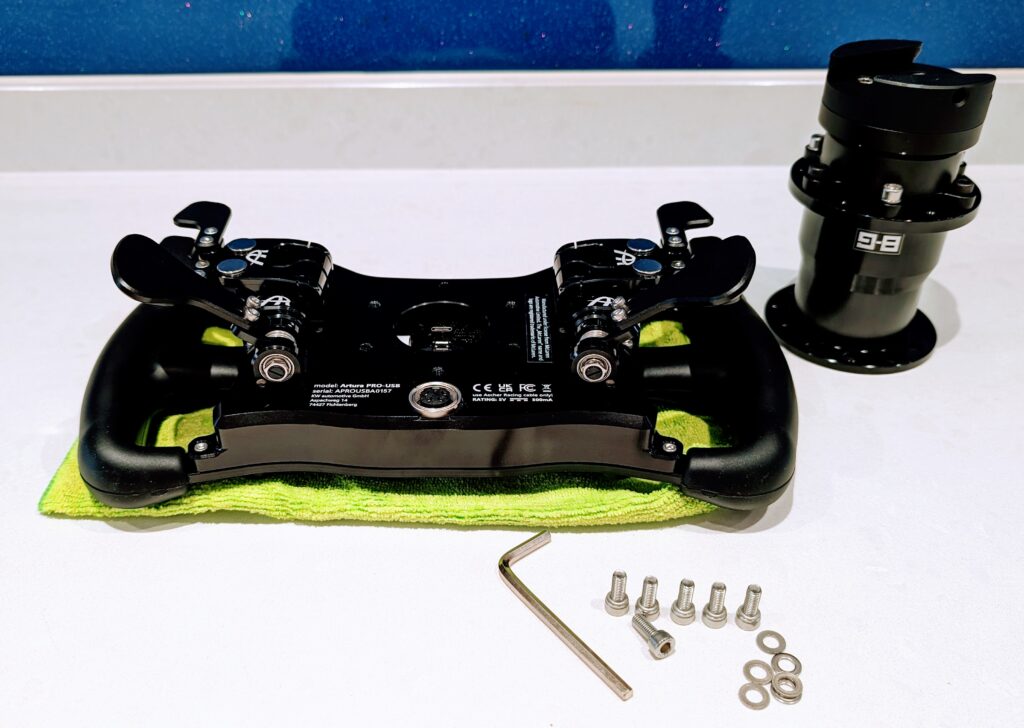
In my cockpit setup, a 100mm extension is just right for my position. I’ve written a guide to installing a QR hub if you’d like to take a quick look for guidance.
Use the right amount of torque to tighten your bolts. As you’re tightening the bolts, arrive at what feels tight without needing to use any extra force. My rule of thumb is to give the bolt an additional 1/4 turn. I use a tiny amount of screw-lock in the thread on my own wheel installations, but research this and decide if that approach is for you.
Here’s my completed installation:
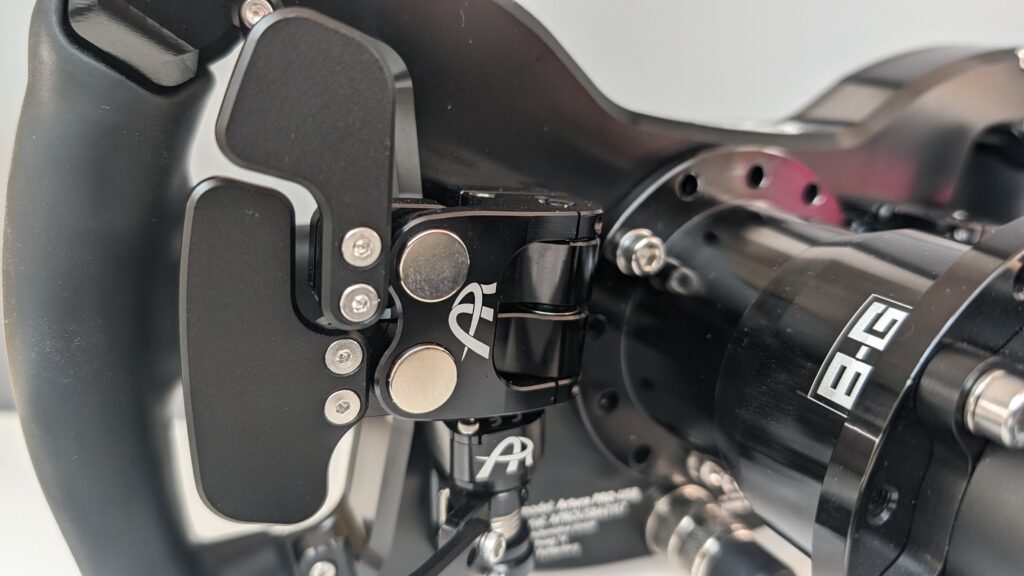
Mounting Options
The manual outlines the mounting options available which depend on your wheelbase. 6x70mm PCD fitments from the exterior of the wheel are the norm, although the manual affords you other options too:
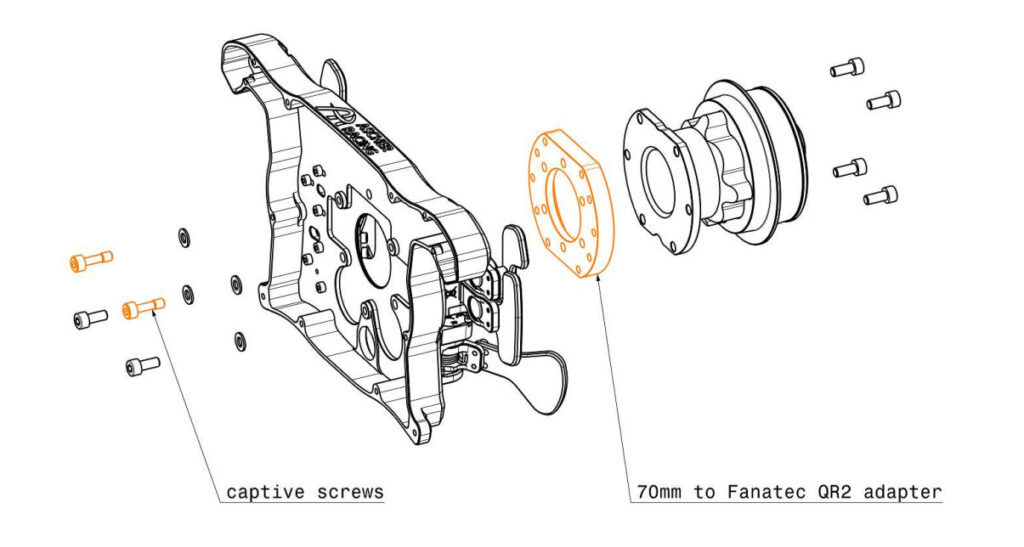
Reading the manual yields a lot of important insight: the fact that Ascher Racing instructs its owners on how to fit QR hubs that require captive screws via the internal casing is impressive. It also demonstrates the level of engineering consideration put into the design.
Here are the quick-release mounting options for the Artura Pro USB that are covered in the manual, some of which require you to open up the wheel body:
- Simucube (SC2) SQR Wheel Side
- Compatible with the Simucube Adapter
- Ascher Racing SQR Adapter
- Compatible with the SC2 SQR Wheel Side
- 70mm Bolt Pattern Quick Release – External Mounting
- Directly compatible with 70mm bolt pattern QRs with non-threaded through holes
- Examples: Q1R
- Asetek QR – Internal USB Connection
- Utilizes the wheel’s internal USB-C connection for a wireless setup
- Requires Asetek QR with USB-C type PCB
- M5 Threaded QRs (requires opening the steering wheel)
- Compatible with QRs that have M5 threaded blind holes or other features preventing conventional mounting
- Mounted from the inside of the wheel casing
- Fanatec Podium Hub (requires opening the steering wheel)
- Mounted from the inside of the wheel casing
- Fanatec QR2 (requires opening the steering wheel)
- Requires additional hardware:
- QR2 to 70mm bolt pattern adapter (e.g., from SIM RACING MACHINES)
- Captive screws to bypass M5 threads of the wheel casing
- Requires additional hardware:
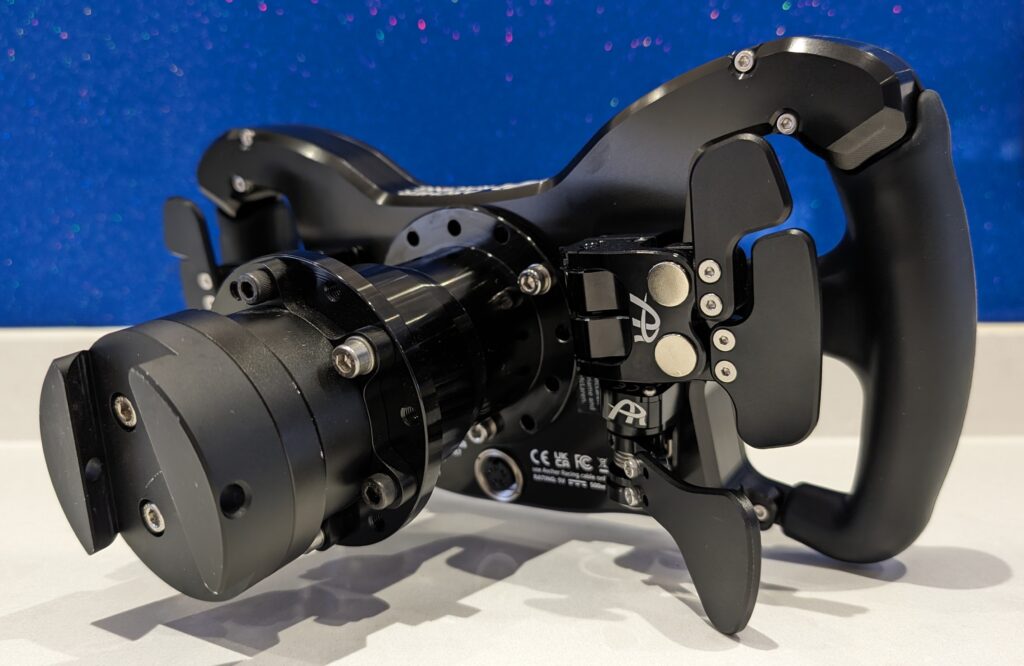
In summary, the Artura is compatible with any direct drive wheelbase that supports a hub with a 70mm PCD fitment, all Asetek wheelbases and Fanatec wheelbase too. Nice.
Overall Chassis Design, Feel and Manufacturing
Driving style and FFB Feel
The Artura Pro USB is a sim racing wheel that you can grab hold of and hustle your car (if that’s your driving style). Conversely, the wheel diameter (300mm) lends itself to a smoother, more endurance racing style of driver input too. Whatever your driving style, the refinement of the chassis machine work makes the wheel communicate FFB detail from my Simucube effortlessly.
If you want to drive smoothly, carrying the speed without overly aggressive inputs, the Artura Pro works well, allowing you to enjoy each paddle input. That’s my driving style, something I’ve carried with me since my Mazda MX5 days (in the real world).
Ergonomics
There’s something about the ergonomics and the chassis design that makes the wheel adapt to you, rather than you adapting to the wheel.
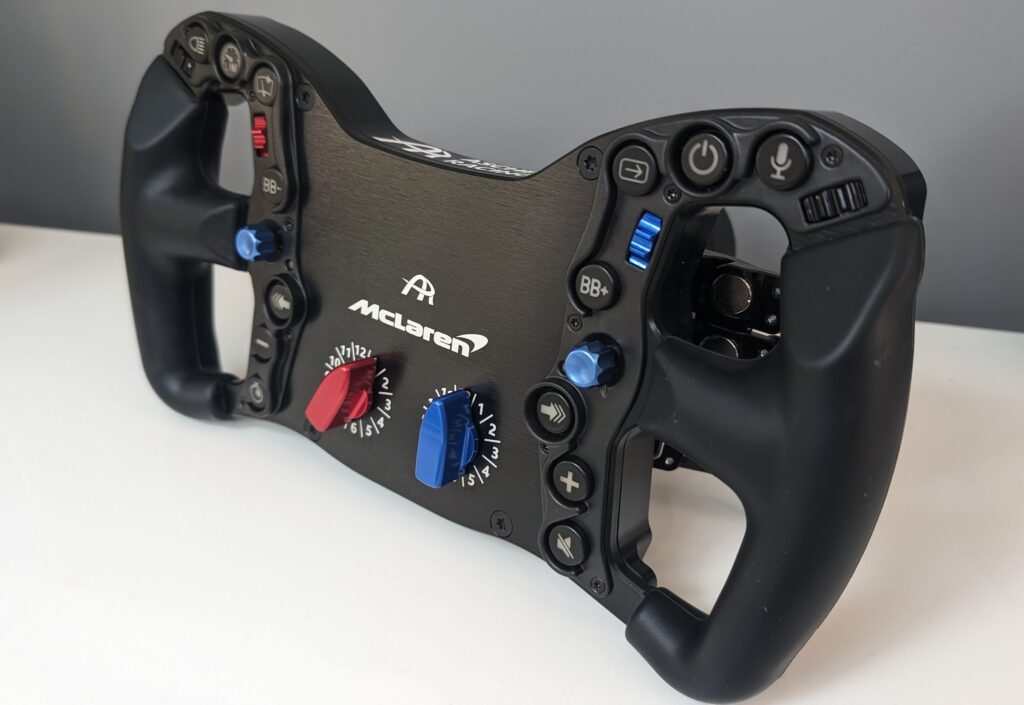
I like the grips, everything is within easy reach and the smoothness of these paddles is sublime. The “highly revised, ergonomic PVC / rubber grips” feel grippy, and smooth to the touch and have just the right amount of compression available so that you don’t start to feel tired. This is without losing FFB detail.
Paddle Feel
The paddles have a uniform feel throughout the depression, followed by a surprisingly soft end stop. Unlike early-generation Ascher paddles, the Gen 6 paddles are very quiet. During use, they’re wholly predictable, and, engaging with the aluminium paddles is just a lot of fun.
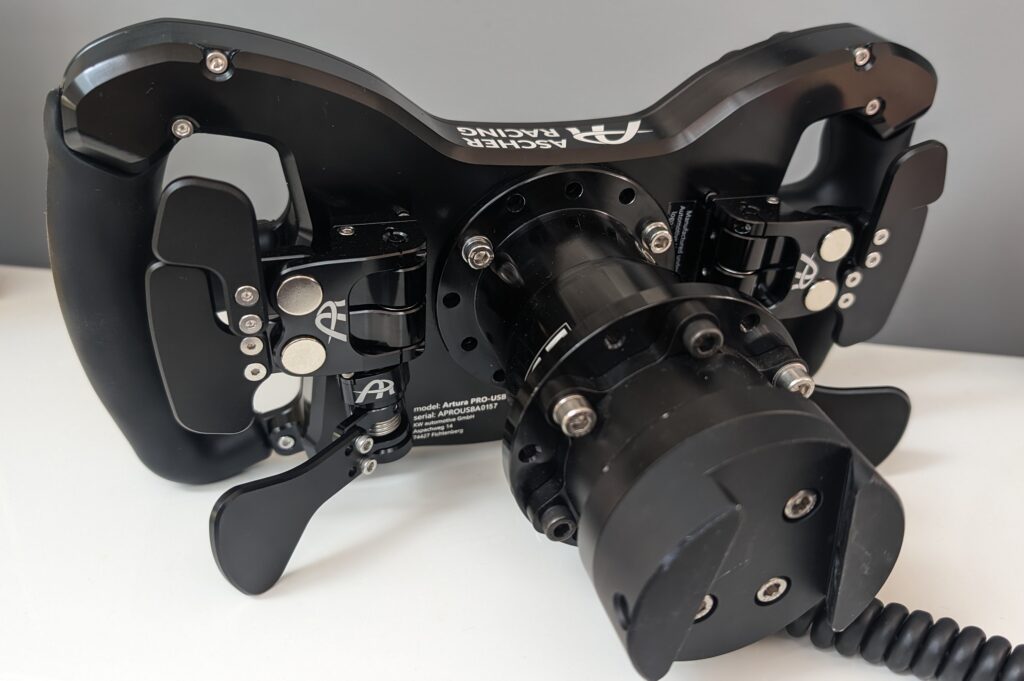
There’s a weightiness to the feel of them that doesn’t interfere with your driving – it’s more a sense of certainty. Very light, carbon paddles can feel more switch-like – Ascher Racing paddles aren’t like that. They feel very refined and dare I say, expensive!
Buttons, Rotaries and 7-Way Joystick Controllers
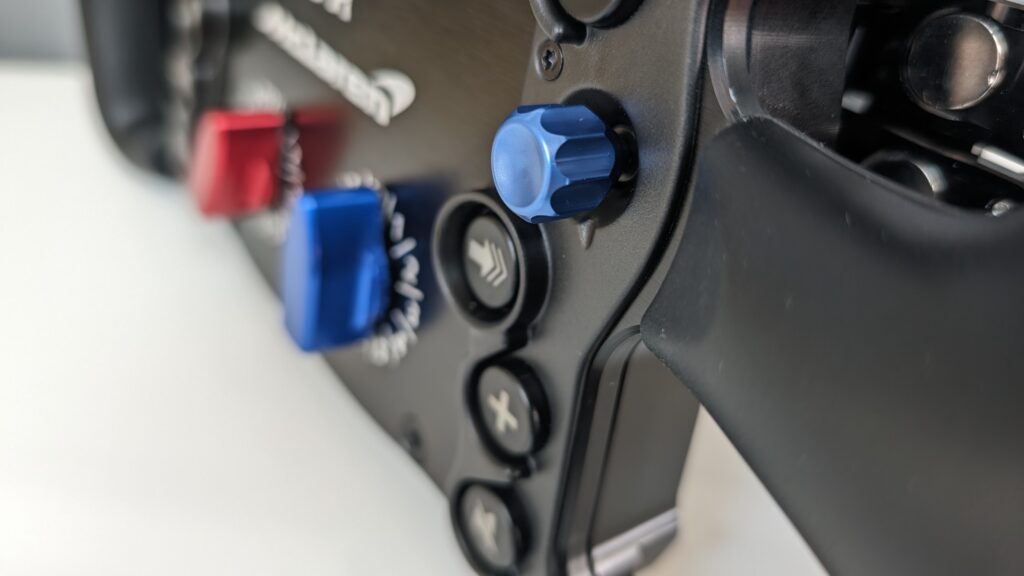
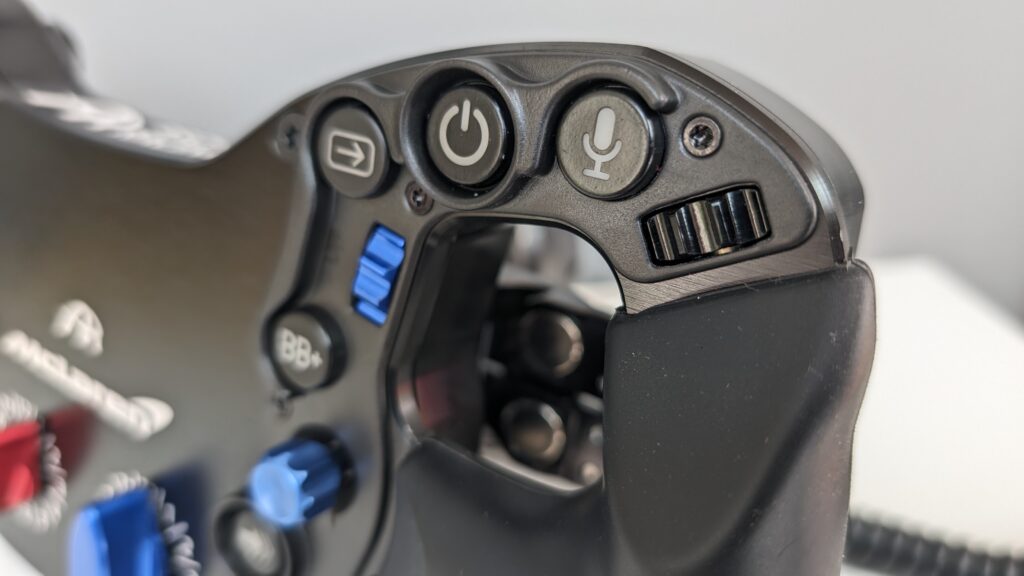
The McLaren Artura Pro USB wheel features a total of 14 RGB-illuminated, configurable momentary push buttons with laser-labeled button caps. The buttons and rotaries are “Motorsport grade”, they are the same components you’ll find on the original McLaren track car’s wheel.

The RGB lighting is distinct and sharp, even in daylight conditions. The LEDs are programmable, too, via Simhub. Installation is as simple as using the Simhub “Add Device” functionality. From there, your button LEDs are assignable based on whatever effect group you’d like to use.
If you don’t fancy making any changes, SimHub installs the default LED profile, which doesn’t need any customisation to get started.
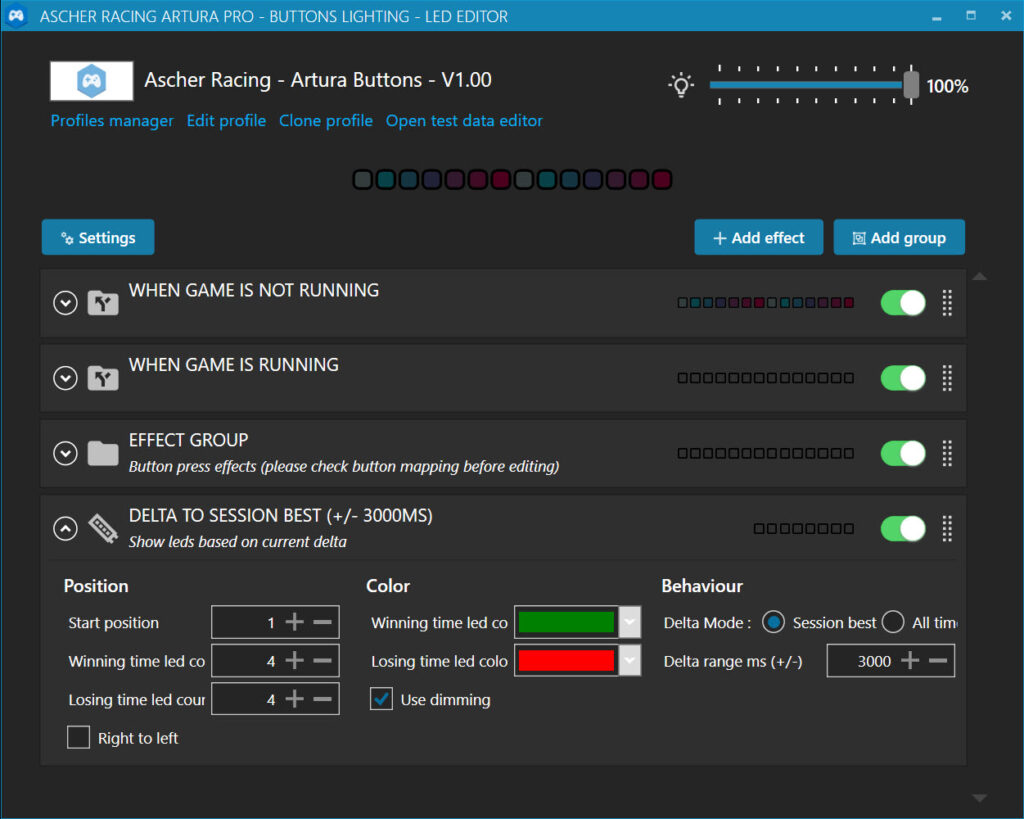
I’d estimate that pressing a button requires medium force, so there’s little chance of an accidental push. This is the same for the rotaries, they have strong resistance with a certain, high-quality feel.
I almost always assign my iRacing black box controls to the joysticks – what’s nice about the components used for the joysticks on the Artura Pro is that you can apply *some* force to them, but they won’t click until you apply the right amount of force. So again, they won’t trigger by accident.
All the components feel like they have a well-thought-out tactile sensation and the aluminium anodise knobs look the part.
Onboard Settings
The McLaren Artura Pro is an incredibly involved, procedures-based wheel (if you want it to be!). I tested out a few procedures while working with the wheel, although I think it’s really important to point out that the default setup is excellent out of the box.
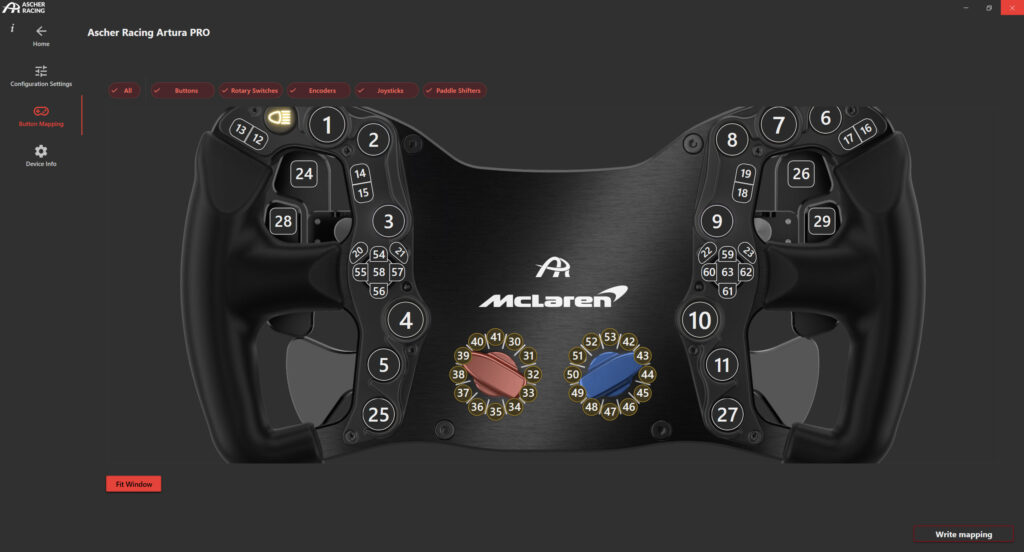
Analogue Axis mode is very interesting, and advanced settings like pulse width adjustment are very nice to have. There are several settings to play around with – the procedure for which is quite simple. The “Device info” screen in the Ascher Control Centre is a useful point of information for guidance on how to make settings changes:
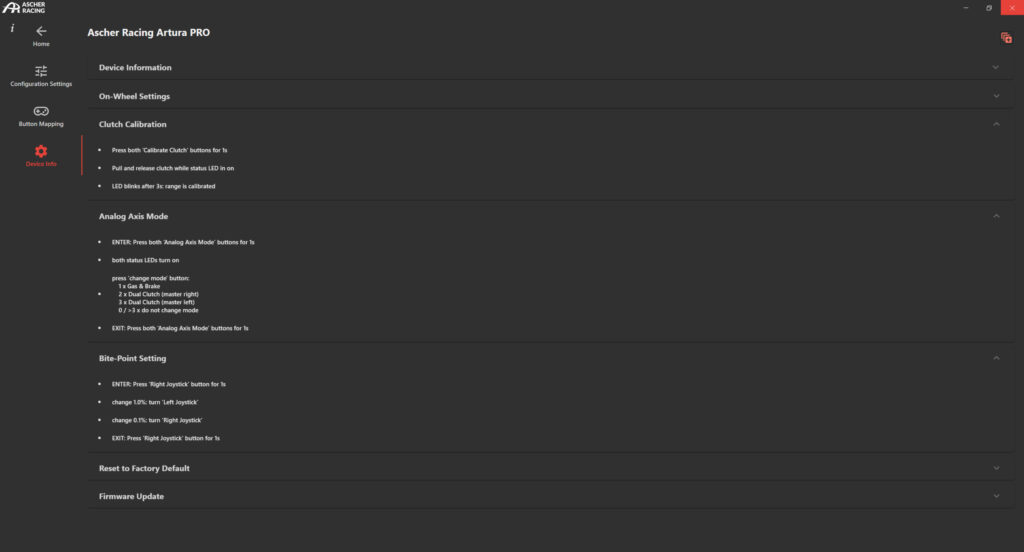
This level of configuration I would class as highly advanced. If you’re a pro eSports driver, possibly in the top splits in sim racing, or you’re a pro driver and want to match your simulator setup as precisely as possible to the real thing; then you’ve got some configuration options to play with that are as far as I understand, unique to Ascher Racing.
How to set the Clutch Bite Point:
Press and hold the Right Joystick button for 1 second to enter the Bite-Point Setting mode. The Status LED located at the bottom left of the joystick lights red:
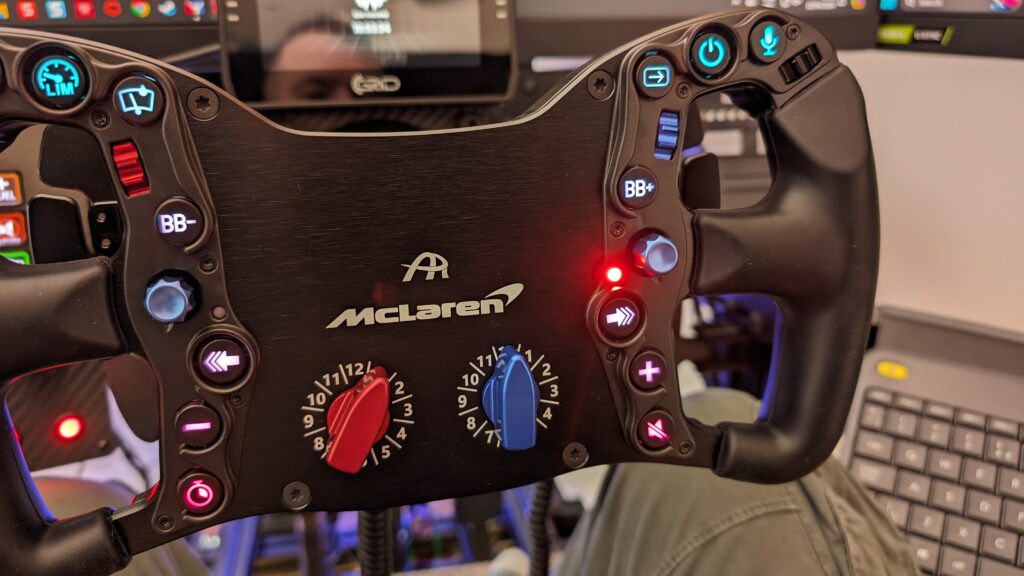
To change the bite point value by 1.0%, turn the Left Joystick. The LED next to the left joystick flashes green with each turn.
For finer adjustments, you can change the bite point value by 0.1% increments by turning the Right Joystick instead. This still flashes the green LED next to the left joystick.
Once you’ve adjusted the bite point to your preference, press and hold the Right Joystick button again for 1 second to exit the Bite-Point Setting mode.
In summary, this procedure is very easy. You’ll feel “the bite point move” – put simply, do you want the clutch bite point to be quite early, or quite late during a paddle release?
It allows you to fine-tune your clutch bite point setting directly on the wheel without needing any additional software.
Encoder Pulse Width Adjustment
Encoder pulse width adjustment is a setting that determines how long the button press signal lasts when you rotate one of the encoders (the thumb wheels on the front of the Artura Pro).
When you turn an encoder, it sends a series of button presses, one for each detent or “click” you feel. The encoder pulse width is the duration of each of these button presses.
Adjusting this setting allows you to optimise how the wheel’s encoders interact with your racing simulator.
A shorter pulse width allows for faster scrolling through multiple encoder positions, which is useful for quickly adjusting things like brake bias or traction control. However, if the pulse width is too short, the simulator might miss the inputs.
To adjust the encoder pulse width, you need to use the Ascher Racing Control Center software:
- Download and install the latest version of the Control Center software from the Ascher Racing website.
- Open the Control Center with your wheel connected
- Click on the gear icon to open the settings menu.
- In the settings menu, look for the “Encoder Pulse Width” option.
- Adjust the value (in milliseconds) to your preference. A smaller value means a shorter pulse, while a larger value creates a longer pulse.
- Click “Save” to apply the new setting to your wheel.
You may need to experiment with different pulse width values to find what works best for your specific simulator and driving style. If you set the value too low and find that the simulator is missing some of your encoder inputs, try increasing it until you find a reliable setting. Get the setting correct and you’ll find yourself with the ability to fly through settings adjustments.
Adjustable Rotary Switch Modes:
The Artura Pro USB wheel has a feature that allows the two front rotaries to be configured to work in various modes. These modes are called “Standard” and “Modifier” modes.
Standard Modes include a Permanent (continuous output signal), Pulsed (a momentary output on change), and Encoder (incremental adjustment).
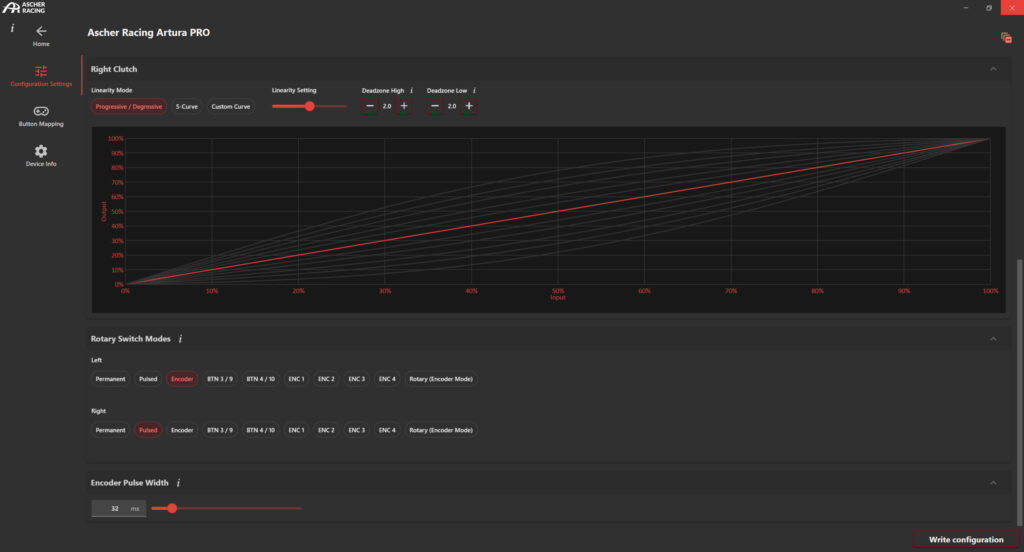
You can configure these modes using Ascher Racing’s Control Centre, which allows you to select the desired mode for each rotary switch and map the functions accordingly.
As an example use case for this type of feature, imagine you’re setting up your Artura Pro USB wheel to run a sim racing platform with in-game menus, such as the iRacing black box. If you tried to assign black box control with the rotary switches in permanent mode, I think the menus would go haywire.
Navigation through the black box is designed to work with encoders that send momentary pulses rather than a constant signal – hence the term “momentary encoder”. So, by changing the mode of a rotary, you could make the front rotaries useful for navigating through a menu.
This is how I believe many F1 wheels are configured so that navigating is slightly easier and more, intuitive. Watch some footage of an F1 driver navigating through a menu on his wheel and see what you think.
This feature demonstrates the unique nature of the onboard electronics in this wheel. Changing how the signal is sent by a rotary is no trivial affair. The more I think about the use cases, the more interesting the idea becomes.
Summary: Ascher Racing McLaren Artura Pro (USB)
What I enjoy about this wheel is primarily the build quality, and how much fun it is to use in a race or test. It’s an officially licenced McLaren racing wheel – and it certainly does not let itself down. It feels great, looks the part and I feel very happy with my purchase.
As a sim racing wheel, the Artura Pro gives you the choice as to how involved you want to be with the device.
You can just install it and race, or, you can tweak the configuration until you have something extremely unique to you. As I mentioned at the beginning of my review – I genuinely feel that the Artura series from Ascher Racing will be considered one of the best sim racing wheels we’ve seen this year.
Buy: Ascher Racing McLaren Artura Pro (USB) (follow that link – you’ll be redirected based on your Country location)
Le Mans Ultimate: How to Drive the LMGT3 and Hypercar
mBooster Review: Moza’s New Active Pedal
Is Moza about to Completely Disrupt the Sim Racing Pedal game?
Mustang GT3 Sim Racing Wheel from VPG – Close Look
Five of the best Gran Turismo 7 track and car combinations
MOZA Racing FSR2 Formula Wheel and CM2 Dash Review
Topic: Sim Racing Wheels
