
I’m a sim racer and amateur racer with a passion for Motorsport, good racecraft and the technical and setup aspect of sim racing.
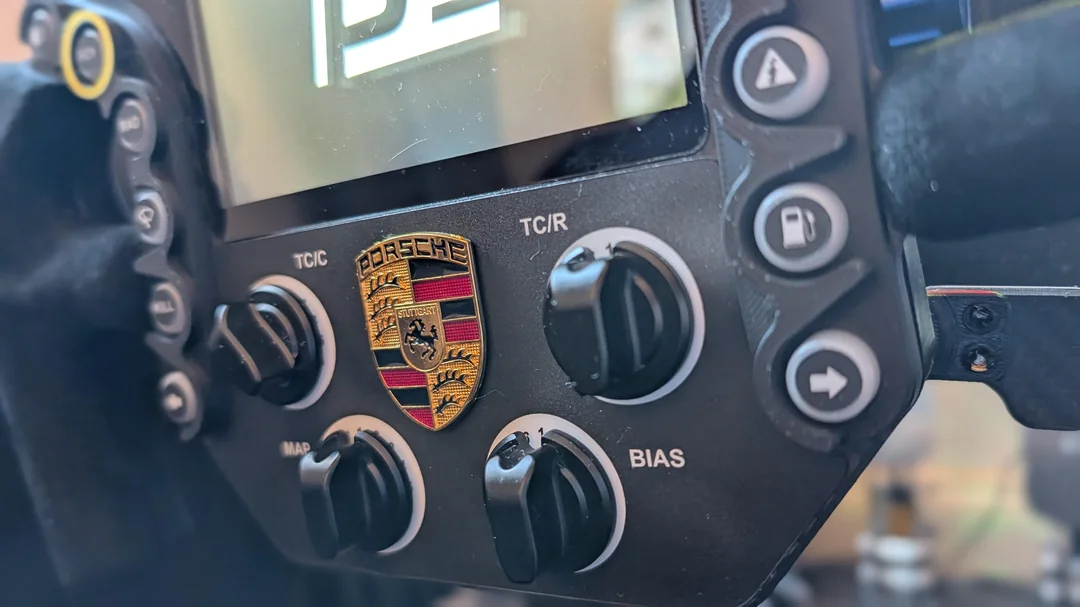
A UK sim racer has shared a (very!) detailed account of building the Pokornyi Engineering GTE Pro V3 steering wheel from scratch, spending £674.27 on parts whilst learning to solder for the first time. The Reddit thread has attracted attention from the sim racing community (especially me – this is cool as!), with builders sharing tips and encouragement for others considering similar projects.
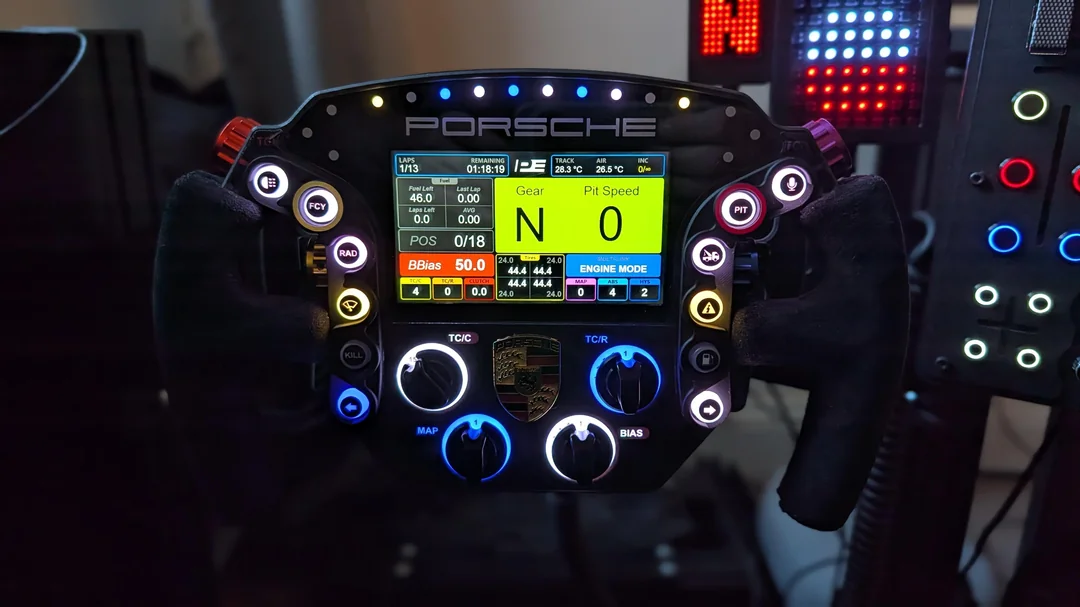
The builder, posting as GoatBotherer on r/simracing (subscribe to his Youtube channel here), documented the complete experience including costs, process challenges, and honest reflections on what worked and what didn’t. What makes this particularly interesting is that they’re a VR racer, meaning the screen and LED matrices are currently pointless for them – though they’re planning to move to triple screens in a couple of months.
Complete Cost Breakdown
The total spend came to £674.27, broken down as follows:
- Project files from Pokornyi: £39.40
- Parts from Pokornyi (encoders, rotary dials, PCB, screen): £320 plus £78.71 import fees
- AliExpress parts (screws, heat inserts, bearings, springs): £64.87
- CNC aluminium parts from GDCTechStore on AliExpress: £127.59
- Metal Porsche badge: £15.55
- Clutch and paddle trigger buttons from Mouser Electronics: £28.15
- 3D printed parts: negligible (owns printer)
- NRG 2.0 quick release: already owned
An important detail: the builder noted having many extra parts left over. If they were to build another wheel, the cost would drop significantly as they’ve already got screws, bearings, and other consumables on hand.
Here’s the full (and very honest) 3 hour assembly video:
Mix-and-Match Approach Works
One of the interesting aspects of this build is the strategic approach to sourcing parts. Rather than buying everything pre-made from Pokornyi or going completely DIY, the builder mixed both approaches based on comfort level and budget.
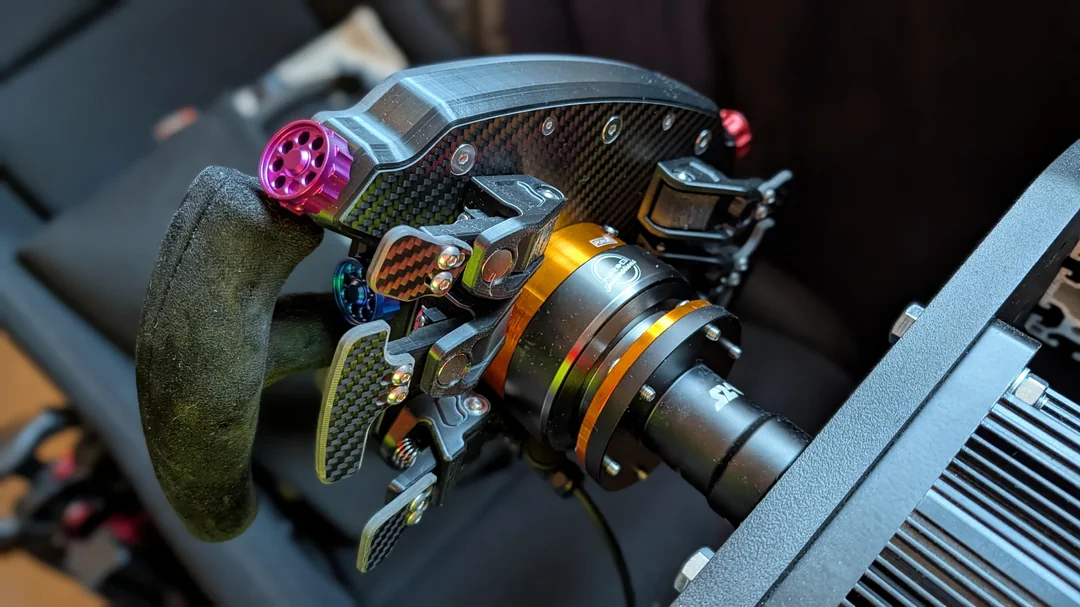
They opted for the pre-made PCB from Pokornyi Engineering. The thought of ordering and assembling the circuit board themselves would have put them off the project entirely (see note about soldering). Similarly, they wanted proper aluminium encoder dials for a premium feel, though you can save money by 3D printing these if you prefer.
However, they saved considerably by 3D printing and building the clutch and paddle assemblies themselves rather than buying ready-assembled units. This turned out to be fairly straightforward despite initial concerns, and the cost saving made it worthwhile.
First-Time Builder Faces Typical Challenges
The builder had never tackled anything like this before. They’d built FPV drones previously, but described their soldering skills and general electronics knowledge as “pretty poor”. What makes this build encouraging for beginners is that despite these concerns, they successfully completed the project.
For 3D printing, they used a Bambu Lab P2S printer with black ABS filament. They did encounter issues where the ABS printed in a way that prevented buttons from fitting through the holes in the button housing. The solution was simple: reprint those specific parts in matte black PLA, which worked fine.
On the soldering front, they mentioned recently getting a Miniware TS101 soldering iron which proved to be an improvement over previous tools. Interestingly, everything they soldered themselves worked correctly. It was the pre-soldered plug-and-play components that had issues – one encoder only works in one direction, and the front bottom left rotary dial doesn’t work at all.
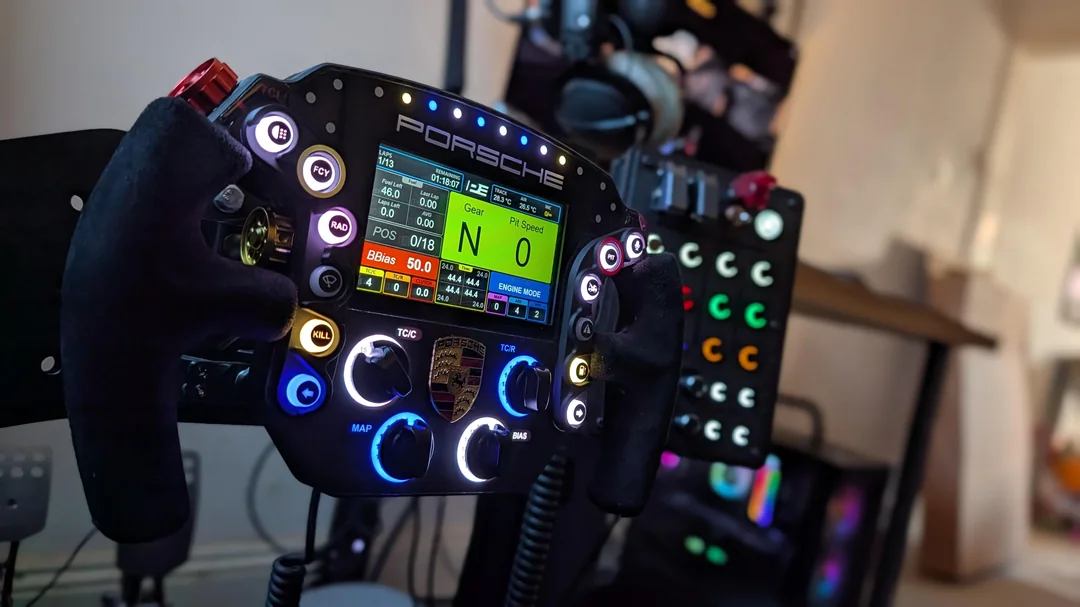
The builder was refreshingly honest about imperfections. They described their suede grip application as a “piss poor job” – it was optional but they thought it would add a premium feel to the wheel. Their conclusion? Good enough as it is.
Community Tips
The thread attracted responses from multiple people who’ve built Pokornyi wheels themselves. One commenter built the HYP-R model earlier this year and called it their favourite wheel. They printed all the knobs and grips themselves, estimating that companies sell equivalent quality wheels for €1,500.
Another builder who completed the v2 version two years ago spent roughly the same amount and praised the documentation quality. What I’ve read on r/simracing is that the Pokornyi build files and bill of materials are exceptionally well structured, which explains why first-time builders are finding success.
Several practical tips emerged from the discussion. One commenter suggested checking second-hand marketplaces for abandoned projects where people have given up – you might find partially completed builds or surplus parts at reduced prices.
Another mentioned that JLC3DP offers SLA printing for parts like button housings at reasonable prices, producing injection-mold quality results that can be superior to home FDM printing for certain components.
Importantly for those worried about soldering, one Finnish builder pointed out that you can buy all components directly from Pokornyi including screws, making it essentially adult Lego with zero soldering required. They built their HYP-R this way with all-aluminium parts for around €1,075 including shipping and taxes to Finland.
Documentation Quality Makes the Difference
Multiple builders emphasised that Pokornyi’s documentation quality is what makes these projects accessible. The bill of materials PDF provides direct links to specific products on AliExpress, removing the guesswork from sourcing parts. The assembly guide is detailed enough that first-time builders can follow along successfully.
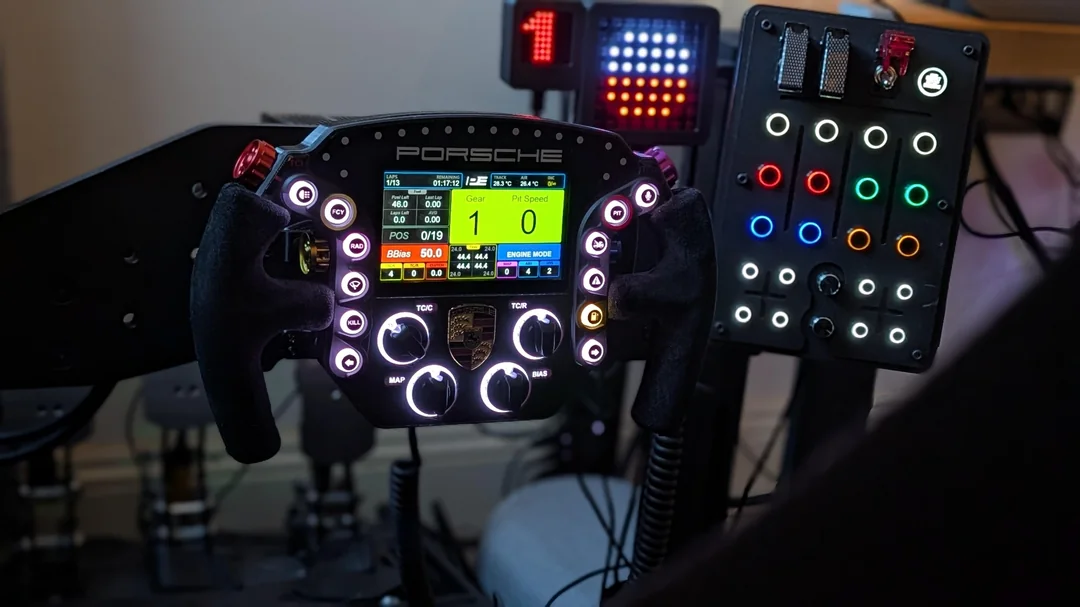
The builder mentioned creating custom LED matrix displays for gear indication and flag status, wiring them to an Arduino nano. Even though this involved small-scale soldering on the LED matrices, they were pleased with the results.
For the screen software, they’re using SimHub. The pre-made PCB from Pokornyi Engineering came with everything needed already installed, making the screen setup essentially plug-and-play.
The End Result
Despite the minor functional issues and imperfect grip application, the builder is genuinely proud of what they’ve created. The wheel feels substantial in size and weight, with quality that belies its DIY origins. Every time they look at it or use it, they’re reminded of what they managed to build themselves.
They’ve even uploaded a 3+ hour build video (with a warning about “quite a bit of swearing”) for anyone interested in seeing the complete process. The link is in the Reddit thread for those who want that level of detail.
For anyone considering a similar project, this build demonstrates that you don’t need expert-level skills to succeed. With decent documentation, strategic part sourcing, and willingness to problem-solve through minor setbacks, building your own sim racing wheel is more accessible than it might appear.
Source: Reddit thread by GoatBotherer
Related Articles

DIY Sim Racer Builds Pokornyi GTE Pro V3 Wheel

MicroProse and Geoff Crammond Reunite to Revive Grand Prix Simulation Series
MAIRA for iRacing: Marvin’s Awesome iRacing App Transforms Force Feedback

Sim Racer Builds Setup on CNC Machine: Wheelbase, Pedals, Shifter, and More

Max Verstappen Uses Assetto Corsa for F1 Race Preparation

MOZA Black Friday 2025: 29% Off Direct Drive Wheels & Bundles
Topic: Sim Racing Wheels