


I’m a sim racer and amateur racer with a passion for Motorsport, good racecraft and the technical and setup aspect of sim racing.
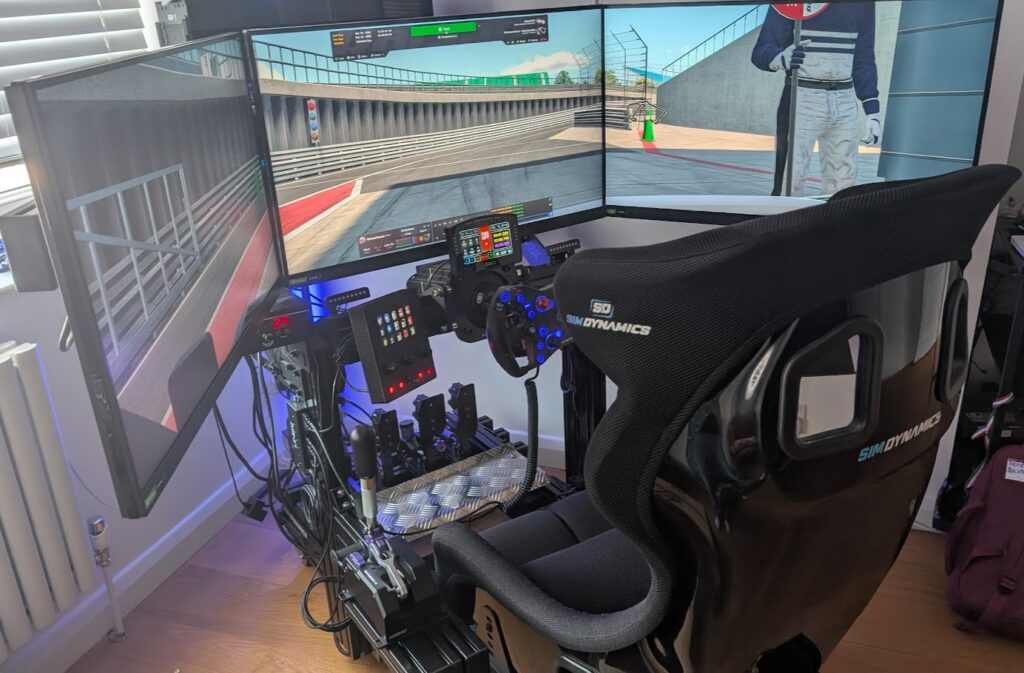
Featured image: My triple setup
Have you spent absolutely ages messing around with NVIDIA Surround? It can be frustrating, can’t it?
After my 27-inch triples I moved to a Samsung Odyssey G9 ultrawide, which is now my work monitor. The rig is back on triples at the moment, with three 32-inch LG UltraGear 32GP850-B monitors, mostly because I was genuinely quite curious to see if I could get that extra bit of immersion. Triples are more complicated to set up than an ultrawide, and they’re fiddly. There’s something about triples, if you’re time poor like I am, you always find yourself messing around with settings for longer than actual racing.
I’ll show you how to set up triple monitors in iRacing on the current build (2026 Season 4), without needing NVIDIA Surround, right through to the Monitor settings and your FOV (field of view).
Quick Navigation
Jump directly to what you’re looking for:
How it works | Windows first | Windowed mode | The ini file | Monitor settings | FOV and horizon | Performance | Fixes
How iRacing runs on three screens
iRacing can run on triples in windowed mode, where the sim sits in one window stretched across all three monitors. You can keep a border on that window so you can drag it about, or turn the border off so it looks like full screen (a borderless window). iRacing says this is usually the easiest way to get the sim onto three screens.
iRacing’s article on stuttering recommends the same setup, and calls it the sim’s multi-monitor support. For what it’s worth, that’s how I run iRacing on my three LGs, in a borderless window.

Back in 2020, I was having problems with Surround on my RTX 2080 Ti, and I’d frequently get a black screen that was unrecoverable unless I rebooted into safe mode and uninstalled the driver. Not cool!
Set the screens up in Windows first
Before you open iRacing, get the three screens right in Windows. They need to run at the same resolution, and the same make and model is the safest bet. Same-size screens from different makers will work, but three different sizes isn’t recommended, as they’re hard to line up and can give you headaches or motion sickness. Connect all three to your graphics card, not the video outputs on the motherboard.
Then go to Windows Settings > System > Display and click “Identify”. Drag the screens about until the order on screen matches the order on your desk, 1-2-3 from left to right. Select the centre screen and tick “Make this my main display”. Check that all three have the same resolution and scale, and under “Advanced display” set the same refresh rate on each one.
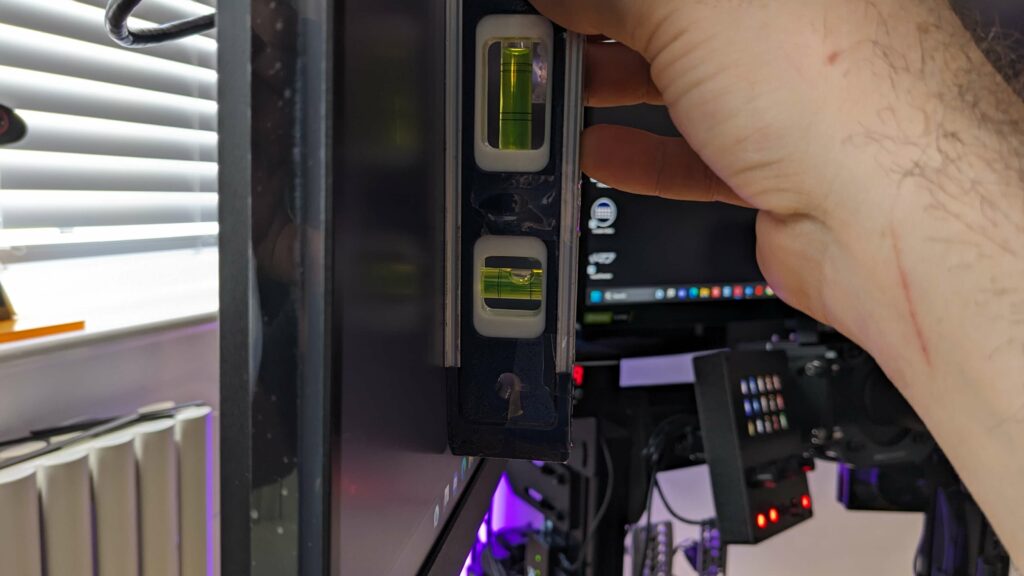
Line the screens up physically too. Hold a spirit level against the edge of each monitor to get it upright.
Setting up windowed mode
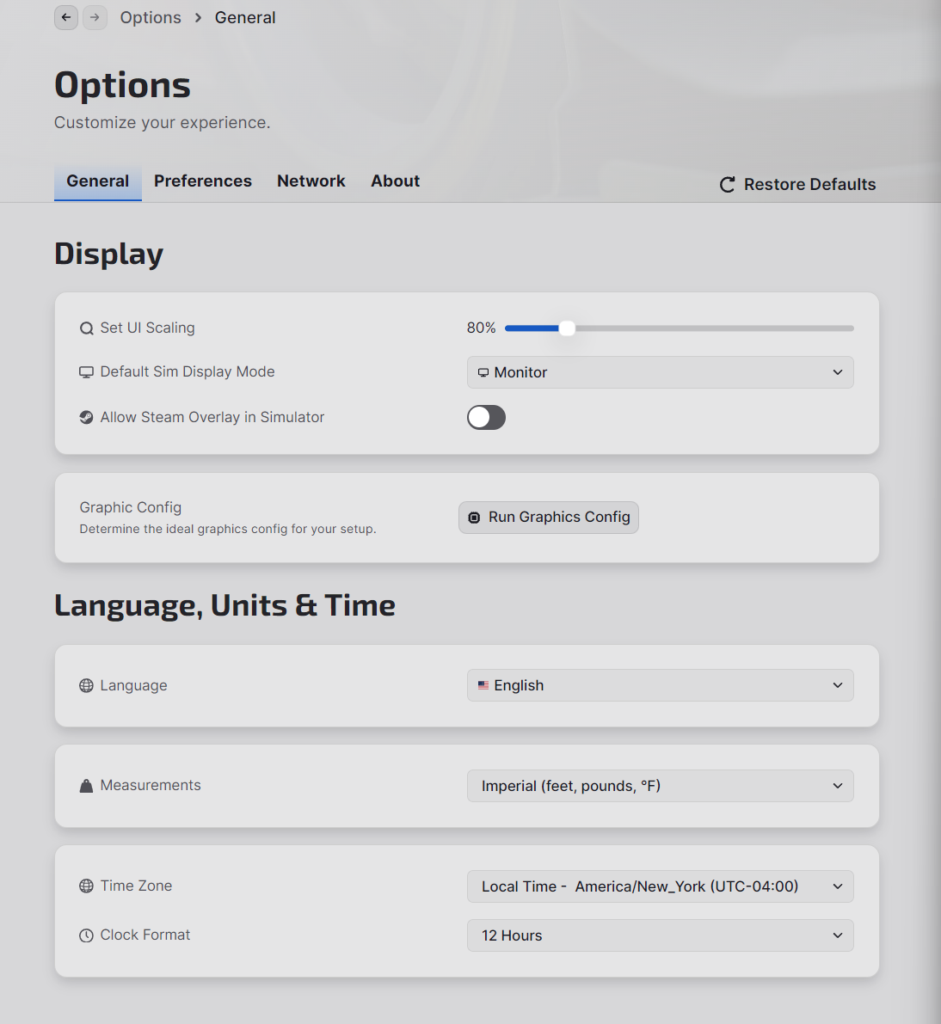
Start in the iRacing UI, which is the launcher app you open before the sim. Click Settings in the bottom-left corner to open the Options page, and pick the General tab. In the Display section, click “Run Graphics Config”.
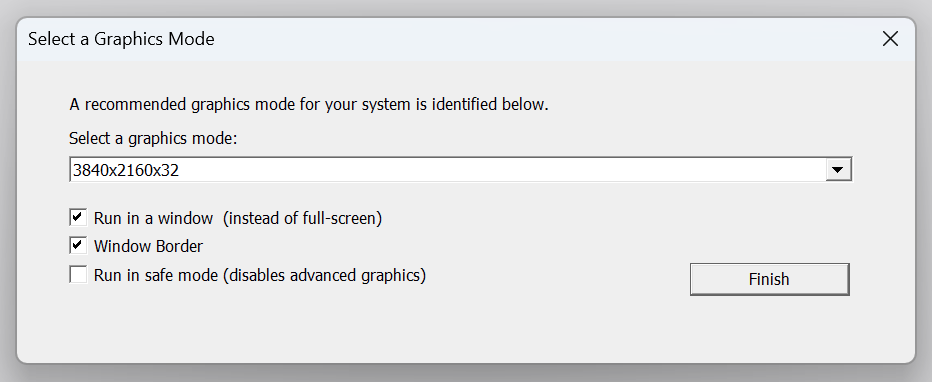
In the “Auto-Configure Graphics Options” dialog, select one of the displays on the graphics card you race on and click “Auto Configure (Recommended)”. It shouldn’t matter which of the three you pick. Under “Select a Graphics Mode”, leave the default resolution or choose a lower one, as you’ll be resizing the window in a moment anyway. Tick “Run in a window (instead of full-screen)” and “Window Border”, then click Finish.
Now launch the sim (a Test Drive session is fine) and drag the window’s sides, top and bottom until it covers all three monitors. iRacing’s instruction for this step is simply “Finesse until satisfactory”, so it’s done by eye.
Visit Our Sponsors
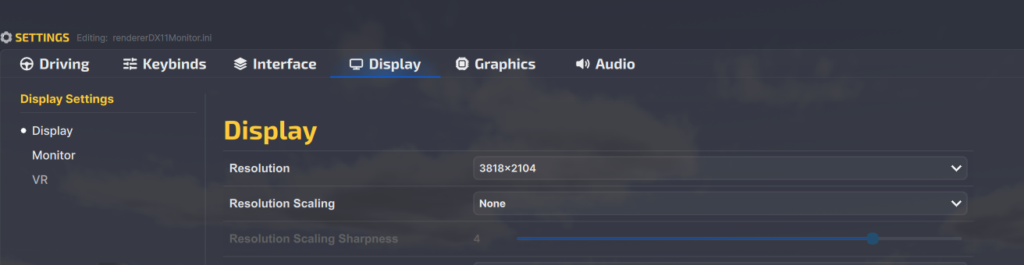
Once it fits, you can head to Settings (top right) > Display in the sim and switch “Border” off if you like. That gives a cleaner picture, but without the border you can’t move or resize the window. Don’t worry if it needs nudging again later; tick “Border” back on and you can drag the edges as before. The next stop is the Monitor section, further down the same Display tab.
Editing rendererDX11Monitor.ini by hand
There’s also a quick and easy way to set up your triples in iRacing’s rendererDX11Monitor.ini file. It’s exact, so there’s no dragging window edges about. Graphics Config writes its settings to this same file anyway. Close iRacing first. The file is located in your Documents folder, under iRacing: Documents\iRacing\rendererDX11Monitor.ini. Before you begin, it might be wise to copy the default file and rename it to something like backup_rendererDX11Monitor.ini.
Once you have rendererDX11Monitor.ini opened, scroll down to “[Display]” (I just use Notepad for this!). In there, windowedHeight is the vertical resolution of your monitors, so a 1440p monitor (in my case) would be windowedHeight=1440. windowedWidth is the monitor’s horizontal pixel width, multiplied by 3. So I have three 2560×1440 monitors, taking the total pixel windowedWidth=7680. windowedXPos is an offset using the value of the horizontal resolution of your monitor, so -2560, like so: windowedXPos=-2560. That starts the window on the left-hand screen rather than your main, centre one.
[Display]
windowedYPos=0
windowedXPos=-2560
windowedWidth=7680
windowedHeight=1440
fullScreen=0
border=0
Set windowedYPos=0, and for a borderless window that looks like full screen, set fullScreen=0 and border=0. Once you’ve updated these settings, save and close the file. Open iRacing and, entering into a simulation session, the image should now spread across all 3 monitors.
The Monitor settings inside the sim
Once iRacing fills all three screens, whether you dragged the window across or edited the ini file, the rest happens inside the sim. Open Settings (top right), go to the Display tab and scroll down to Monitor. The header reads “Editing: rendererDX11Monitor.ini”, which means you’re working on that same file. Set “Monitor Type” to “3 Flat Screens” or “3 Curved Screens”. “Monitor Width” is measured edge to edge, not diagonally, and it includes the bezels (the casing around the edges of the screen). “Bezel Width” is the bezel on one edge only, not both added together. Enter your “Viewing Distance” and click “Compute”, which sets your “Field of View When Driving”.
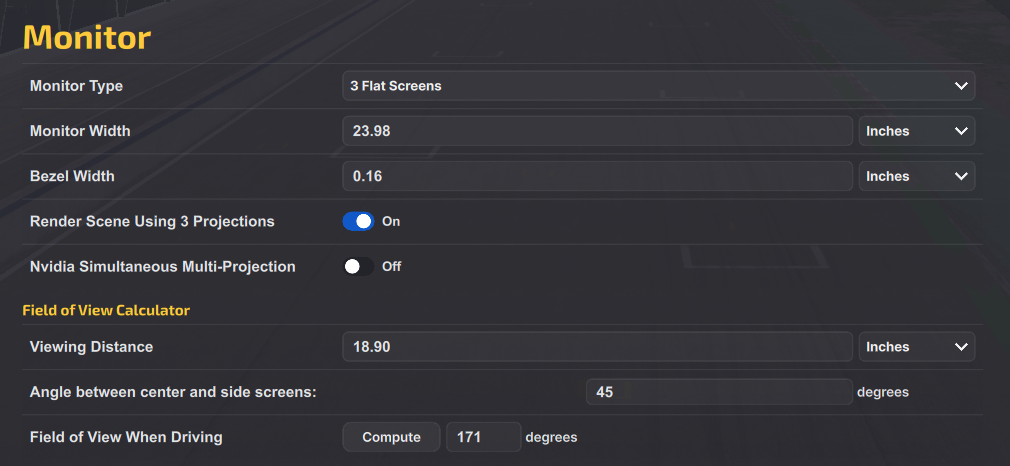
Then turn on “Render Scene Using 3 Projections”, which gives each monitor its own camera and a more realistic view of the track. On an NVIDIA card, turn on “Nvidia Simultaneous Multi-Projection” (SMP) as well, for a performance gain. The YouTuber Dan Suzuki says to tick both in his 2023 triples guide, and most of the side-angle advice below is his too, from that guide and a video he made in July 2026.
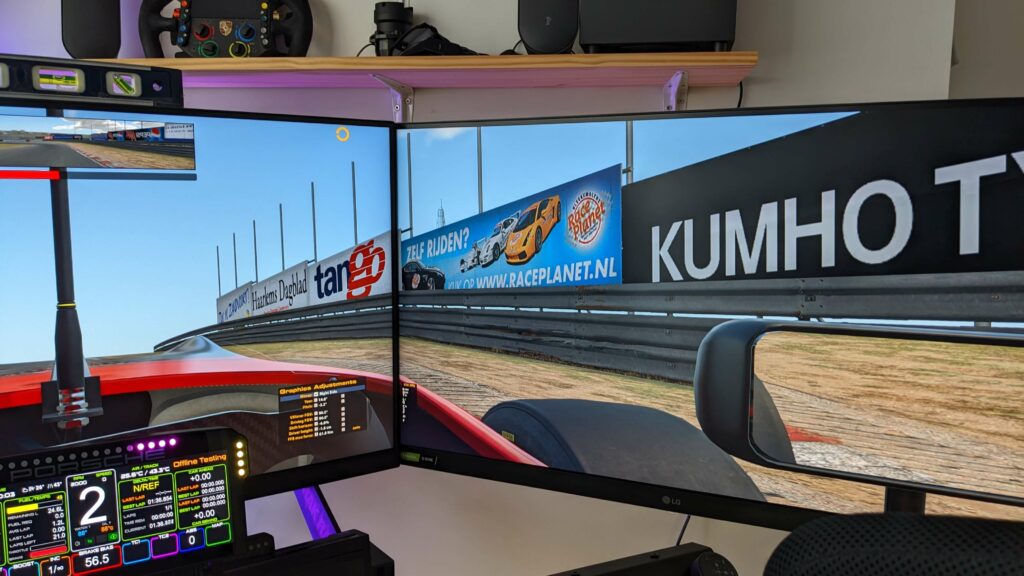
The sim also needs the angle of your side screens, which it only uses with 3 projections on. Ideally each side screen sits square to your eyes, and the angle for that depends on the size of your screens and how far you sit from them. The FOV calculator in the next section works it out for you. Set the side screens close to that by eye. A degree or two either way doesn’t matter, because your head moves about while you’re driving. On 42-inch triples at 80 cm, for example, the ideal works out at 60 degrees, and 58 is close enough. Don’t set the sides too flat, though, or you lose FOV. Then measure the angle your screens are actually at, make both sides the same, enter that figure in “Angle between center and side screens” and click “Compute” again.
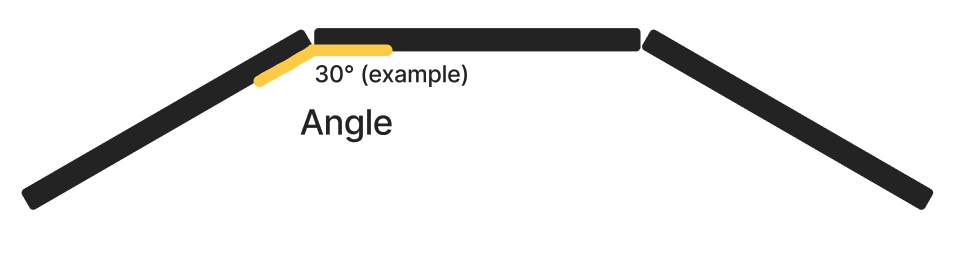
Curved screens swap the angle for “Radius of curvature”, and you’ll find that figure in the monitor’s documentation.
Viewing distance, FOV and the horizon
Viewing distance is the shortest distance from between your eyes to the surface of the centre screen, measured with you sat in your normal racing position. Mine is about 90 cm.
The correct FOV will feel weird at first, a bit like having your face up against the car’s windscreen. It’s narrower than most of us are used to, so everything seems to move more slowly. A reduced FOV helps you become more aware of small changes in the car’s attitude and balance. Test it at a circuit you know well. Are you finding it easier to clip the apex and get a good entry and exit?
Try the calculator below to sanity-check the figure “Compute” gives you, or open it on our FOV calculator page.
Next comes the horizon, which is the eyeline height setting. Sit in your normal position, get in any car and use Shift + [ and ] to move the horizon, which shows as a red bar. Set it to your natural eyeline. iRacing says getting this right is essential to minimising the warp between the centre and side screens. Ctrl + [ and ] adjusts the driver height, so put the virtual wheel roughly where your real wheel sits. Those two are global, but each car can take its own tweaks too. In the cockpit camera, press Ctrl+F12 to open the Camera menu and use the X, Y and Z offsets, which iRacing likens to adding or removing seat bolsters. Click “Save Car” and keep the name car.cam.
Performance settings for triples
If you’re on an NVIDIA card, leave SMP switched on, because with 3 projections on, the sim is drawing three views instead of one.
Cap your frame rate as well, under Settings > Graphics > Frame Rate > “Max Frames Per Second”. iRacing’s rule of thumb on a high-refresh screen is to limit it to the monitor’s refresh rate, and some people find 2-5 fps below that works best, so 160 on a 165 Hz screen. Keep all three screens on the same refresh rate, as you set in Windows earlier.
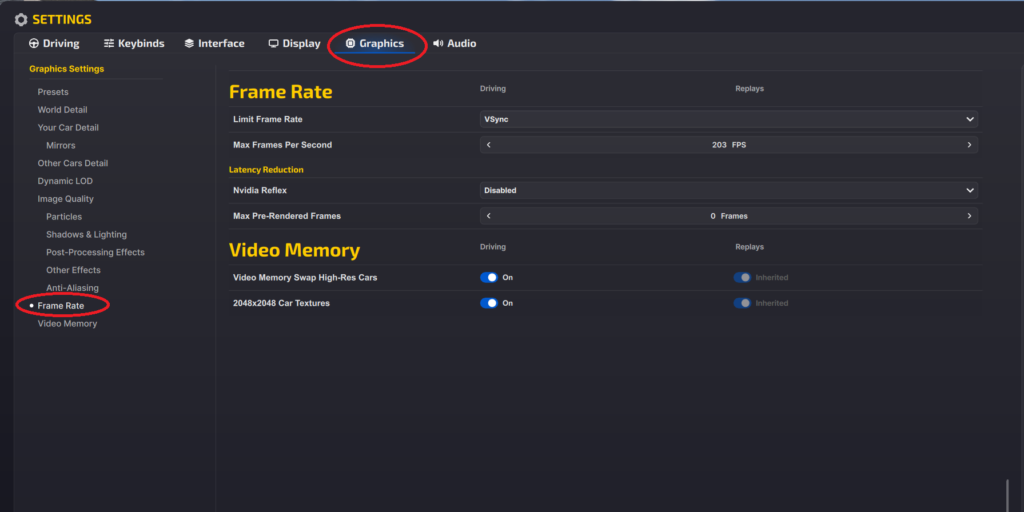
I set my refresh rate to 120 Hz on the LGs. Three 1440p screens take a gaming PC to drive, and even with my RTX 4090 the frame rate on the triples is usually around 90 fps at the very most.
When it goes wrong
If the side screens look stretched, check that “Monitor Type” is set to three screens and that “Render Scene Using 3 Projections” is on.
NVIDIA doesn’t officially support G-SYNC on triples run as one window, but users have found that disabling Multiplane Overlay (MPO) clears up G-SYNC’s visual problems and gets it working anyway. NVIDIA publishes mpo_disable.reg and mpo_enable.reg files to switch it off and on again, and you’ll need to reboot afterwards.
When you’re testing kit like I do, you can sometimes lose your best iRacing config, which is frustrating. If you made that backup of rendererDX11Monitor.ini, copy it back over the file and you’re where you were.
Triples are a tougher challenge, but probably a more satisfying one. Once the picture is right across all three screens, the next jobs are your force feedback and, if you’re on a Simucube, the Simucube’s iRacing settings. Enjoy!
Related Articles
iRacing Simagic Settings: FFB for the Alpha EVO and Alpha Mini
iRacing Simucube Settings: Simucube 2 Pro, Sport and Simucube 3
iRacing FFB Settings: Force Feedback for Fanatec, Moza, Logitech and More
iRacing Promo Codes 2026: Verified Discount Codes
iRacing Safety Rating, Explained: How the Number Actually Moves (and How to Get It Back)
The iRacing Career Guide: From Rookie to GT3
Topic: iRacing