

I’m a sim racer and amateur racer with a passion for Motorsport, good racecraft and the technical and setup aspect of sim racing.
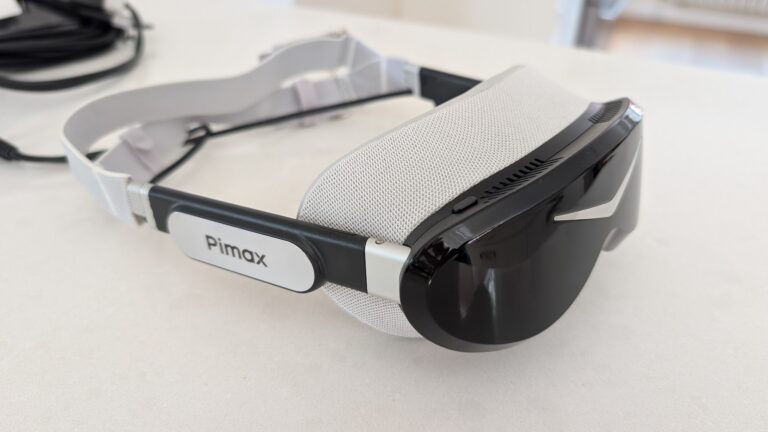
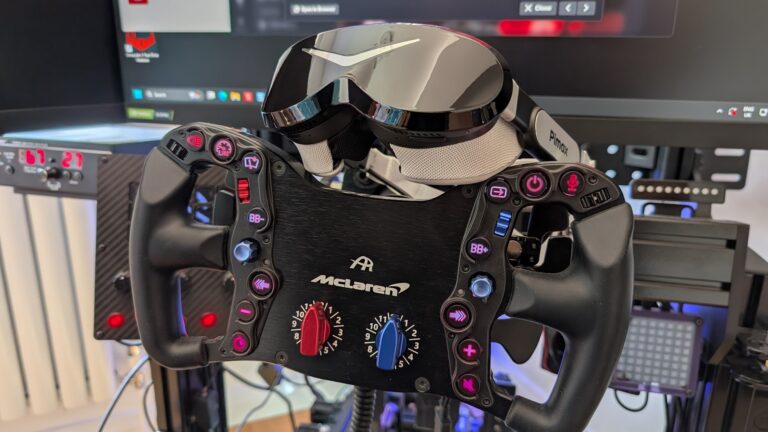
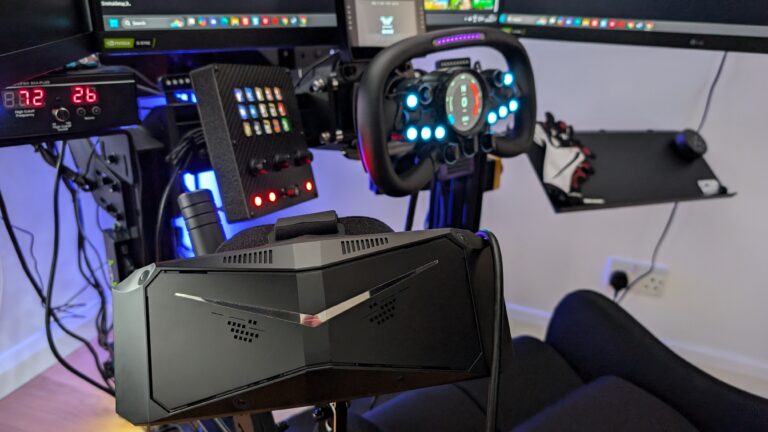
Featured image: Pimax Crystal Light
I’ve spent countless hours testing the Crystal Light across different sims, and in that time, I’ve discovered that getting the right setup makes all the difference between an average VR experience and something far more special. I admit, I’m running a RTX 4090 setup, which gives me plenty of opportunities to find what works best (especially in iRacing and ACC).
With that said, I initially tested the Crystal Light on an RTX 3080-powered machine, and we’ve been running this on my son’s 4070 ti. With a bit of luck, I’ll be able to cover a broad range of settings and provide some troubleshooting advice.
A quick note, I use Steam VR for simplicity. I am aware that there’s some performance to be gained in OpenXR and there’s a good guide to using OpenXR from Pimax here.
Quick Navigation:
Initial Setup Steps · Nvidia Control Panel · Pimax Play Settings · iRacing Specific Settings · Assetto Corsa Competizione Settings · Troubleshooting: Real-World Performance Solutions · Heat Management Tips · Comfort Modifications · Final Thoughts
Initial Setup Steps
Getting started is easy enough, but, there are a few steps we need to take to get the setup right first time. Here’s what you’ll need to do first:
Install Required Software:
- Steam VR (Find this in the Steam store – it’s free)
- Pimax Play (latest version)
- Latest Nvidia drivers (currently 566.03)
Before First Use:
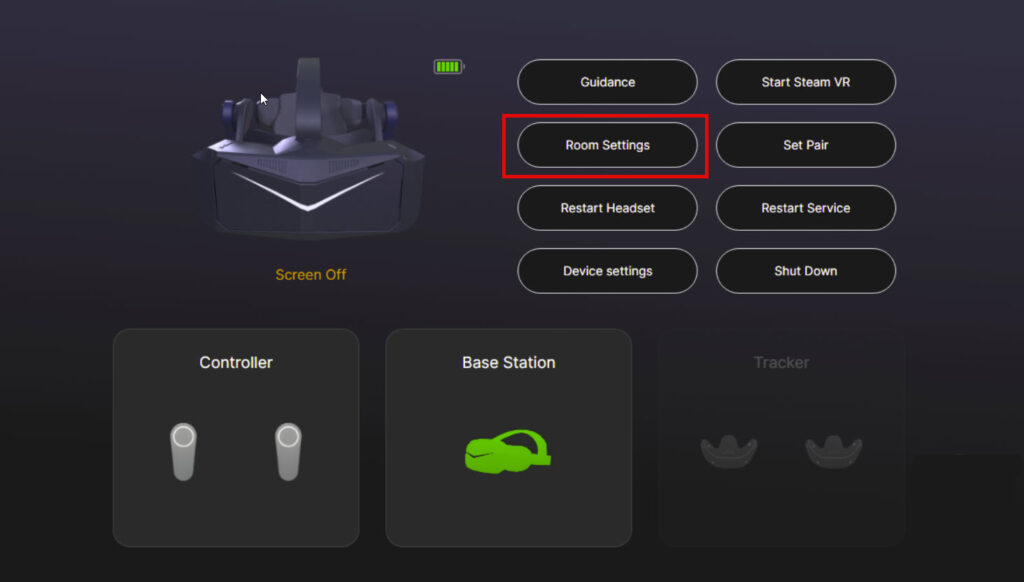
- Run room setup in Pimax Play
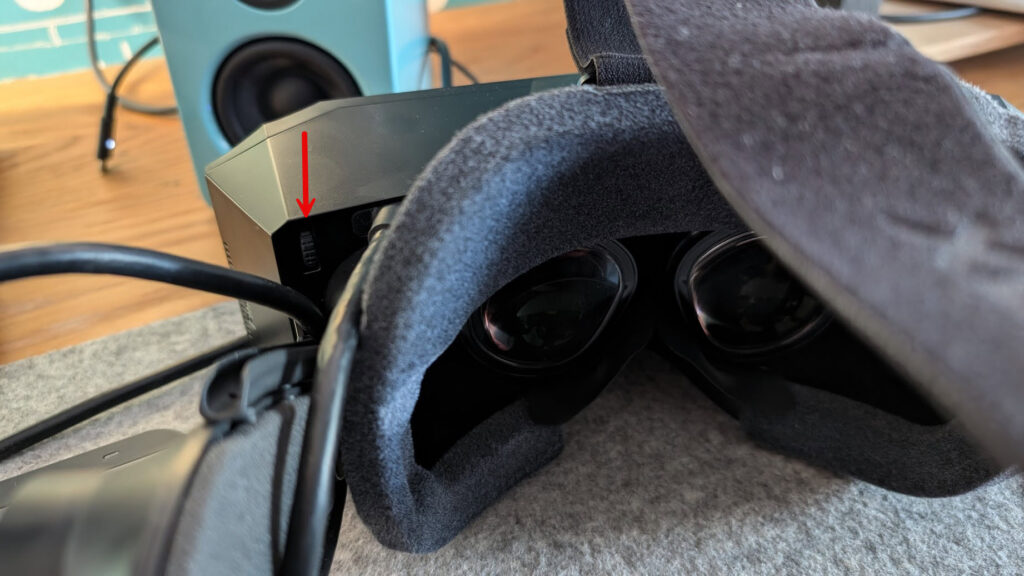
- Adjust physical IPD using the slider (top-right of headset)
- Connect headset to DisplayPort on the back of your GPU
- Connect the USB plug to a USB 3 socket
Nvidia Control Panel
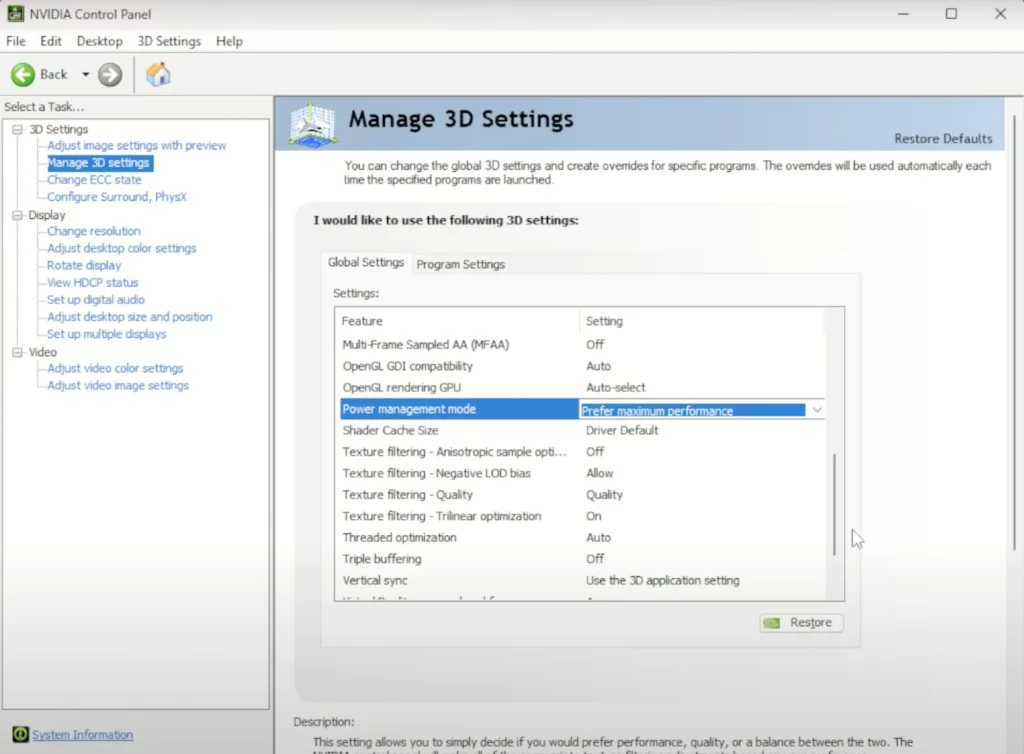
Here’s where things get interesting. NVIDIA’s control panel settings make a massive difference to VR performance – I noticed this particularly when testing different image sharpening values.
After trying various combinations, here’s what I’ve found works best:
Open the Nvidia Control Panel Navigate to “Manage 3D Settings” > “Global Settings”
Visit Our Sponsors
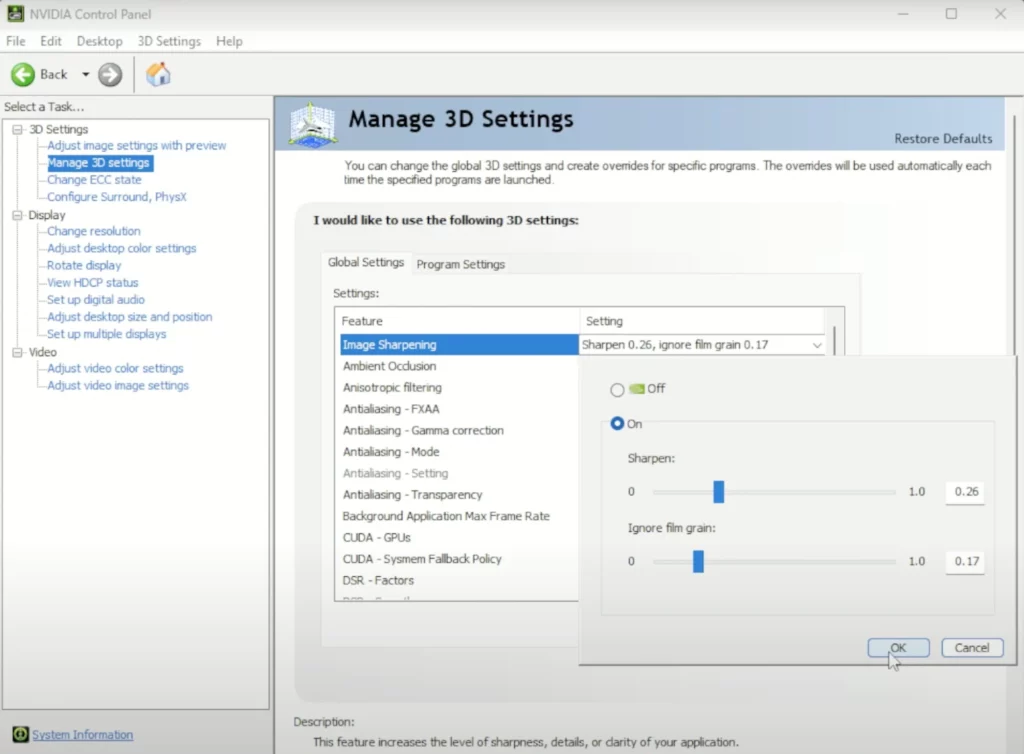
Configure these specific settings:
- Image Sharpening: 0.25 (improves distant object clarity)
- Power Management Mode: Prefer Maximum Performance
- Low Latency Mode: Ultra
- Virtual Reality Pre-rendered Frames: 1 (depending on the power you have available, I’ve found setting this to 3 works just as well, if not slightly better).
- Vertical Sync: Off
- Shader Cache Size: Unlimited
Click “Apply” and restart your PC
Pimax Play Settings
One thing I’ve learned about the Crystal Light is that the refresh rate settings make a huge difference to the overall experience. I’ve found 120Hz to be the sweet spot on the 4090 (although still it seems to ask a lot of the GPU / CPU – this is a higher spec setting). If you’re running a less powerful GPU, you might want to consider 90Hz for better stability:
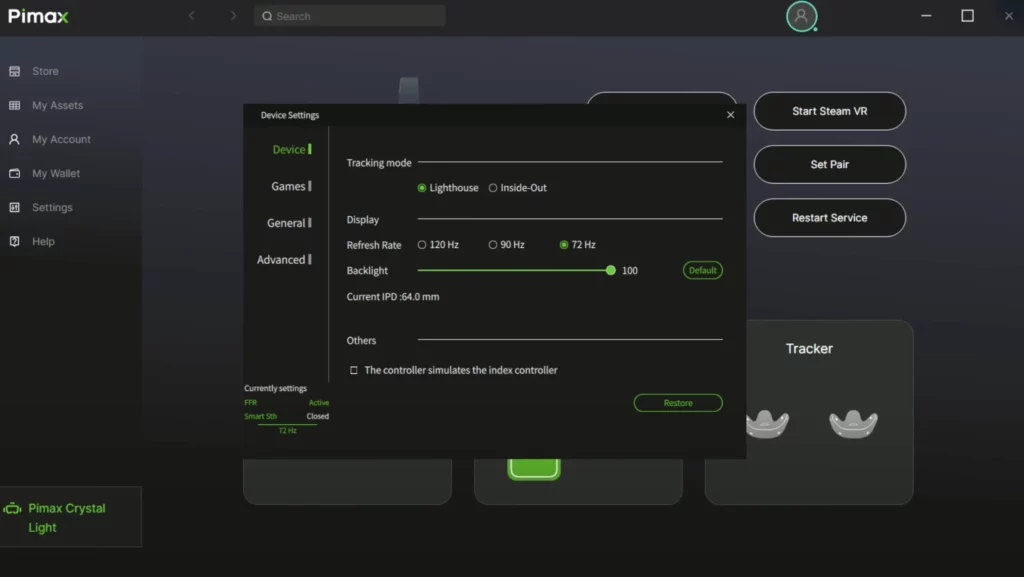
Open Pimax Play and configure:
- Refresh Rate: 120Hz (90Hz for GPUs below 4070 Ti)
- Render Resolution: 100% (native)
- Fixed Foveated Rendering: Enabled
- Brightness: 80% (I reduce this to 70% for night racing as I’ve mentioned before 100% is very bright!)
iRacing Specific Settings
iRacing has been my go-to sim for testing the Crystal Light, and it’s where I’ve spent most of my time perfecting these settings.
The settings themselves are extremely similar, if not the same as the OG Pimax Crystal. Here’s what I’ve found works incredibly well:
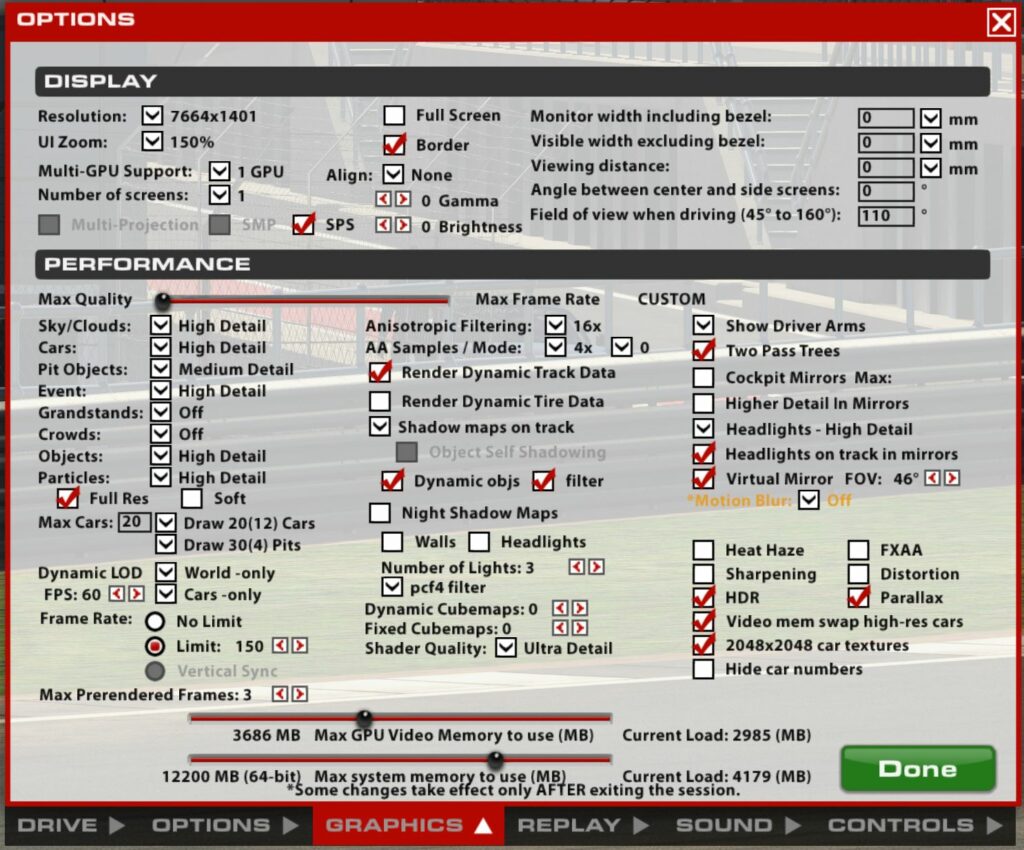
Graphics Settings Tab:
- UI Render Mode: VR
- Sharpening: Off (we’re using Nvidia’s)
- HDR: Enabled
- Dynamic Objects: Enabled
- Dynamic Track Surface: Enabled
Detail Settings:
- Shader Quality: High
- Shadow Maps: Track Only
- Shadow Detail: Medium
- Pit Objects: Low (reduces CPU load)
- Crowds: Disabled
- Grandstands: Disabled (major performance impact)
- FXAA: Enabled
- Heat FX: Off
Assetto Corsa Competizione Settings
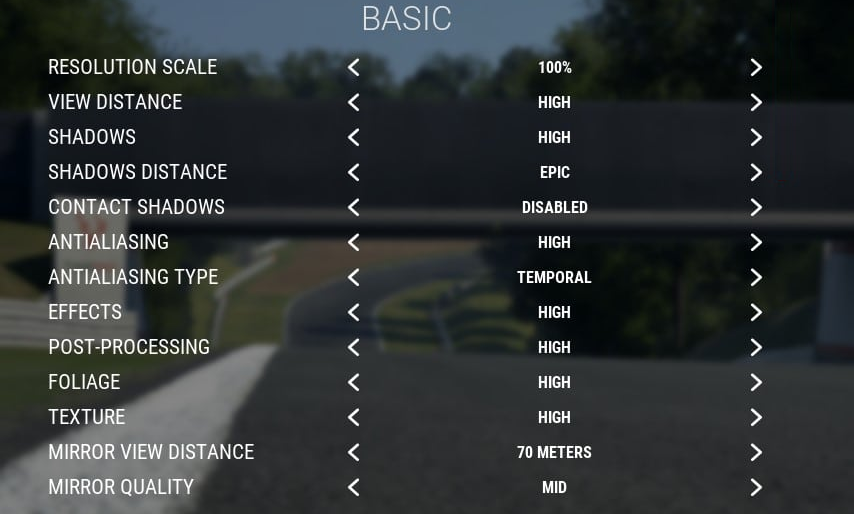
- View Distance: Medium (better performance without losing crucial visibility)
- Shadows: Medium
- Antialiasing: TAA
- Post Processing: Low
- Materials Quality: High
- Mirror Quality: Low
- Mirror Framerate: 30fps
- VR Pixel Density: 130% (reduced to 100% for GPUs below 4080)
For GPUs below the 4080, I’d recommend these additional adjustments:
- Reduce VR Pixel Density to 100%
- Set all shadows to low
- Disable volumetric fog
- Reduce visible cars to 10
- Consider a 90Hz refresh rate
Troubleshooting: Real-World Performance Solutions
Through testing and community feedback, I’ve hit a few bumps in the road and managed to come up with usable fixes. Hopefully these will help you too:
Stuttering Issues
If you’re experiencing stuttering, particularly in ACC, try these steps in order:
- First Steps:
- Disconnect additional monitors
- Close background apps
- Set your Windows power plan to High Performance
- If Stuttering Persists:
- Check GPU temperatures (MSI Afterburner is great for this)
- Verify Steam VR resolution isn’t set above 100%
- Consider reducing refresh rate to 90Hz or lower temporarily
- Last Resort Options:
- Lower visible cars count
- Reduce mirror quality
- Disable volumetric fog
Visual Clarity Problems
The most common complaint I’ve heard about VR is blurriness. The Pimax Crystal Light is somewhat sensitive to facial position so it’s really important to get a good fitting while you’re wearing the device.
Here are some other tips:
- Quick Fixes:
- Clean lenses with a microfiber cloth
- Verify IPD setting matches your eyes
- Check render resolution is at 100%
- Advanced Solutions:
- Adjust image sharpening and performance settings in Nvidia Control Panel
- Verify your headset is properly seated
Heat Management Tips
You get hot using VR! Here’s what I’ve learned about managing it:
- Keep your room cool – I aim for around 20°C – I leave a window open
- Use a wind simulator
- Take 5-minute breaks every hour
Comfort Modifications
After extended testing, I’ve found a few essential comfort modifications:
- The Studioform mods make a huge difference in this area
- Use the built-in speakers for voice chat only
- Consider a thicker face gasket if the lenses feel too close (again, available via Studioform)
Final Thoughts
The Crystal Light is capable of delivering an incredible sim racing experience, but it does require some setup work to get it perfected. If you’re running a less powerful GPU than the 4090, focus first on stability rather than maximum visual quality. You can always incrementally increase settings as you find performance headroom.
Remember that VR performance can vary significantly based on your specific hardware combination, ambient temperature, and mistakes like the wrong USB port choice. Take time to find your optimal setup, and don’t be afraid to experiment with different settings combinations.
Related Posts
Pimax Dream Air Settings for iRacing: My Baseline
Pimax Dream Air Review: A Sim Racer’s Verdict
Best Pimax VR Settings for iRacing in 2026: A Complete Guide
Best VR Headsets for Gaming 2026: PC VR vs Standalone Compared
Best Pimax VR Settings for Assetto Corsa Evo (v0.6, May 2026)
VR Sim Racing Games in 2026: What Works on a Pimax (And What Doesn’t)
Topic: VR Headsets