As much as two years ago I reviewed the original version of SIM 3D’s excellent pedal rumble kit. At the time, Calvin (the Founder and all round-top guy) was just starting out and had a limited range of pedal attachments available. This was (as you’ll see in the article below) absolutely fine as I owned a set of Heusinkveld Sprint Pedals, still to this day among my favourite sim racing pedals. However – I switched to the SimTrecs ProPedal GT for which there was no rumble kit available. That’s changed, and Sim 3D supports a huge list of pedals including, the SimTrecs!
So, in this updated article I’m going to revise any of the information below for HE Sprint owners (as that’s barely changed, but I’m updating based on my experience mounting the revised rumble motors to my SimTrecs.

It’s known that people who have lost a sense tend to develop other senses to compensate for the loss. In a similar but far less serious situation, I think sim racers are much the same in comparison to experienced track drivers. Because you can’t “feel” the physics of a real car in the sim, you learn to take other signals into account.
Your hearing (for example) learns to detect understeer over the speakers. And while you can’t feel the rotation of the chassis in your body, you do become extremely aware of over-rotation with your eyes and through the opposing forces through your steering wheel.
It’s not difficult then, to make a case for any update to a sim that gives you more, better, or entirely new feedback on what the car is doing on the track.
A lot of people are buying motion sims for this exact reason.

More than a bit more down to earth, budget wise, are rumble motor kits for your sim racing pedals.
What’s a rumble motor?
A rumble motor (or, eccentric rotating mass vibration motor, “ERM”) is a small, low-power DC motor that has an improperly balanced weight on the rotor shaft. When the motor turns, it creates a vibration.

A rumble motor kit for your brake (and sometimes throttle) can be used to create vibrations through your pedals that approximate a tyre lockup under braking and wheel slip on the throttle during an understeer moment.
Testing Sim 3D’s rumble motor kit for Heusinkveld Sprints
I happened upon Sim 3D on a Facebook thread talking about Simucube PSU brackets. It’s funny how you discover small new businesses like that. Anyway, Calvin, the owner gave me a call to check my order. We got talking about Sim 3D’s other products and by the end of the discussion, I was completely sold on the idea of testing his rumble kit design.
I later ordered their wind sim, which I also recommend!

The Sim 3D Rumble Kit is an Arduino based kit that uses Simhub’s “Wheel lock” effect and “Wheels slip” effect. Both effects do exactly as they sound, a configurable vibration to warn about tyre locking and your rear tyres breaking traction (slipping).
Configuration is easy (and there’s plenty of support available from Calvin himself and via their Discord community)
Too long, didn’t read
If you’ve come here to ask if you should try one on your Heusinkveld Sprints, Ultimates, Fanatec CSL Elites, Thrustmaster TLCM’s and so on, the answer is a definite yes. Setup is easy (I talk about the setup in just a moment) and the reward is striking.

What happens with a pedal rumble kit installed?
While you’re driving, if you’re approaching the threshold of grip under braking (read my article about threshold braking here) then it’s very difficult to “feel” any physical signals that you’re locking up. That is, except for the noise, tyre smoke, FFB signals, missing the apex and so on. But by that point, it’s much too late.
What’s clever about adding a pedal rumble kit is you can set it up to pre-warn you about a lock by making it sensitive to early moments of under rotation. Under rotation is the point where the tyre is on or slightly past the maximum grip level under braking. Any more brake pressure will lock the tyres. This is very difficult to sense in the simulator, in fact, I’d say it’s one of the hardest parts of learning to become a sim racer when you’ve spent so much time in real Motorsport.
With the rumble kit installed, you feel the tyres under rotating, slipping, or locking through the pedals.
This is clever, and very useful, for two reasons.
Firstly, you have a warning when you’re getting the most out of your brakes. So you can feel a lot more confident when you’re nibbling away at the brake point. In theory, this will make you faster (with some practice!) but critically, it should make you less likely to have a big crash.
Secondly, I think having this extra feedback through the pedals can help you calibrate your maximum brake pressure more accurately. As I’ve written before, I used to reduce the max brake force in Smartcontrol to the point just where the chassis starts to lock up when I was learning the Porsche 911 RSR GTE. This is called the threshold, hence the phrase “threshold braking”.
During original testing (back in 2021), I found about another 3% of additional maximum brake force in the pedal. Getting the most out of the brakes is where all the lap time is.
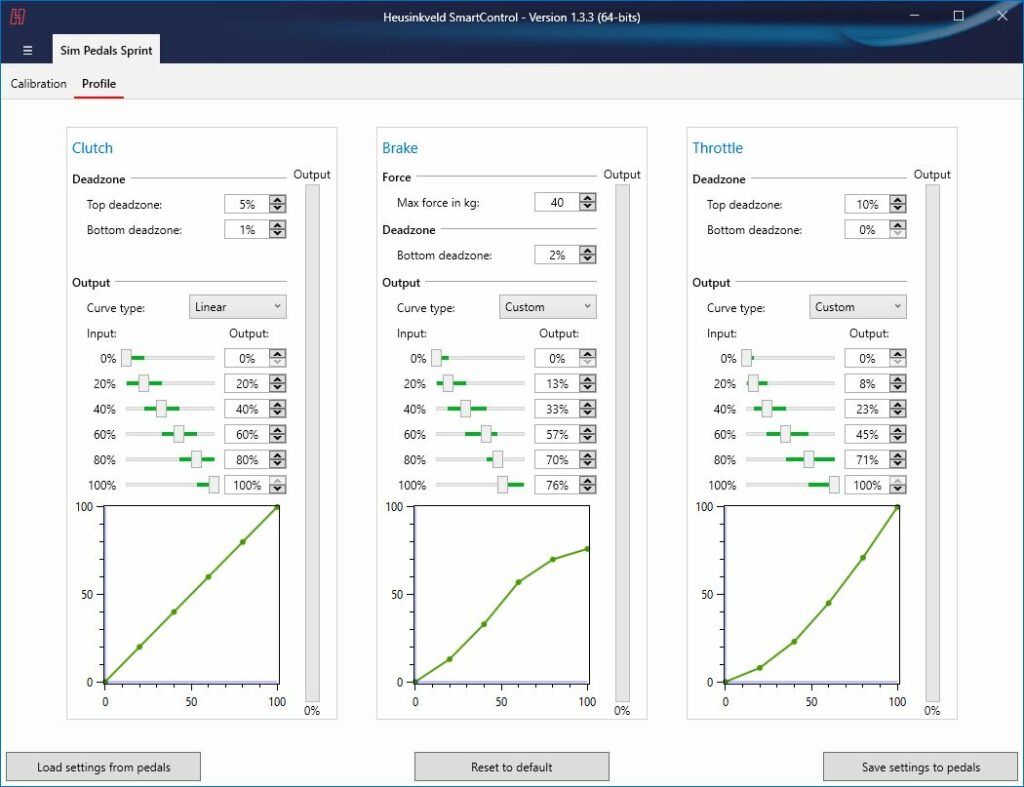
How to install the Sim 3D Rumble Kit to your Heusinkveld Sprint pedals
Installing the Sprints is easy, all you need is an Allen key. Each rumble unit fits neatly behind the pedal with the screws already in place.
Before:

After:

The cables all come supplied, with only the little motor connections that need any real care as they’re quite small.
Here’s a closer look:

I found installing the system really easy, with a few tie wraps to hold the Arduino box in place. Excuse the cable tidiness!

Connect your rumble kit to a USB port and you’re ready for the next step. You might notice when you boot your PC that Windows installs a serial USB device driver. I did, so at that point, I knew something was working.
How to install the Sim 3D Rumble Kit to your SimTrecs Pro Pedal GT
Since the original article, a really important feature has changed. Aside from the wider range of pedal support SIM 3D offer, they’ve started supplying rumble brackets with two rumble motors added:

The power of the output from two motors is so much stronger than the previous versions I actually mistook the brake’s ruble motors for my Buttkicker.
Installation to the SimTrecs pedals is slightly trickier, but not so much that anyone who can turn an Allen key would struggle.
Mounting to the SimTrecs throttle, the bracket uses 3M adhesive strips. As it happens I’ve used these strips before and they are very, very strong.

I think it’s best to make sure there’s no grease or dirt on the back of your throttle pedal, ideally by cleaning them with some isopropyl alcohol. From there mounting the bracket is a doddle, but do think about what you’re doing because you only get one chance!
The brake pedal is slightly trickier. Fortunately, there are two threaded M6 bolt holes on the back of the SimTrecs brake arm, that SIM 3D take advantage of to mount their brake rumble bracket:

There’s just one slight issue – I couldn’t find a pair of M6 bolts short enough to mount the bracket directly onto the base. I needed a spacer of about 5mm. As we’re operating from a home office, sometimes you need to be creative with your solutions:

A tap washer perfectly fills the gap – Ideally I’d have M6 bolts that were about 6mm shorter (I want to say 8mm length in total). But as I couldn’t find anything I settled for the bolt, washer, tap washer and then the bracket, attached in that order:

As you can see in the picture above, it’s a neat solution and wouldn’t lose any “fidelity” on the vibration as the bracket itself is mounted hard against the brake pedal.
The final installation looks pretty good I think:

How to setup Simhub for Arduino / motor effects
I’m assuming you’ve already installed Simhub. If not, here’s my post on dashboards with Simhub for a useful primer.
Open Simhub, and head to the Arduino menu option on the left-hand side of the window.

From there, select “Single Arduino”. I initially had nothing in the detected hardware box (below), so I installed the Windows driver for Arduino via this link.
As soon as the driver had been installed, Simhub detected the device:

Next, head to the Shakeit Motors option (left hand nav) and select “Motors output”

Clicking “Arduino motors and fans”, select “Enable”.
Here, you select which effects should be active. It’s good first to use the “Test now” link, just to work out which channels your throttle and brakes are on.

You can rename the channels to “brake” and “throttle” which can be handy. In my example above I’ve marked the channels with “BR” for brake and “THR” for, you know.
Scroll down the effects list. Enable all options for “Wheels lock” on your brake channel and your rears for “wheel slip”. I later went on to enable all four tyres for wheel slip to see if I could get understeer feedback. Still testing and tuning!

Next, select “Effects profile” from the options tab at the top. This is where you tune the rumble motors.

Here’s a useful how-to from Calvin explaining the wheels lock and slip settings (mine are in the screenshot of course!)
As Calvin explains, gamma factor, threshold, minimum force, and input gain are all vital for tuning the feel of the system.
- Gamma Factor deals with “responsiveness to minor feedback”, specifically how early would you like a warning that you have under rotation headed towards a brake lock? I like to get a large window of information through my pedal so that I can play with the chassis at the limit of grip.
- Threshold allows a certain amount of lock before you’re warned
- Minimum force controls a steady curve of vibration intensity as you approach a lockup
- Input gain – some sims may need this increasing above 100 (iRacing is fine at 100)
First drive and tuning
Like any new sensation, it takes time to adjust to the new pedal feel. My best advice is to drive completely normally and slowly adapt to the vibrations. As you’re driving, try to brake later and harder and respond to the feedback you’re getting.
Try to separate each event in your mind. For example: “a wheel locks, I get this sensation”. Eventually, you learn – much like muscle memory, the new outputs start to make sense.
While I was playing around with the settings, I found that I wasn’t getting feedback as early as I would like, so I dropped the threshold setting down to 0. I also turned up the brake channel and reduced the volume of the wheel slip channel, as I wanted to focus more on brake control than rear traction.
I’m planning to play with minimum force next, as I’d really like to experience a bit less vibration for the minor under-rotations and small locks.
Conclusion
I really like it when a pedal mod is actually useful. I think I’ve been plain enough about brake mods that don’t work that well in the past, but with the pedal rumble mod from SIM 3D, I must say I’m really surprised. For me, it’s the additional confidence in braking I’ve found.
Pros:
- Enhanced Feedback: The rumble kit provides additional feedback through vibrations, simulating tyre lockup under braking and wheel slip during understeer moments, which can enhance the driving experience by providing cues that are otherwise missing in sim racing. I call this “additional information” and I think it’s a very useful additional tool for sim racers to use.
- Easy Installation: The installation process is straightforward requiring minimal tools and effort.
- Configurable Effects: Utilizes Simhub’s “Wheel lock” and “Wheels slip” effects, which are configurable to suit the user’s preference, allowing for a tailored experience.
- Support and Community: There’s ample support available from the product’s creator and a Discord community for troubleshooting and tips.
- Compatibility: The kit supports a wide range of pedals, including Heusinkveld Sprints, Ultimates, Fanatec CSL Elites, Thrustmaster TLCM, and more, making it versatile for different setups.
- Improved Braking Confidence: The feedback from the rumble kit can help drivers better gauge braking points and pressure, potentially improving lap times and reducing the likelihood of crashes.
Cons:
- Sensitivity to Setup: The effectiveness of the feedback can be highly dependent on the correct setup and tuning within Simhub, which might require some trial and error to get right.
- Potential to Overwhelm: For some users, the additional feedback might be overwhelming or distracting, especially if not properly adjusted to a comfortable level.
- Installation Nuances: While generally straightforward, the installation process can have its quirks, such as needing spacers for certain pedal setups or ensuring clean surfaces for adhesive mounts.
Issues Other Reviewers Found to Be a Problem:
- Packaging and Presentation: The unboxing experience was described as plain and somewhat underwhelming, with the product arriving in a basic beige box. This aspect might not affect the product’s functionality but could impact the initial impression.
- Perception of Material Quality: The use of 3D printed components led to a perception that the product might be cheap. This perception could influence the overall value assessment of the product by potential buyers.
- Installation Clarity: There was some confusion regarding the installation process, particularly with the mounting hardware. More explicit guidance could be beneficial.
- Mounting Hardware Accessibility: The design of the mount made accessing certain parts difficult during installation, leading to frustration. This could be improved for a smoother setup experience.
- Cable Length: While the braided wires from the control box to the motors were appreciated for their durability and appearance, their length (approximately 55cm or just under 2 feet) might be too short for some setups, limiting placement options for the control box.
- Software Setup: While not a direct criticism of the hardware, there is some setup required within SimHub, which might be daunting for users unfamiliar with such software. A more straightforward, perhaps one-click setup process was suggested as an improvement.
As this post is updated with the addition of the SimTrecs Pro Pedal GTs, I want to add that the key difference between the 2021 version and these 2023 versions is the sheer brute force of the dual motor brackets. They’re strong enough now that 100% output will be a little too much – in my opinion) but they are so much more powerful that the sort of vibration we’re talking about is comparable to the Buttkicker under my seat. Both the Buttkicker and the SIM 3D pedal rumble kit work so well together, I recommend you try out both!
Related posts:
Le Mans Ultimate: How to Drive the LMGT3 and Hypercar
mBooster Review: Moza’s New Active Pedal
Is Moza about to Completely Disrupt the Sim Racing Pedal game?
Mustang GT3 Sim Racing Wheel from VPG – Close Look
Five of the best Gran Turismo 7 track and car combinations
MOZA Racing FSR2 Formula Wheel and CM2 Dash Review
Topic: Sim Racing Pedals
One thought on “Pedal Rumble Kit from Sim 3D: Review”
Comments are closed.



Very interested