

I’m a sim racer and amateur racer with a passion for Motorsport, good racecraft and the technical and setup aspect of sim racing.
Featured Image: Mclaren Artura Pro (SimHub-supported device)
SimHub is the “go-to” application to manage your sim racing peripherals, from RPM lights, dashboards and DDUs to wind simulators and bass shakers. It has evolved over the years to become accessible, and straightforward and comes complete with heavily revised, intuitive UX.
Every sim racer has to get started with SimHub at some stage, so, today, I’m using my own SimHub setup as the basis for this guide. We’ll look at DDUs. LED / RPM Profiles, general device settings, wind simulator and pedal rumble motors settings…
What I appreciate about SimHub is the wide adoption of support by all of the top sim racing manufacturers (bar a few obvious, “ecosystem” obsessed companies). When a device has SimHub support, the developers create a device profile containing all of the important settings, so the device is pre-configured.
Update for 2026: SimHub has grown a lot since this guide first went up. Dashboards now install as packaged .simhubdash files, ShakeIt drives haptic pedal reactors and active shifters natively, there is a Motion Addon for motion rigs, and it plugs into Elgato Stream Decks. The core setup below is unchanged – I have folded the new bits into the relevant sections. For the deepest reference, the official docs live on the SimHub GitHub wiki.
For example, the LED profile for my Grid Brows requires almost no setup whatsoever. SimHub lets you get set up quickly so that you can just go racing. Often the device is in SimHub’s device library, but as a fallback, you can usually find the SimHub configuration files on the manufacturer’s website:

By the end of the guide, you’ll have a good setup SimHub install running your DDU, LED flag, pedal rumble kit, wind sim and even your steering wheel.
Quick Navigation
Jump directly to what you’re looking for:
Installation |
Dashboard Overview |
Car Settings |
Updating Dashboards |
LED Profiles |
Arduino |
ShakeIt Wind |
ShakeIt Motors
Installation
Let’s start by downloading and installing the latest version of SimHub from the download page.

Download as a zip file and extract the installer somewhere useful.
Open the installer, accept the agreement, make sure all boxes are checked and click install. If you’re updating a current installation of SimHub, don’t worry, you won’t lose any settings.

If this is your first installation, make sure to check all boxes for .net and the screen drivers installed (will save you hours of headaches if you plan to install a DDU or acquire a sim racing wheel with a display)

Once the installation has been completed, the application will automatically launch, you’ll find the icon for SimHub in the hidden icons section in your taskbar. If it doesn’t automatically launch, find it in your start bar.
Dashboard Overview
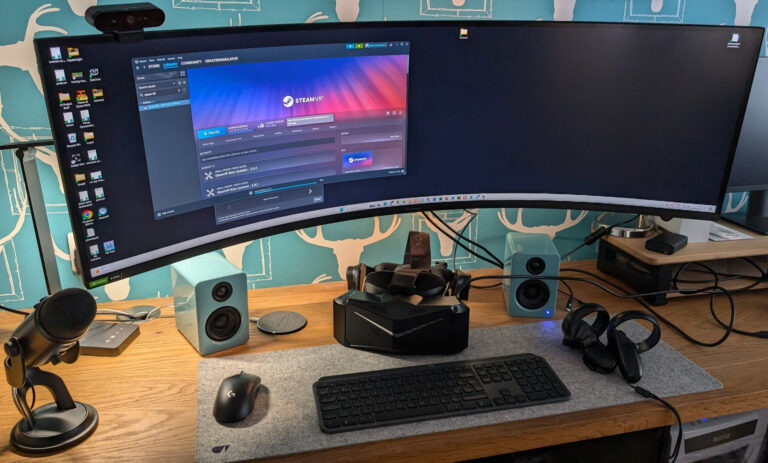
Open the App, and you’re greeted by the SimHub Dashboard. Here’s mine with a few devices added:

The dashboard in SimHub has been revised over the years to create a useful, overview-style UI. It provides the status of all of your connected sim racing equipment and gives high-level control over “feedback” devices such as rumble motors, wind sims and bass shakers.
You can also select and activate your sim racing games (I mostly use iRacing but often switch to other platforms if I feel like a change). You’ll see that my currently active game is indeed, iRacing.
The centre of SimHub’s dashboard is arranged into several sections:
My devices
“My Devices” lists your connected sim racing equipment.
My setup currently features a GRID Brows V2 device, a GRID DDU5 dash display, and my Ascher Racing Artura PRO.

SimHub-supported devices are often wheels, bass shakers, dashboard displays and RPM / Flag lights. Essentially, support is given to any manufacturer willing to do the development work for their product to be supported – if you’re not sure always check before you buy a device.
In the devices panel, you might see a gear icon to the right of the devices section which is a shortcut to the Device configuration (also featured in the left-hand navigation, which we’ll look at in a moment). You can manually import a device from a file or select your pre-configured device from the SimHub device library.
Feedback
Here, you can adjust basic feedback control, such as bass shaker volume, motor amplitude, and wind sim maximums for idle (car not running) and race (car running).

My favourite simulators
This section contains the thumbnails of your frequently used or favourite racing games.

That’s the dashboard out of the way, so now let’s take a more detailed look at the properties available in each of the items featured in the left-hand navigation.
Car Settings
The Car Settings dialogue is split into two primary sections: “DEFAULT CAR SETTINGS (FOR THE CURRENT GAME)” and “CONTROLS”.

Within the “DEFAULT CAR SETTINGS (FOR THE CURRENT GAME)” section, you’ll find:
Redline and shift lights:
Here, you can adjust the RPM range for your car’s redline and set up how the shift lights behave. The redline is broken down into three stages (Shift light 1 at 90%, Shift light 2 at 95%, and the redline at 96% of the max RPM).
Low fuel alert:
This allows you to configure the low fuel alert trigger (in remaining laps) and the RPM at which the low fuel alert will start playing.
Shift light and redline settings:
You can fine-tune the shift light trigger percentages for stages 1 and 2, and set the redline as a percentage of the total RPM.
Redline and shift-light controls
Under the “CONTROLS” section, you’ll find:
Increment/Decrement redline value:
You can assign buttons to give you the ability to make adjustments to the redline values.
Switch per gear redline definition (when car model is known):
This option lets you define different redline settings for each gear when the car model is recognised by SimHub. This is quite an advanced feature as it requires an understanding of the simulation’s peak torque availability at different RPMs!
Redline change steps when car is known (RPM):
Here, you can set the RPM increment/decrement value when adjusting the redline for a recognised car model.
At the bottom of the screen, there’s also a toggle labelled “Synchronize car redline when game gives it”, which, when enabled, will automatically sync the redline settings with the values provided by the game, if available.
These settings give you a great deal of control over your car’s redline and shift light behaviour, which means you can tailor the shift alerts for each car and game. In reality, (and as you can probably tell from the setup of this screen) I rarely touch it (if ever).
And that’s the great thing about SimHub, you can get as involved as you’d like or, just go racing!
Device Settings
The “My devices” screen in SimHub provides an overview and control options for your connected sim racing hardware. In my case, you’re viewing the settings for a GRID DDU5 dash display, which is currently connected to my sim racing setup.

In this view, you can see all SimHub registered connected devices. I’m running GRID Brows V2, GRID DDU5, and my Ascher Racing Artura PRO. Clicking on each device icon will show you the specific settings for that device.
We’re going to look closely at the GRID DDU5, the screen is divided into several sections:
Brightness setting:

Here, you can adjust the brightness of the LED and LEDs on your DDU5 using a slider, ranging from 0 to 100%.
Hardware:
This section allows you to connect to a specific screen and configure the screen settings, such as rotation and refresh rate.

My Grid Porsche Cup DDU is a small HDMI monitor and requires the HDMI hardware to be selected in this dropdown to work correctly.
Main dashboard and Idle behaviour:
Here, you can select the main dashboard you want to use with the DDU5, choosing from a list of installed dashboards. I’ll cover how to install a dashboard with SimHub in a moment.

Using “Idle Behaviour”, you can choose what happens to the dashboard when the game is not running, either powering it off or switching to the idle dashboard. While I like to use several different dashboards, I always leave TWF’s dashboard for the idle mode as it leaves a clock on the display unit, a nice feature I think!
Dashboard playlists and car assignment:
In this section, it’s possible to configure how SimHub manages the dashboards for your display.

You can set the main (your preferred) dashboard to be used when the game gets activated, set the idle dashboard for when the game is not active, and choose whether to load a specific dashboard when the car model has no defined playlist.
Next we’ll look at how to update the dashboard.
How to update the dashboard in SimHub

I use Lovely Dashboard. It just works, there are several different flavours of dash depending on your preferences and hardware. The software is well supported and the founder is an enthusiastic contributor to the sim racing industry. It’s not the only set worth a look though – TWF Dashboards (Hakan Uzunoglu’s pack, free from his GitHub or OverTake) is the other big free collection I keep coming back to, and it’s the one I leave running in idle mode. Grab both, try them, see which suits your unit.
Assuming by now you’ve installed SimHub, you need to download and install the Roboto Font Family and of course, download Lovely Dashboard:

For my Grid DDU5, the TK Edition or standard “LOvelyDashboard” version will work very well.
Quick note, because the process has changed since I first wrote this. The dashboard I actually run is the Lovely Dashboard from Lovely Sim Racing, and these days you install it through the Lovely plugin rather than downloading dashboard files one at a time. Grab the plugin from lsr.gg, run the installer, and enable it in SimHub when you are prompted on the next launch (you enable the lovely plugin plus its ATSR LED and Post-it notes helpers). Then open the plugin’s Dashboard tab and hit Install next to the dash you want – it imports straight into SimHub, and updates are a single click from the same tab. The free version is plenty; a membership from a euro a month unlocks the extra modules and the Pit Wall screens.
Download your preferred edition – these days dashboards come as a single packaged .simhubdash file – and double-click it with SimHub running. SimHub unpacks the dashboard and installs any custom fonts and images for you:

SimHub may need to restart, although in my case it didn’t.

The dashboard should just install and you can immediately test it in iRacing or your preferred simulator.
One thing worth knowing: SimHub now reaches well beyond screens. There is a SimHub Stream Deck plugin that pushes live telemetry to an Elgato deck, so a key can show fuel or tyre temps rather than just firing a macro, and Fanatec (now owned by Corsair) shipped their own official Stream Deck plugin for tuning-menu control. If you run a deck, it is worth wiring up – I cover it in the Stream Deck for sim racing guide.
A powerful feature here is that you can set up SimHub to activate different dashboards depending on the car you’re driving.
This is done by clicking “add car playlist”, selecting the car you want to create a playlist for and then select your preferred dashboard.
Build your own dashboard in SimHub
I’d wanted to give making a dashboard display for my sim a go for ages. As it turns out it’s really, really easy to get started. All you need is an old tablet or a mobile phone, your sim racing PC and SimHub:
The bit that confused me at first is how the tablet actually talks to SimHub. It’s a built-in web server. SimHub runs one on your PC (port 8888 by default), so you don’t install anything on the tablet at all – you just point its browser at your PC. Get both devices onto the same wifi, open Dash Studio’s mobile access helper to grab the address, then type something like http://192.168.1.50:8888 into Chrome on Android or Safari on an iPad. Your dash list loads, you pick one, and it runs full-screen in the browser. Two things that catch people out: it has to be http not https, and both devices need to be on the same network (guest wifi and most VPNs will block it). If the page won’t load on the tablet, try opening http://127.0.0.1:8888 in a browser on the PC first – if that works, it’s a firewall or network thing rather than SimHub.
Worth knowing SimHub doesn’t only drive a dashboard on a separate screen. Through Dash Studio’s overlays it can lay telemetry straight over the game on your main monitor – input traces for throttle, brake and steering, a delta bar, a radar, lap timing – which is the easiest option if you haven’t got a spare display at all. Ready-made packs like Romainrob’s collection and the Lovely overlay save you building one: you enable them under the Overlays tab in Dash Studio, drop a new layout, and drag it wherever you want it to sit on screen.
If you’re interested in reusing an old tablet to run as a SimHub dashboard, check out my how to guide.
If repurposing an old tablet sounds like more faff than you fancy, there’s a purpose-built option now. Corsair’s Xeneon Edge is a 14.5-inch ultrawide touchscreen (2560 x 720) that plugs in over a single USB-C cable and shows up in Windows as an ordinary second monitor – so SimHub doesn’t need anything special, you just drag a Dash Studio dashboard onto it and set it full-screen, exactly as you would with the tablet. Corsair’s own iCUE software can layer its own widgets on top (a clock, system stats, a virtual Stream Deck) if you want them, separate from whatever SimHub is drawing. I haven’t lived with one yet, so I can’t tell you how it holds up over a season, but at around 250 dollars it’s a tidy answer for anyone who’d rather buy a screen than build one. I go into it properly in the sim racing dashboard guide.
LED Profiles
SimHub has long supported LED profiles for RPM lights (and others such as iFlags, brows and so on).
Many manufacturers have registered their devices with the SimHub team, in which case your LED profile should be set to a good default.
How to install a new LED profile in SimHub
If you’d like to install your own, here’s what to do. Select the LEDs tab on your device screen:

I’m going to download an LED Profile from Daniel Newman Racing for my Grid DDU5. The LED layout of my DDU is 5/10/5.

Download and unzip the files. You’ll need the “.LEDSPROFILE” file, so extract that and save it somewhere memorable.
Click “Import Profile” and select your newly downloaded LED profile – highlighted below:

SimHub will confirm the new profile is installed:

You can, of course, create your own profiles or modify an existing one. Daniel’s profiles aren’t the easiest to modify when you’re starting out, but generally, the manufacturer’s default ones are.

Arduino
The Arduino page in SimHub allows you to manage and configure your Arduino-powered LED matrix, which in this case, is set up to display the current gear of your car while racing. This page provides various settings and options to customise the behaviour and appearance of your gear indicator.

At the top of the page, you can see the “ReaperWare iFlag SimHub Profile” section, which, under the RGB matrix tab, shows what profile is currently loaded.
The profile itself is unique to Reaperware’s iFlag, the setup for which I’ve covered in the iFlag review.
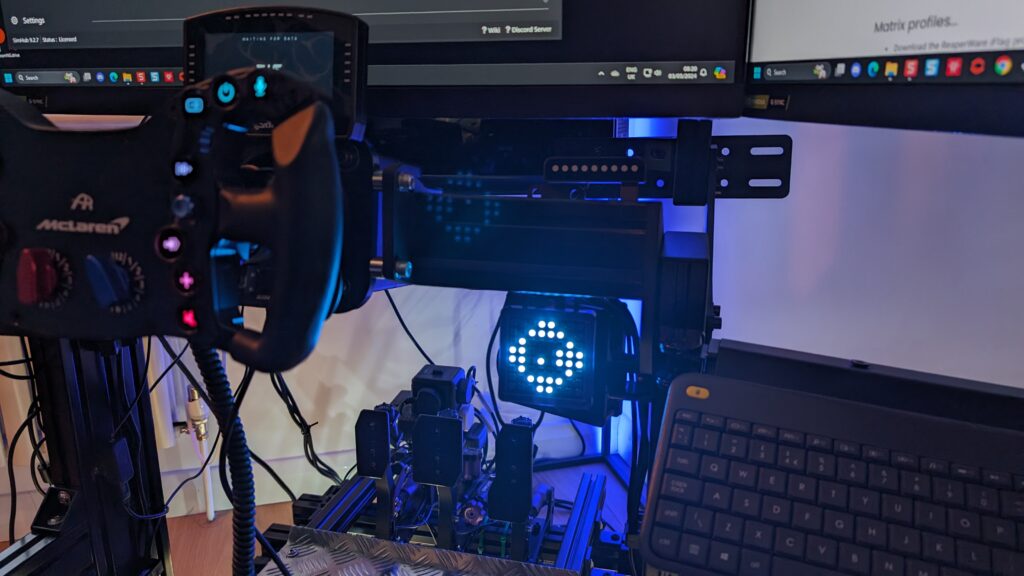
It’s worth exploring the profile effects, though:
Gear indicator settings
Under the “GEAR” effect, you have the following settings:
Show current gear:
This toggle allows you to enable or disable the display of the current gear on your LED matrix.
Position:
Here, you can set the starting position for each gear indicator on the matrix.
You have three options:
- Matrix start position: This sets the starting point for the gear display on the matrix.
- Start position X: This allows you to adjust the horizontal starting position of the gear indicator.
- Start position Y: This setting controls the vertical starting position of the gear indicator.
Gear:
This dropdown menu allows you to select the specific gear for which you want to configure the display settings.
Font:
Choose the font style for the gear indicator from the dropdown menu.
Colour:
Use the colour picker to select the desired colour for the gear indicator.
Redline colour:
If the “Redline Blink” option is enabled, you can choose a different colour for the gear indicator when the engine reaches the redline RPM.
Redline Blink:
Enable this option to make the gear indicator blink when the engine reaches the redline RPM. You can adjust the blink delay using the slider provided.
To add more gear indicators or create groups of settings, you can use the “+ Add effect” and “+ Add group” buttons at the bottom of the page. Additional effects that work well with an iFlag are flags (obviously) and shift warnings.
Shakeit Wind
This section is where you can set up and adjust wind effects on your wind sim (mine is the SIM3D version) or other Arduino-compatible wind simulation devices.

Shakeit Motors
Here’s the final section of my SimHub setup guide, the pedal rumble kit I have from SIM3D.
Worth flagging how far ShakeIt has come. It now drives more than bass shakers: SimHub can run haptic pedal reactors (Simagic, Fanatec, VNM) and active shifters natively over USB, pulling ABS, traction loss and wheel-slip straight from the telemetry, and multi-channel USB soundcards work without separate routing software. There is also a separate SimHub Motion Addon now, on its own licence, if you ever move to a motion rig.

I won’t repeat myself, although I do recommend you read this guide to setting up the pedal rumble kit in SimHub.
Related Posts

Best Pimax VR Settings for F1 25 in 2026: A Damage-Control Guide
Best Pimax VR Settings for Le Mans Ultimate in 2026

Best Pimax VR Settings for Automobilista 2 in 2026
Best Pimax VR Settings for Assetto Corsa in 2026
Best Pimax VR Settings for Assetto Corsa Evo (v0.6, May 2026)

Sol for Assetto Corsa in 2026: Still Worth Installing, or Switch to Pure?
Topic: Software