I’m a sim racer and amateur racer with a passion for Motorsport, good racecraft and the technical and setup aspect of sim racing.
Featured image: Cube Controls F-Pro with SQR QR Hub
I fit a new wheel to a QR hub on a near weekly basis, that’s not a flex, it’s the job. Reviewing sim racing wheels as a hobby means that I’ve fitted a lot of sim racing wheels, with QR hubs, ready to mount on whatever wheelbase I’m working with at that moment.
Today, I’m going to cover what you need to know to demystify the subject so that you can find a compatible QR hub for your wheel/wheelbase combination.
It’s wise to do some pre-purchase research because there are different fitments depending on your wheelbase. Some, like Fanatec and Asetek, have a proprietary or very unique way of mounting a QR hub to the wheelbase side.
Compatibility, then, is key. How will you mount your “6 x 70mm” PCD QR hub to your Simagic Alpha? And how does the Simucube 2 Pro work?
I’m covering off QR hub compatibility based on my experience with the direct drive wheels featured in my buyer’s guide.
Here’s a list of the steering wheels I’ve worked with, which almost all feature a 70mm PCD fitment, I’ll cover what “PCD” means, too.
Table of Contents
- What does “6 x 70mm” PCD mean?
- How to Mount a QR Hub to a Sim Racing Wheel
- Cross-Brand Compatibility – The Reality Check
- Simucube
- Fanatec: QR1 and QR2
- Asetek
- SIMAGIC
- MOZA
- VRS DirectForce Pro
- Premium Universal Quick Releases
- Thrustmaster T818 DD
- Accuforce
- Electronic Compatibility Solutions
- My Recommendations
- Quick Reference Table
- Final Thoughts
By the time you’ve read this article, you’ll know which adapter fitment (size) will match your sim racing wheel and wheelbase.
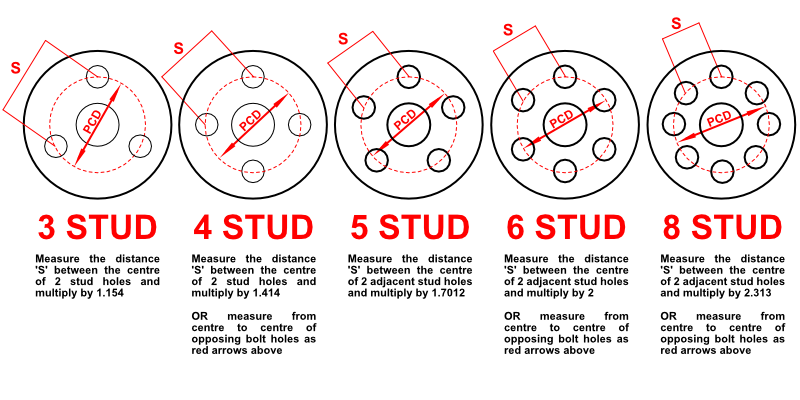
What does “6 x 70mm” PCD mean?
“PCD measurement” is the way a steering wheel fitment is described. There are usually 6 holes pre-drilled into a sim racing wheel (that’s the “6” part).
PCD stands for Pitch Circle Diameter and whilst it’s more technical than that, you really only need to understand that those 6 holes are spaced 70mm apart from one another as measured from the centre of the circle.
Here’s a selection of hub adapter plates sorted by price:
Some sim racing wheels feature a 50.8mm PCD (particularly formula-style wheels). But, most, if not all of the sim racing wheels you’re likely to encounter are the ubiquitous “6 x 70mm”.
The “6 x” part refers to the number of bolt holes arranged around the PCD (70mm or 50.8mm) circle, most of the sim racing hubs use M5 bolts.
Cross-Brand Compatibility – The Reality Check
Here’s the uncomfortable truth: whilst most modern sim racing wheels use standard 70mm PCD patterns, getting them to work across different ecosystems isn’t always straightforward.
The mechanical side is usually fine, you can physically bolt most wheels to most wheelbases with the right adapter.

The electronic side is where it gets messy. Each manufacturer has their own way of handling button inputs, shift lights, and telemetry data. Some use proprietary protocols, others use USB, and some offer both.
This means you might end up with a wheel that mounts perfectly but requires a separate USB cable dangling from your rig, or worse, buttons that simply don’t work.
I’ll cover the electronic compatibility solutions later, but first, let’s talk about the mechanical fitments.
How to Mount a QR Hub to a Sim Racing Wheel
With some careful thought, it’s easy to match one end to the other: match the wheel to the hub, match the hub to the adapter. The adapter fits the wheelbase and you can get going!
I’m going to demonstrate fitting a Simucube SQR hub to the Cube Controls Mercedes-AMG, GT Edition sim racing wheel.
To get started, follow these steps:
1. Decide which Fixtures You’re Going to Use:

Take a look in the box and see what has been supplied. In the image above, Cube Controls supply several types of screws, nuts and washers along with different bits of fitting hardware designed to give you maximum compatibility with a range of manufacturers.
The “bits you need” typically contain M5 T20 Torx bolts. It’s worth spending time on this; your end goal is to tightly fix the hub to the wheel with no twisting or wobbling.
2. Pre-drill any Holes in the Wheel:
Some wheels come pre-drilled, some are unfinished and require you to do a little work yourself. The Cube Controls AMG was pre-drilled on the rear.
3. Locate your Universal Hub Adapter and Identify the PCD:
In this example, I’m using the 70mm PCD, which you’ll note is the larger hole pattern:
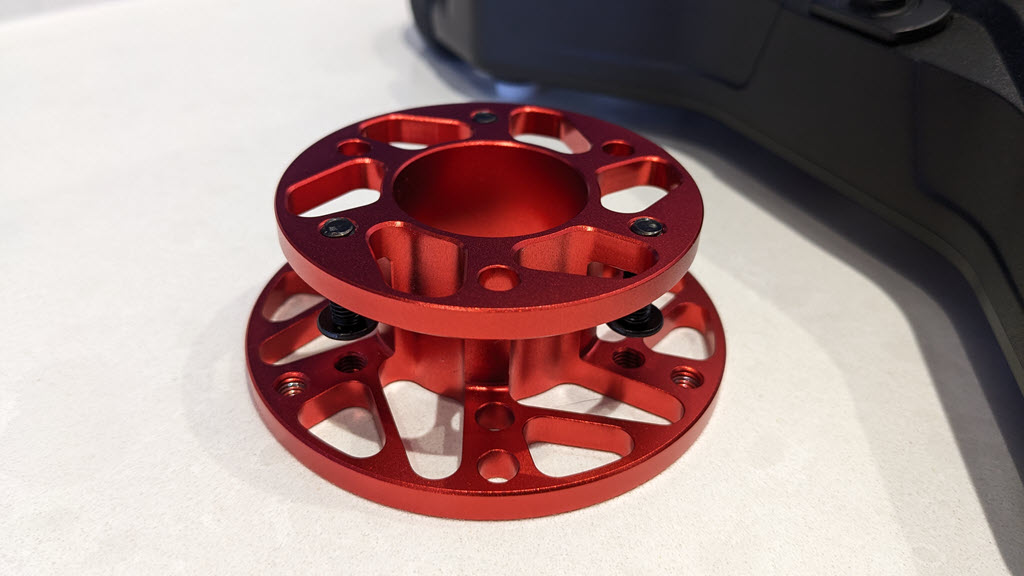
Note how there are 6 holes on the larger circle (70mm PCD) and 6 on the inner circle (50.8mm PCD).
4. Dry Fit and Check Before Final Assembly:
It’s always worth doing a dry fit to check everything lines up properly before you commit to the final assembly. You’ll save yourself frustration if you spot any issues now rather than when everything is half-assembled.
Note how the bolts pass through the wheel and into the hub adapter. The rear of the AMG wheel has mounting pillars on the internal side of the wheel chassis that the bolts thread into:
5. Arrange the Bolts around Your QR Hub Base and Place onto the Wheel:
I’m going to use the Torx bolts supplied and my own Hex (Allen) bolts when fitting the SQR hub.

6. Tighten the Bolts into the Wheel:

Note from the image above that I’ve already threaded the bolts into the wheel side of the hub adapter.
Once you’ve completed the task, tighten the bolts evenly in a star pattern (like you would when fitting a car wheel) to ensure even pressure distribution. This prevents warping and ensures a solid, flex-free connection.

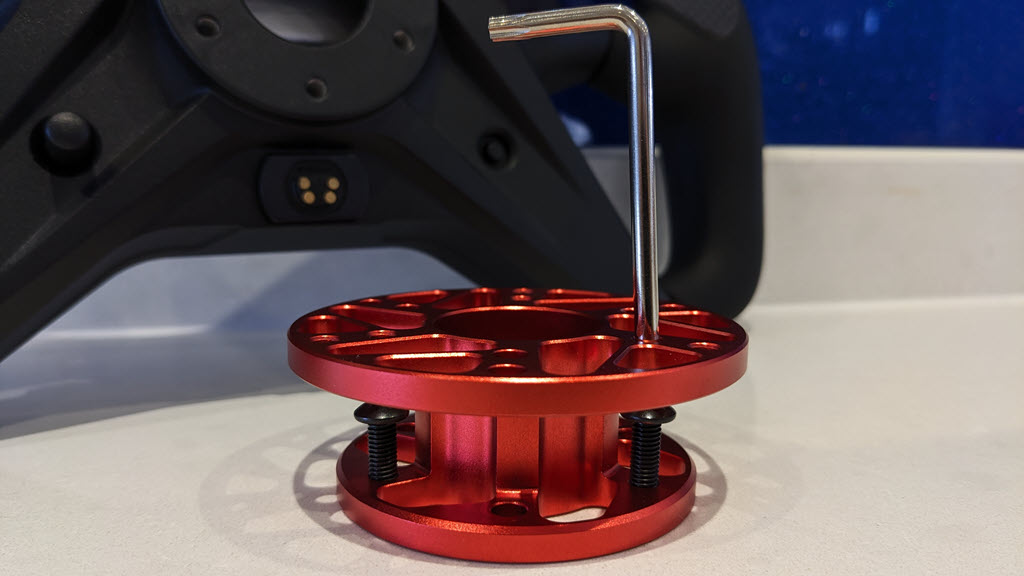
7. Attach the QR Hub to the Universal Adapter:
Now you can attach your chosen QR hub (in this case, the SQR) to the universal adapter you’ve just mounted.
I wish there were a red anodised SQR hub:
Note that my SQR hub is pre-assembled. For instructions on how to assemble the SQR hub itself, scroll down to “SQR Hub installation” on this Simucube 2 review.
Assuming you have the QR hub ready to install, arrange the bolts around your QR hub base and finger-tighten first:
Then use the appropriate tool to tighten them fully, again using a star pattern.
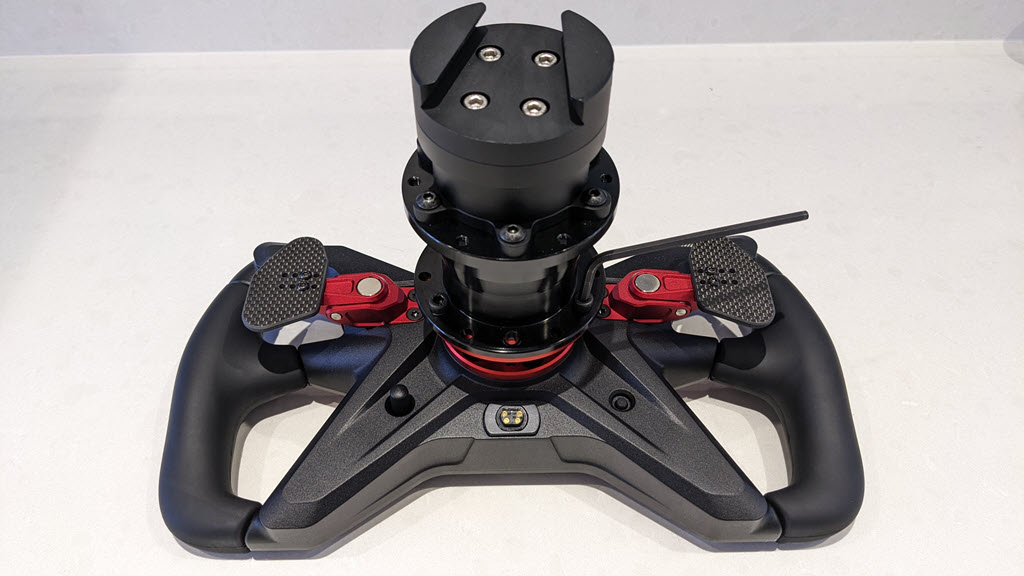
Job done! Now your wheel is ready to mount to the wheelbase.
Simucube
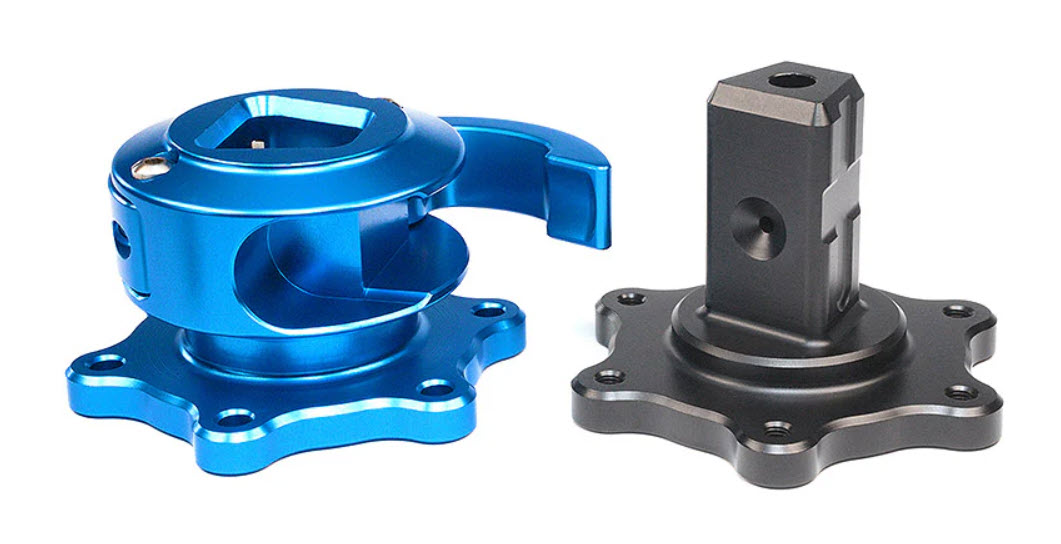
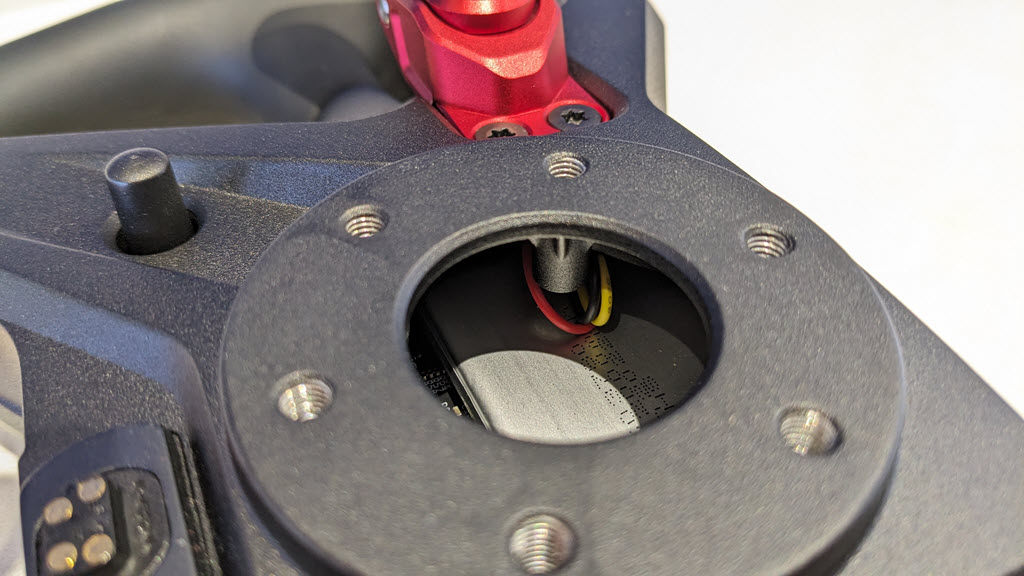
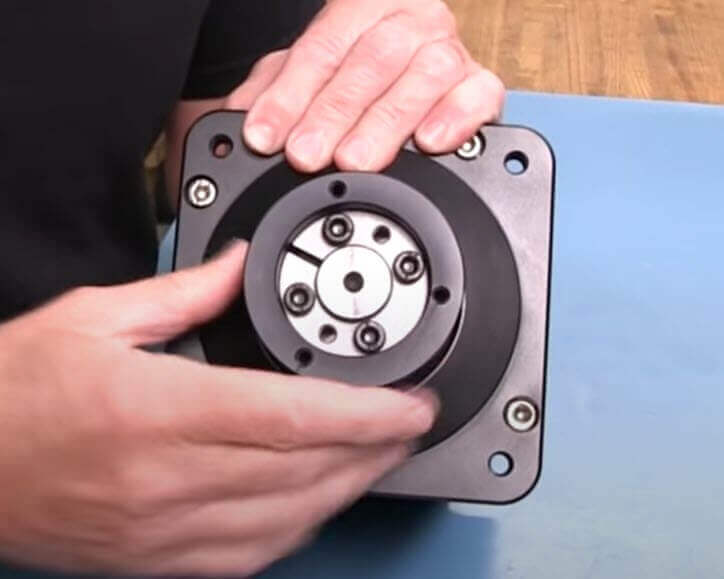
The Simucube wheelbases come with a wheelbase side SQR hub supplied. The SQR hub kit will accommodate any 50.8mm or 70mm PCD wheel (the wheel side mount is tapped with M5 threads). You’ve seen in my “how to install a QR hub” section, a “wheel side” SQR being fitted, here’s the wheelbase side:

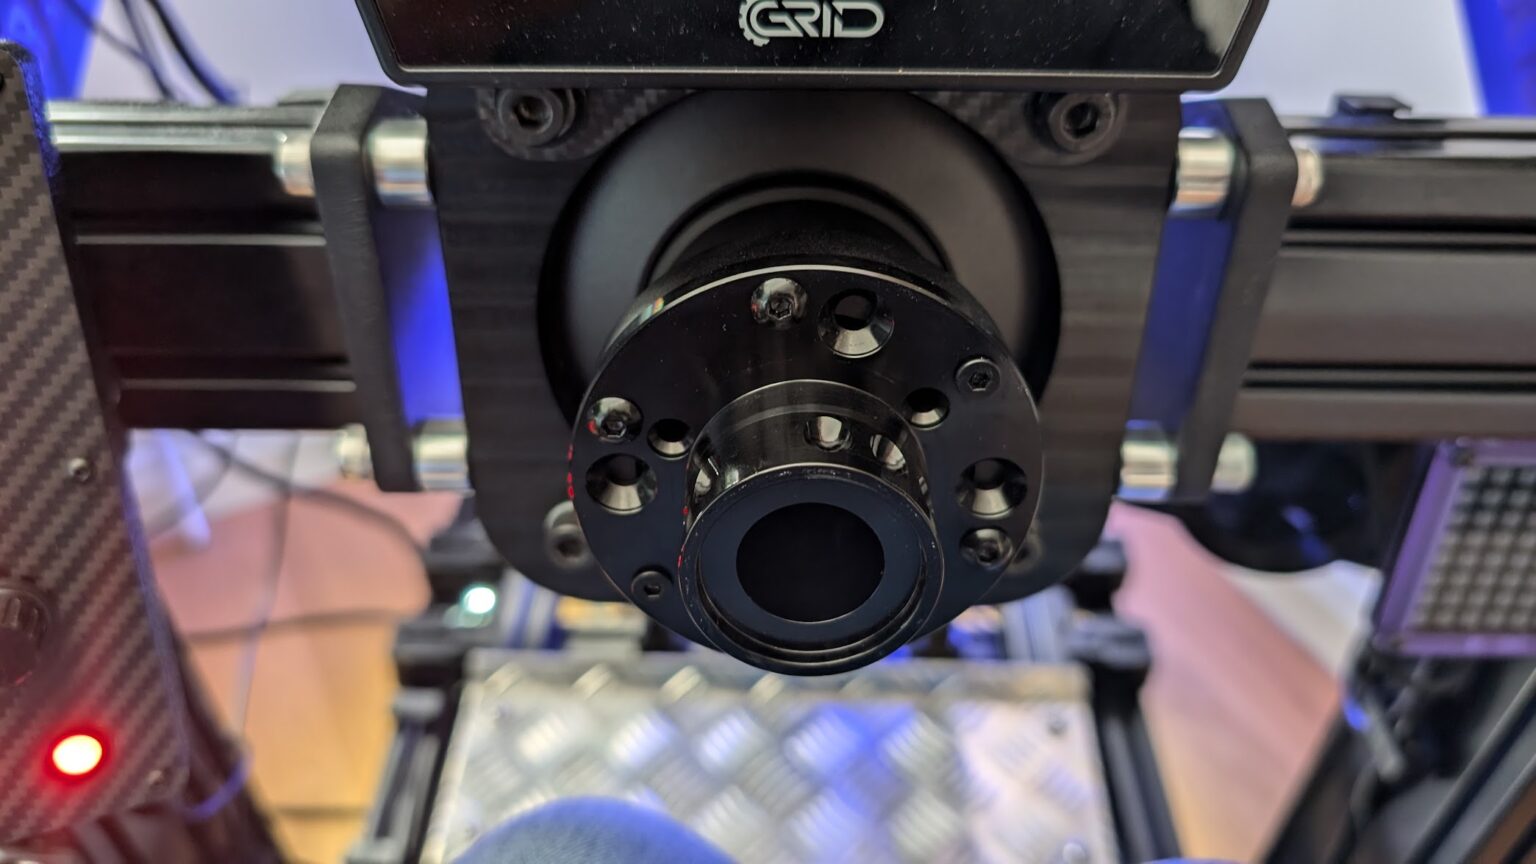
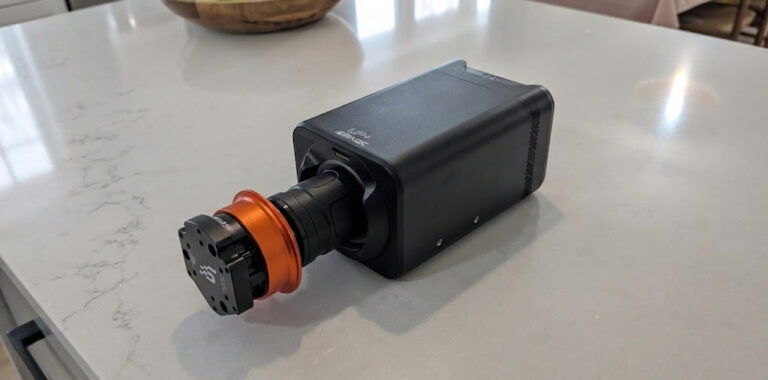
The image below shows my Simucube 2 Pro with the standard plate removed. This reveals the unique 3-hole mount (non-standard, non-PCD) that allows you to fit any other style QR hub or spacer directly onto the Simucube shaft from which you can attach any QR hub or spacer directly to the wheelbase.
Simucube Link System
For Simucube 3 users, the new Link Quick Release represents an evolution in the QR system. It maintains the no-play precision Simucube is known for, whilst adding modern connectivity features.
The Link system is designed to work seamlessly with Simucube’s ecosystem, including their Link Hub, which consolidates all your Simucube gear connections through a single USB port. For Simucube 2 owners, there’s an adapter plate available to retrofit the Link QR to older wheelbases.
Simucube also offers 70mm adapters for both the Simucube 2 and Simucube 3 systems, allowing you to mount third-party quick releases with industry-standard 70mm PCD patterns.
Fanatec: QR1 and QR2
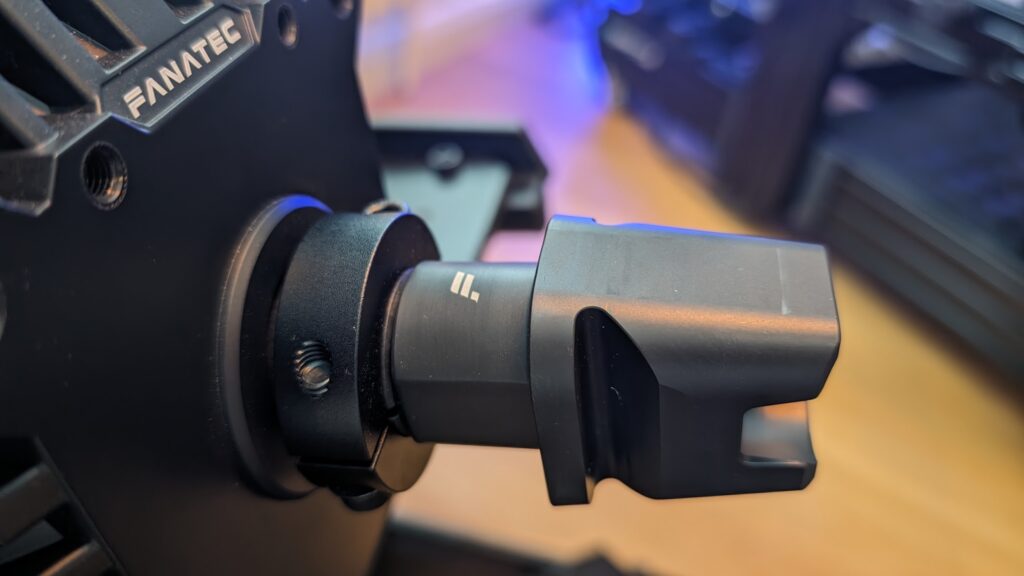
Fanatec very recently updated their somewhat maligned QR1 hub with the revised QR2:

The QR2 has received overwhelming community praise as a “game-changer” that resolves the QR1’s well-documented issues with play and wobble. Users report zero flex and significantly enhanced force feedback detail. The system comes in three variants: QR2 Lite ($60, composite), QR2 Standard ($100, die-cast aluminium), and QR2 Pro ($200, CNC-machined billet aluminium with FIA certification for real-world motorsport use).
Fanatec is a closed “ecosystem”, meaning that only a Fanatec wheel is intended for a Fanatec DD wheelbase (like my CSL DD). You can mess around making non-Fanatec wheels compatible with the Fanatec Podium QR hub, but in my experience most sim racers tend to stick to the Fanatec ecosystem.
The older QR1 system (above) is being phased out, and for good reason, what I’ve read on r/simracing suggests widespread frustration with clunking, wobble, and play that affects force feedback quality.
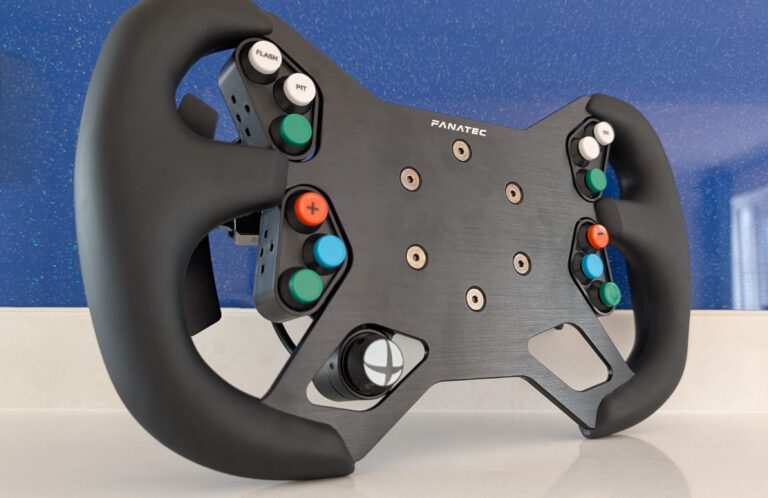
Fanatec Podium Hub
The Podium Hub is Fanatec’s solution for mounting non-Fanatec wheels to their ecosystem. It’s essentially a universal hub adapter with integrated electronics that converts third-party wheels into Fanatec-compatible devices.

The clever part about the Podium Hub is that it completely bypasses Fanatec’s proprietary communication protocol. Once converted, your wheel is just another USB device as far as your PC is concerned.

Asetek
If you own an Asetek wheelbase, you’ll have their standard QR hub mount attached to the wheelbase side. You probably own a Forte, La Prima or Formula Steering wheel, too, which is supplied with the compatible QR hub attached. If, however, you want to add a new wheel, it might be wise to check out the options.
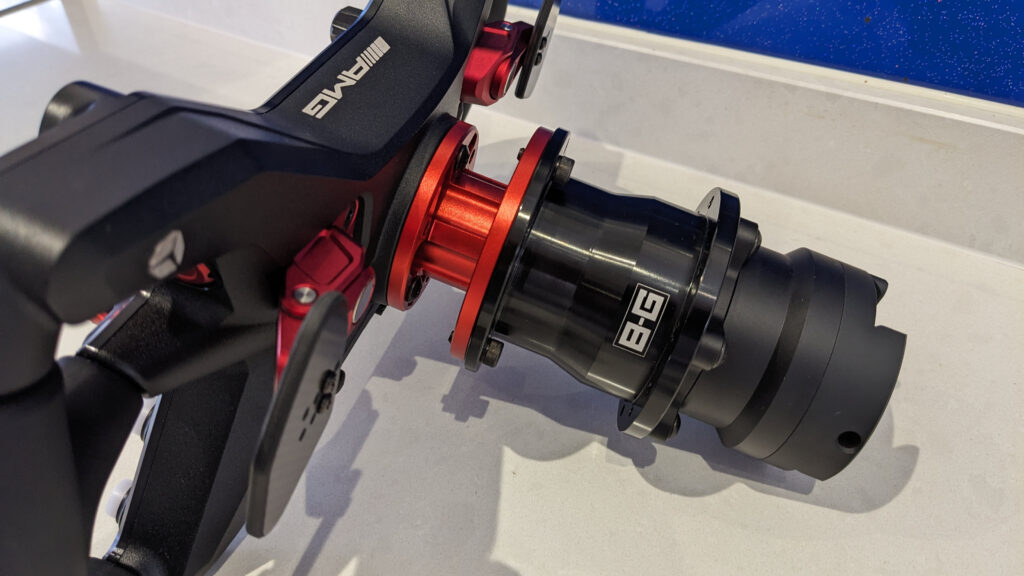
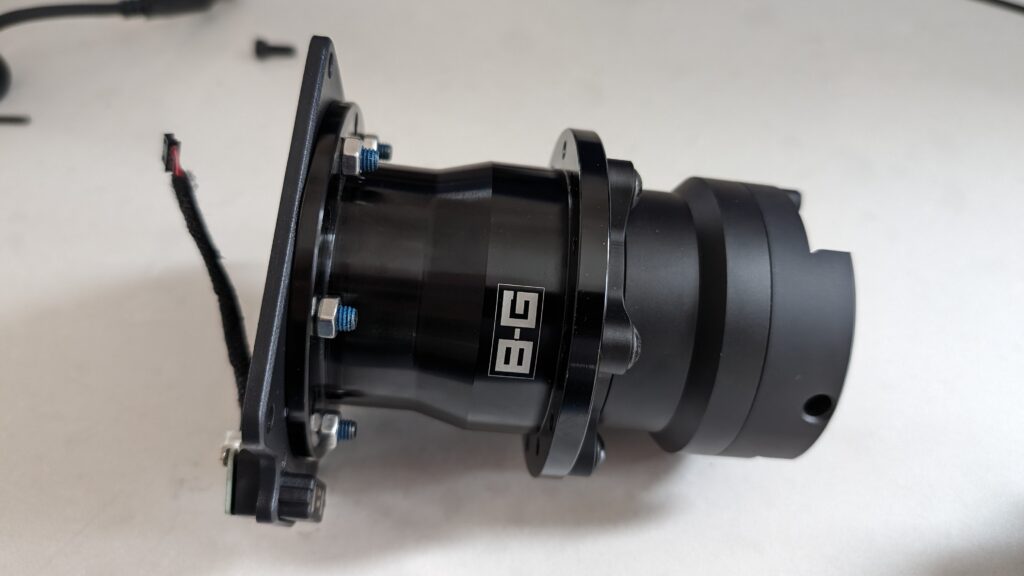
I have this Asetek QR for the Artura Series hub, for my Artura wheel:
Note how it has a USB connection inside the hub, so that the wheel can piggyback the USB connection through the wheelbase, alleviating the need for a cable.
Cube Controls also make an aftermarket hub for the Asetek series of wheelbases. Check out this Cube Controls Asetek Invicta Quick Release Adapter:
The key thing to know about these Asetek-compatible hubs is that the wheel side PCD fitment is 70mm PCD. Thus, the wheel compatibility is universal.
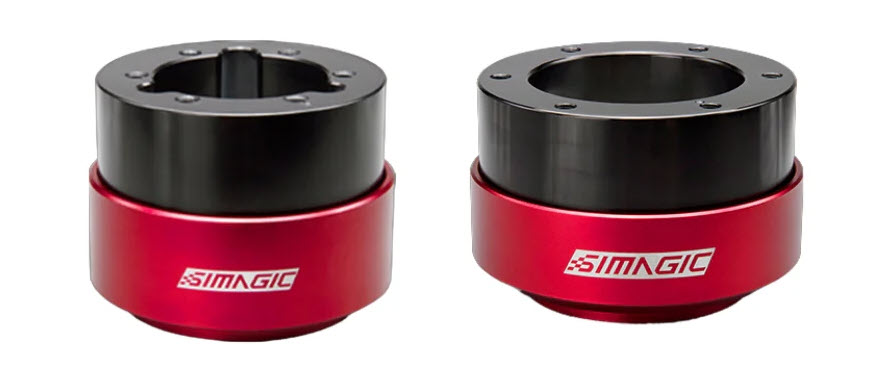
SIMAGIC
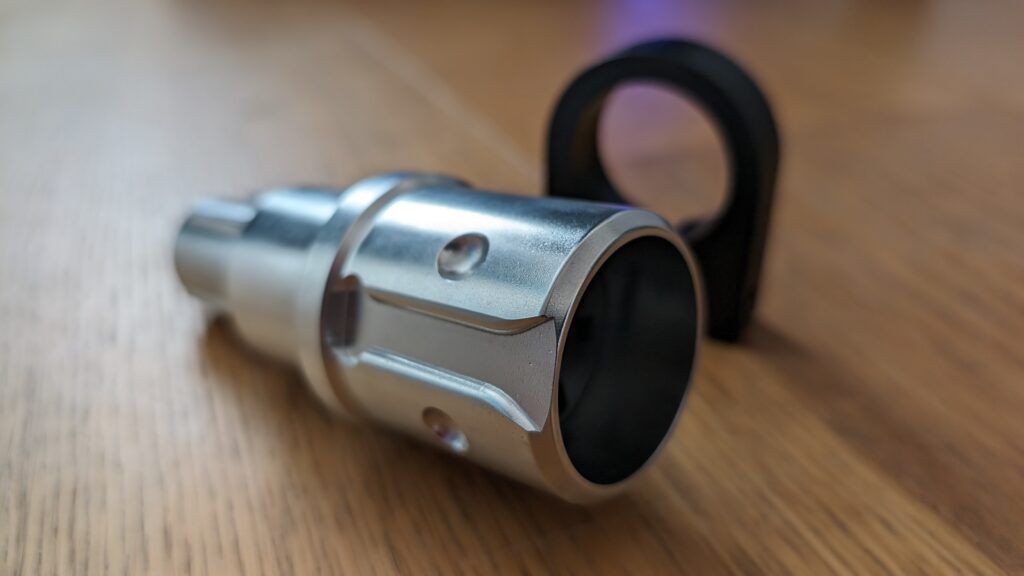
Having recently reviewed the GT NEO, I can show you the standard hub that comes fitted with all SIMAGIC wheels, the QR50:
The SIMAGIC QR hubs are a ball-bearing type hub adapter; they click into place when you pull back the lip. It’s a very secure fit and mates perfectly with the wheelbase side QR system.
The Simagic QR system is highly regarded in the community for its rock-solid performance and stability. The QR-A adapter features forged aluminium alloy with CNC precision machining and anodised surface treatment, making it compatible with standard 50mm and 70mm PCD patterns.
Depending on the wheel fitment you’re using, SIMAGIC makes an adapter in either 50.8mm PCD (QR50) or 70mm PCD (QR70):
SIMAGIC GT Pro Hub
The GT Pro Hub is SIMAGIC’s all-in-one solution, it’s essentially a complete steering wheel with QR hub included:
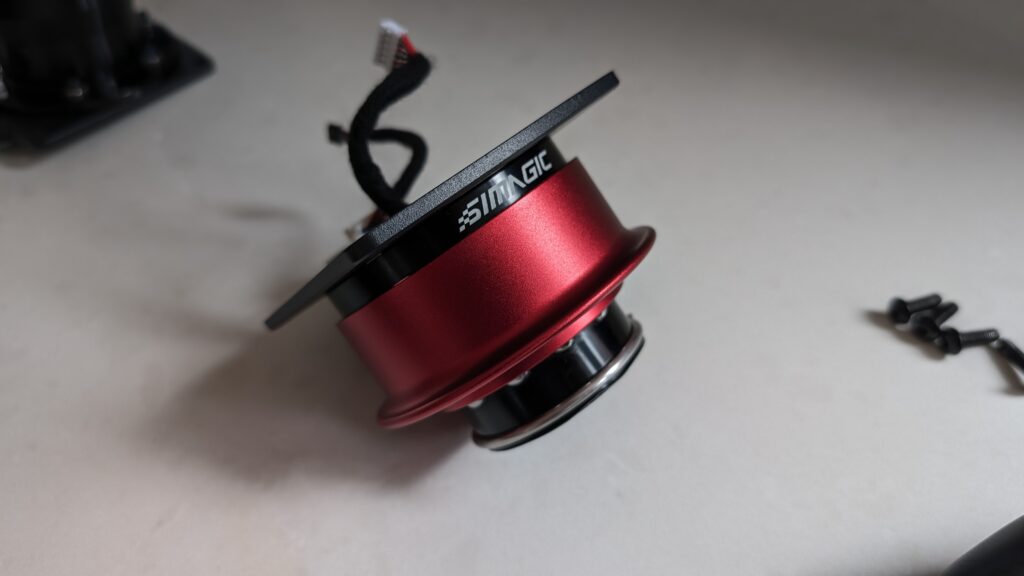
Mounting a SIMAGIC Wheel to a Simucube Wheelbase
If you want to use a SIMAGIC wheel on a Simucube wheelbase (or vice versa), you’ll need the SIMAGIC MAGLINK adapter. This clever piece of kit allows you to mount SIMAGIC’s ball-bearing QR system to Simucube’s three-bolt pattern.
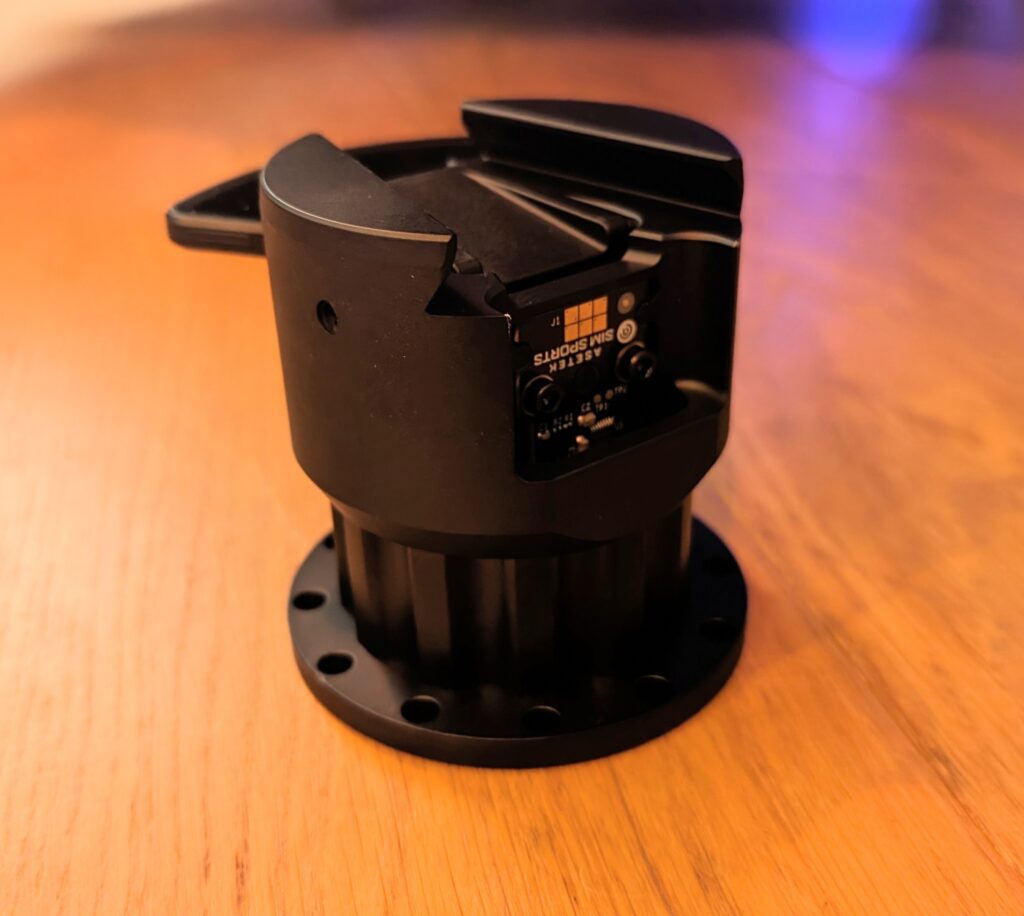
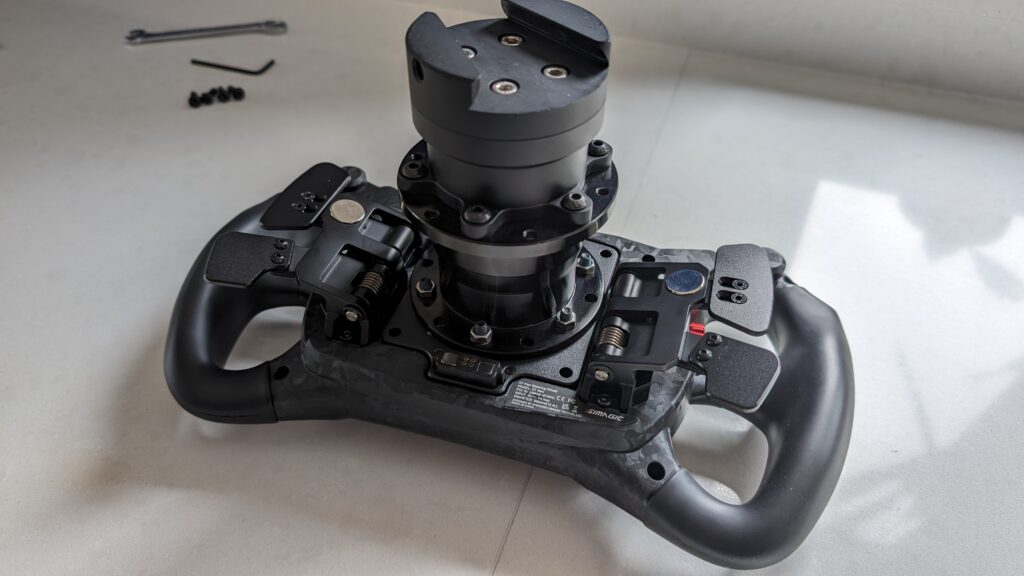
I’ve used this exact setup, you can read more about it in my SIMAGIC GT NEO review. Here’s what the MAGLINK looks like with an SQR hub mounted:
The QR hub adapter plate mounts snugly on the back of a SIMAGIC wheel:
MOZA
Moza wheels and wheelbases tend to be part of an ecosystem, which means it’s pretty unlikely that you’ll need a QR hub. If, however, you have a non-Moza wheel that you’d like to mount to your wheelbase, try this:

Constructed from aviation-grade aluminium alloy, the Moza QR is priced competitively at around $49, offering excellent stability and strength for its ecosystem.
This NRG style adapter is compatible with the R5/R9/R16/R21 wheelbases, featuring a standard 70mm PCD wheel side fitment.
Mounting a Moza Wheel to a Simucube Wheelbase
If you want to use a Moza wheel on a Simucube wheelbase, you’ll need a 70mm PCD adapter plate that can bridge between the two systems:
VRS DirectForce Pro
The VRS DirectForce Pro uses a standard 70mm PCD mounting pattern on the wheelbase side, making it one of the most universally compatible direct drive bases on the market.
This means you can directly mount:
- Simucube SQR hubs
- Ascher Racing Buchfink Q1R
- NRG-style quick releases (most common)
- D1 Spec quick releases
- Any 70mm PCD adapter plate
- Custom 3D-printed solutions from the community
Premium Universal Quick Releases
Beyond the ecosystem-specific options, there are several premium universal QR solutions that offer exceptional build quality and compatibility across multiple wheelbase brands. These are the adapters serious sim racers turn to when they want zero play, rock-solid connections, and the flexibility to swap between different ecosystems.
Ascher Racing Buchfink Q1R
If you’re after a no-compromise universal QR that’s earned its reputation through years of flawless performance, the Ascher Racing Buchfink Q1R is widely regarded as one of the best quick release adapters available. What I’ve read on sim racing forums consistently praises its reliable, play-free connection, even after years of daily wheel swaps.
The Buchfink Q1R features CNC-machined aluminium construction for the main body, whilst critical clamping components are crafted from 4mm layers of stainless steel, ensuring a “no play by definition” connection. This robust design means it can handle the significant forces generated by high-end direct drive wheelbases, with users reporting that the QR itself remains steadfast, with any observed flex originating from the wheel rim itself.
The system is split into separate base-side and wheel-side units. The base side is compatible with a range of high-end direct drive wheelbases, including the Simucube 2 Sport, Pro, and Ultimate, VRS DirectForce Pro, and AccuForce V2. The wheel-side units support both 50mm and 70mm PCD (Pitch Circle Diameter) patterns, utilising a 6 x 70mm bolt pattern for M5 bolts on the larger variant. This broad compatibility means you can purchase one base unit and multiple wheel-side adapters for your collection of steering wheels, including custom builds with button boxes and paddles, and it’s also perfectly suited for Ascher Racing’s own wheel offerings. The entire quick-release system adds approximately 50mm to the length of your steering column.
The wheel-side unit weighs in at approximately 270g. At around $138 for the base side and $129 for each wheel-side unit, it’s positioned as a premium solution, but one that delivers exceptional rigidity and quick, easy wheel changes without the wobble that plagues cheaper alternatives.
VNM Simulation Quick Release
VNM Simulation offers a cost-effective universal QR solution that doesn’t sacrifice build quality. Their system is constructed from high-grade aluminium, ensuring a robust and dependable connection. Designed with a “zero-play” mechanism, it provides enhanced rigidity and a solid feel, crucial for accurate force feedback transmission.
The wheel-side unit employs a standard 6x70mm PCD bolt pattern, making it broadly compatible with most aftermarket steering wheels on the market. The base-side adapter is designed to fit a 70mm PCD wheelbase, including popular options such as Simucube 2, VRS DirectForce Pro, and AccuForce V2. The VNM Quick Release is a relatively lightweight component, with the wheel-side weighing approximately 280g and the base-side around 340g.
At around $55 for the wheel side and $110 for the base side, VNM positions itself as an excellent value proposition. You’re getting robust, simplistic construction with a tool-free quick release mechanism. Users consistently report that VNM products are solidly built with impressive finish quality, though perhaps not as “refined” as some higher-end options. But for a reliable, absolutely secure connection at this price point, it’s hard to fault.
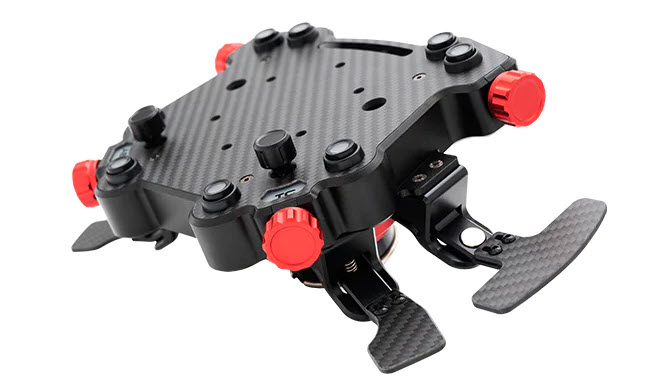
Cube Controls QRX Quick Release
The Cube Controls QRX represents the premium end of universal quick releases, engineered for serious sim racers who demand zero play and motorsport-grade materials.
CNC-machined from 7075 aircraft-grade ergal aluminium, the QRX full set delivers a magnetic, self-centering connection that’s both rapid and rock-solid. The system features spring-loaded steel locking rods and an adjustable wedge system that completely eliminates play, providing a rattle-free connection lap after lap. This design ensures exceptional rigidity and feel, capable of handling the high torque output of direct drive wheelbases without introducing any flex or unwanted movement.
What truly sets the QRX apart is its integrated USB electrical connector with gold-plated spring contacts, maintaining a stable data connection for wheel controls without the need for external cables, thus decluttering your rig. The QRX is highly versatile, compatible with all Cube Controls wheels and any 50.8mm or 70mm PCD mounting systems, ensuring broad usability across various setups. The total weight of the QRX Quick Release, including both the base and wheel side, is approximately 530g, with the wheel-side weighing around 280g and the base-side at 250g.
At $250 for the full set, it’s priced at the premium end, but you’re getting FIA-grade aluminium construction, magnetic self-centering precision, and integrated electronics that remove cable clutter from your rig.
The QRX also requires a specific base-side adapter for various wheelbases. Cube Controls offer dedicated adapters for Simucube and other popular systems to ensure optimal fitment.
Thrustmaster T818 DD
Thrustmaster’s entry into the direct drive market brings their own QR system, but thankfully they’ve embraced some level of standardisation. The T818 uses a proprietary QR system on the wheelbase side, but the wheel side accepts standard 70mm PCD patterns.
This means you can:
- Use any Thrustmaster wheel designed for the T818
- Mount third-party wheels using the Thrustmaster QR adapter
- Create custom solutions with 70mm PCD compatibility
The catch? Electronic compatibility is limited to Thrustmaster’s ecosystem unless you go full USB conversion.
Accuforce
The Accuforce system from SimXperience is one of the older direct drive platforms still in use. Like VRS, it uses a standard 70mm PCD mounting pattern, making it compatible with most universal QR systems.
The AccuForce V2 wheelbase can accommodate:
- Simucube SQR hubs
- Ascher Racing solutions
- NRG-style adapters
- Any 70mm PCD quick release
Based on my experience testing dozens of wheel/wheelbase combinations, here’s what I’d recommend:
If you’re staying within an ecosystem: Use the manufacturer’s QR system. It’s the path of least resistance and usually provides the cleanest integration.
If you’re mixing brands: The Simucube SQR is the most versatile option I’ve used. It’s reliable, well-built, and broadly compatible. For premium builds, the Ascher Racing Buchfink Q1R offers exceptional quality and zero play.
If you’re on a budget: The VNM Quick Release provides excellent value. Alternatively, stick with one ecosystem to avoid compatibility headaches.
If you’re building a high-end rig: Consider the Cube Controls QRX for its integrated USB and premium construction, or the Ascher Racing Q1R for its proven track record and play-free design.
Quick Reference Table
| Wheelbase | Standard QR | 70mm PCD Compatible | Notes |
|---|---|---|---|
| Simucube 2/3 | SQR | Yes (direct mount) | Most versatile |
| Fanatec CSL/DD | QR1/QR2 | Via Podium Hub | Closed ecosystem |
| Asetek | Proprietary | Yes (70mm wheel side) | USB pass-through |
| SIMAGIC | QR50/QR70 | Via MAGLINK | Ball-bearing system |
| Moza | NRG-style | Yes | Aviation-grade aluminium |
| VRS DFP | None | Yes (direct 70mm) | Most compatible |
| Thrustmaster T818 | Proprietary | Yes (wheel side) | Electronic limitations |
| AccuForce V2 | None | Yes (direct 70mm) | Open platform |
Final Thoughts
QR hub compatibility doesn’t have to be a mystery. Once you understand the PCD measurements, ecosystem limitations, and electronic requirements, it all starts to make sense.
The key is planning ahead: know what wheelbase you’re working with, understand its mounting system, and have a solution for electronics before you order that shiny new wheel.
What I’ve read on sim racing forums suggests most frustration comes from impulse purchases without checking compatibility first. Take the time to research, ask questions in the community, and you’ll save yourself both time and money.
Remember: the best QR system is the one that works reliably with your setup. Sometimes that’s the expensive premium solution, sometimes it’s the manufacturer’s standard option. There’s no universal “best”, just what works best for your specific combination of wheels and wheelbases.
Related Articles

Racing Cockpits Buyer’s Guide

Best VR Headsets for Flight Simulation
Fanatec ClubSport Steering Wheel GT3 for Xbox Review
Simagic Sim Racing: The Complete Buyer’s Guide (2026)
Corsair for Sim Racers: Ecosystem Buyers Guide 2026