

I’m a sim racer and amateur racer with a passion for Motorsport, good racecraft and the technical and setup aspect of sim racing.
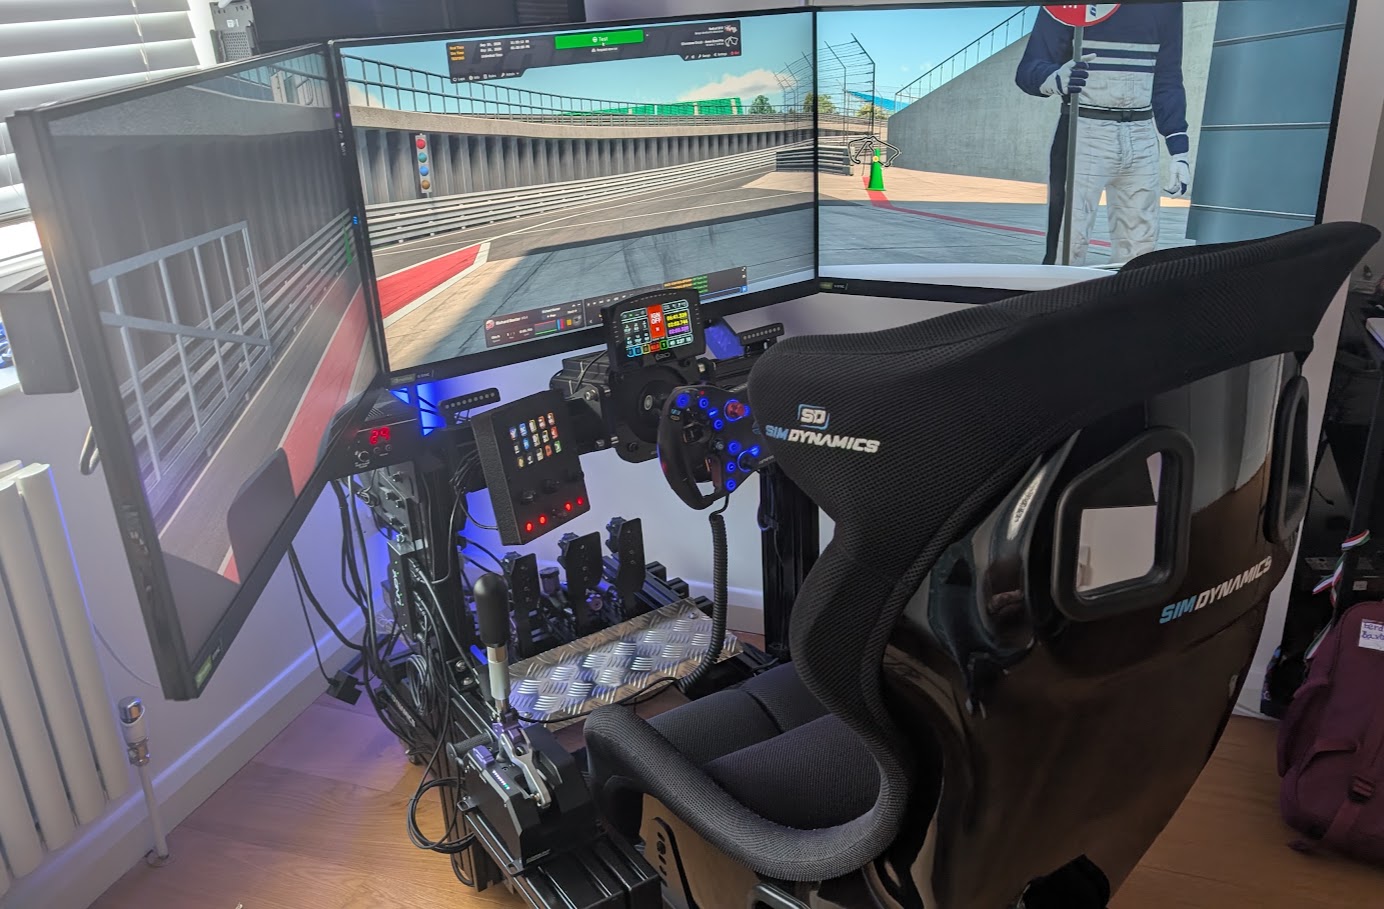
The Samsung G9 ultrawide is now my main workstation monitor, and I have three LG 32GP850-B panels set up on the rig instead. I have experience with both, with a triple configuration being the more immersive but fiddlier option. I run my own triples in Le Mans Ultimate (LMU) in windowed mode, set up through the Config_DX11.ini file, and I’ll walk you through it. The settings live in three places: the config file, a Multiview switch in the graphics menu and a triple screen tool you open with a key combination. Miss the Multiview switch and your side screens come out stretched. Work through the steps below and you’ll have all three screens drawn at the correct angle and your seat in the right place.
Quick Navigation
Jump directly to what you’re looking for:
What you need |
The five numbers |
Editing the config file |
Multiview |
The triple screen tool |
Seat position |
Final thoughts
What you need before you start
You’ll need:
- Three monitors, ideally identical (same model, resolution and refresh rate)
- All three plugged into the graphics card, not the motherboard’s display outputs
- Le Mans Ultimate installed on Steam and launched at least once
- A tape measure and an angle gauge (a digital one, or a set square with a protractor)
- A keyboard, for the shortcut that opens the triple screen tool
The last patch note to mention the triple setup is the keybind reset in June 2026 (V1.3.3), and there’s been nothing on it in the notes since, up to LMU V1.4.2.3 on 30 September 2026. There’s no triple screen article on Studio 397’s own support site, which is why the steps below come from the patch notes, the LMU forum and the setup tutorials on YouTube, the newest of them from August 2026.
Measure the five numbers LMU asks for
Start with the tape measure, as LMU describes a triple setup with five numbers (the screen width, screen height, eye distance, side angle and bezel gap). Everything goes in as metres apart from the angle, so 727 mm is entered as 0.727. Width and height are for one screen. Take the LG 32GP850-B panels on my rig as an example. LG lists a pixel pitch of 0.2724 mm, and multiplying that by the 2560 x 1440 resolution gives a picture 0.697 m wide by 0.392 m tall.
Eye distance is measured from your eyes to the centre screen. For the side angle, line the angle gauge up on the screens from above and be as accurate as you can. If your two sides don’t sit at the same angle, that’s fine, because each side can be set separately later on. The last number is the bezel (the casing around the edges of the screen), and you measure it from its outer edge to where the picture starts. On the 32-inch panels in the setup tutorials it came out at 6 mm and 7 mm. With a bezel-free kit it’s 0, and you can fine-tune it later, live in the tool, in steps as small as 0.1 mm.
What the sources don’t agree on is whether width and height mean the picture or the whole monitor. Ramon Pellegrim entered 0.714 x 0.428 on a 32-inch LG, which is within a millimetre of LG’s 714 x 429 mm outer size for the 32GP850-B. Trauma Team Racing tape-measures the total width, so both of them use the whole monitor. Dan Suzuki’s FOV (field of view) calculator uses the picture, calculating its size from the screen’s diagonal. Mister Seby Racing’s 0.610 x 0.340 is a 16:9 shape, which points to the picture area too. Try the picture area first, because the tool links width and height to your resolution’s aspect ratio, which a 16:9 picture matches and a casing doesn’t. The bezel also has its own gap value, so putting in the casing size as well counts the frame twice. To check your numbers, sit in the pits and make sure the pit wall runs straight across the seams. If it bends or steps at a bezel, adjust the width or the gap in the tool until the line is straight.
The five numbers LMU’s triple screen tool asks for, seen from above
If the screens aren’t mounted yet, or you want to check your angle against your seating distance, our FOV calculator works it out for you. Put in your screen size, aspect ratio, bezel and distance, and it gives you the triple screen angle. Once the angle and the distance are set on the rig, stick to them.
Visit Our Sponsors
Jot your five numbers down as you go and keep them handy.
| Field | Unit | How to get it | Example: LG 32GP850-B |
|---|---|---|---|
| Screen width | metres | Picture width of one screen (try first) | 0.697 (picture area, from LG’s pixel pitch) |
| Screen height | metres | Picture height of one screen (try first) | 0.392 (picture area, from LG’s pixel pitch) |
| Eye distance | metres | Your eyes to the centre screen | Measure yours (600 mm = 0.600) |
| Side angle | degrees | Angle gauge on each side screen | Measure yours (the tutorials used 55 and 60) |
| Bezel gap | metres | Edge of the casing to the start of the picture | Measure yours |
Edit Config_DX11.ini for windowed mode
LMU runs in one window spread across all three screens, at a custom resolution you set in Config_DX11.ini (LMU’s graphics settings file). The game’s Window Mode has to be Windowed with Borderless off, because borderless squashes the picture.
Make sure LMU is closed before you go looking for the file. In Steam, right-click Le Mans Ultimate > Manage > Browse local files, then open the UserData folder and you’ll find Config_DX11.ini (the default path is Steam > steamapps > common > Le Mans Ultimate > UserData). Open it in Notepad. The file is only created the first time the game runs, so if it isn’t there, launch LMU, close it and look again.
Set WindowedMode=1 and Borderless=0. CustomVidRes is three times one screen’s width by its height, so (7680, 1440) for three 1440p screens or (5760, 1080) for three 1080p screens. You can also pre-fill ViewParams with your five numbers in order, then copy the same values onto LeftView and RightView, which means the tool opens with your numbers already in it. For three 1440p screens, it looks like this:
// Config_DX11.ini - three 2560 x 1440 screens, windowed mode across all three
WindowedMode=1
Borderless=0
CustomVidRes=(7680, 1440)
// width (m), height (m), eye distance (m), side angle (deg), bezel gap (m)
ViewParams=(0.697, 0.392, 0.600, 55.000, 0.006)
LeftView=(0.697, 0.392, 0.600, 55.000, 0.006)
RightView=(0.697, 0.392, 0.600, 55.000, 0.006)
The width and height are the LG 32GP850-B’s, and the last three numbers on each line are only an example, so put your own eye distance, angle and bezel gap in. Save the file, then launch LMU. Studio 397 fixed a crash with CustomVidRes and Borderless=1 in February 2025, but borderless still squashes the picture across three screens, so leave it at 0.
If LMU’s display settings ever get tangled, Mister Seby Racing’s tip is to delete Config_DX11.ini altogether. LMU builds a fresh one the next time it starts, so you’ll need to set the lines above again.
Turn on Multiview in the graphics settings
Once the file is saved, open Settings > Graphics. Set Window Mode to Windowed and pick your custom resolution (if it isn’t listed, restart the game). Then turn Multiview on. The game’s tooltip says it needs a resolution at least 3.7 times wider than it is high, and three 16:9 screens give 5.33:1 (7680 x 1440 on 1440p panels).
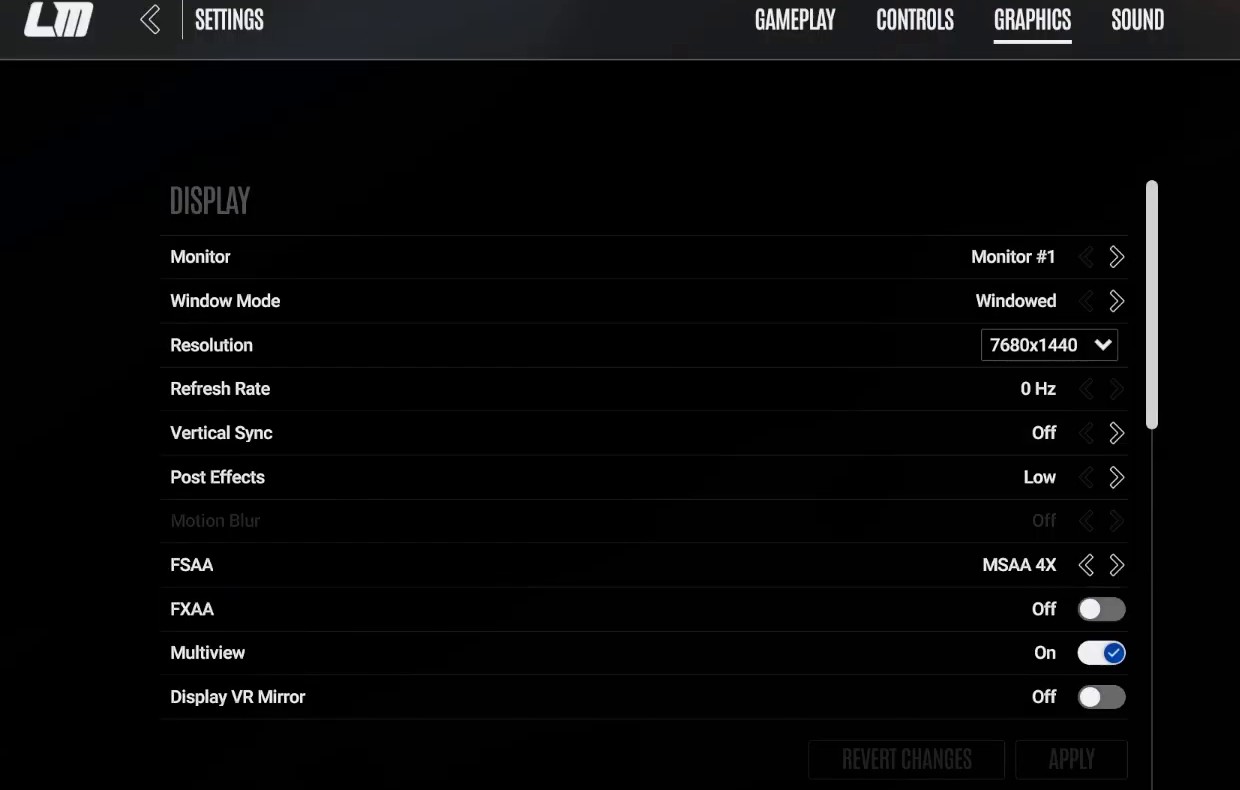
Multiview is the switch that puts LMU into triple screen mode. With it on, hit Apply, and when the game asks you to confirm, keep the changes. If your side screens ever look stretched, come back to this menu and check that Multiview is on.
Older threads about this menu describe bugs that have since been fixed. Multiview not working on custom resolutions was sorted in September 2024, and the February 2025 update fixed CustomVidRes and Multiview not saving between launches. Most recently, V1.3.2.0 (April 2026) stopped a changed refresh rate on triples being forced to 0 Hz.
Enter your numbers in the triple screen tool
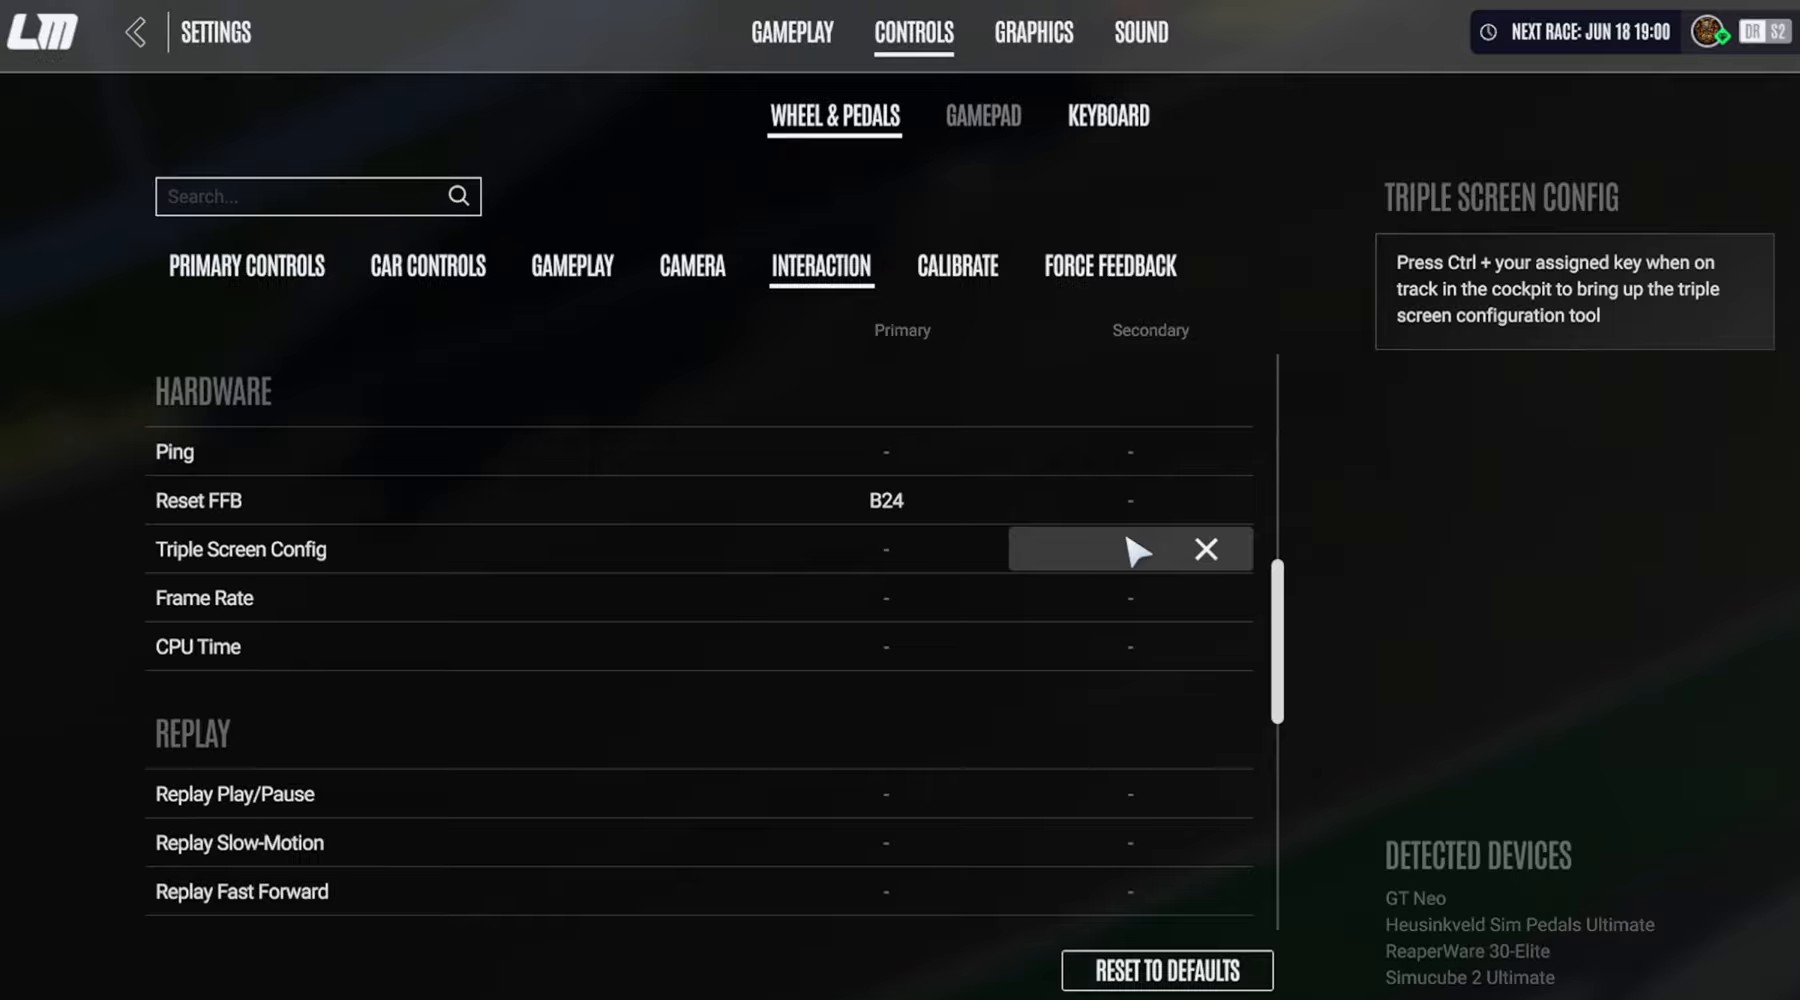
Load a practice session and park somewhere quiet. The triple screen tool opens with Ctrl plus the key assigned to Triple Screen Config. You’ll find that control in Settings > Controls, on the Interaction tab under Hardware. The screenshot below shows it on the Wheel & Pedals sub-tab, and Mister Seby Racing bound his on the Keyboard sub-tab. Ramon Pellegrim opens the tool with Ctrl and = in his August 2026 tutorial, and an LMU forum moderator called that combination the default in January 2025. If = is awkward, assign another key. Older guides say Ctrl + Shift + =, which was the combination when Studio 397 added the tool in February 2024 (the patch notes call it the Triple Screen multiview tool). The June 2026 update (V1.3.3) reset the bind to the game default, so a key you changed before then needs setting again.
The tool has three buttons along the top, labelled Left, Main and Right, one for each screen. The w (width) and h (height) fields go in metres and are linked to your resolution’s aspect ratio unless you unlink them. Alongside them, eye is your eye distance in metres, gap is your bezel width in metres and ang is the side angle in degrees. Each field has its own minus and plus buttons. Put your numbers in on Main first, then Left and Right, which take the same numbers unless your two sides sit at different angles. Anything already in Config_DX11.ini is filled in for you, and every change shows on the screens straight away.
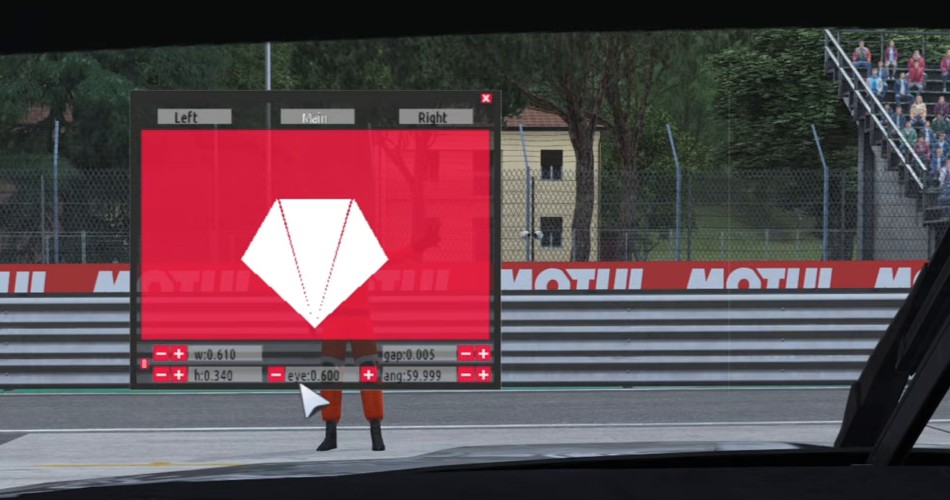
If the HUD looks stretched or out of line on your triples, update the game, as V1.3 fixed that in March 2026. For a quick sense check, the right-hand mirror should sit roughly in the middle of the right screen, and once it does, close the tool with the X.
Set your seat position
Last of all, head to Settings > Controls to bind the seat forward and back, and up and down. Keyboard keys or wheel buttons both work. Before V1.3 these binds were on the Camera tab, and the V1.3 menus kept a Camera tab, so that’s where to start looking.
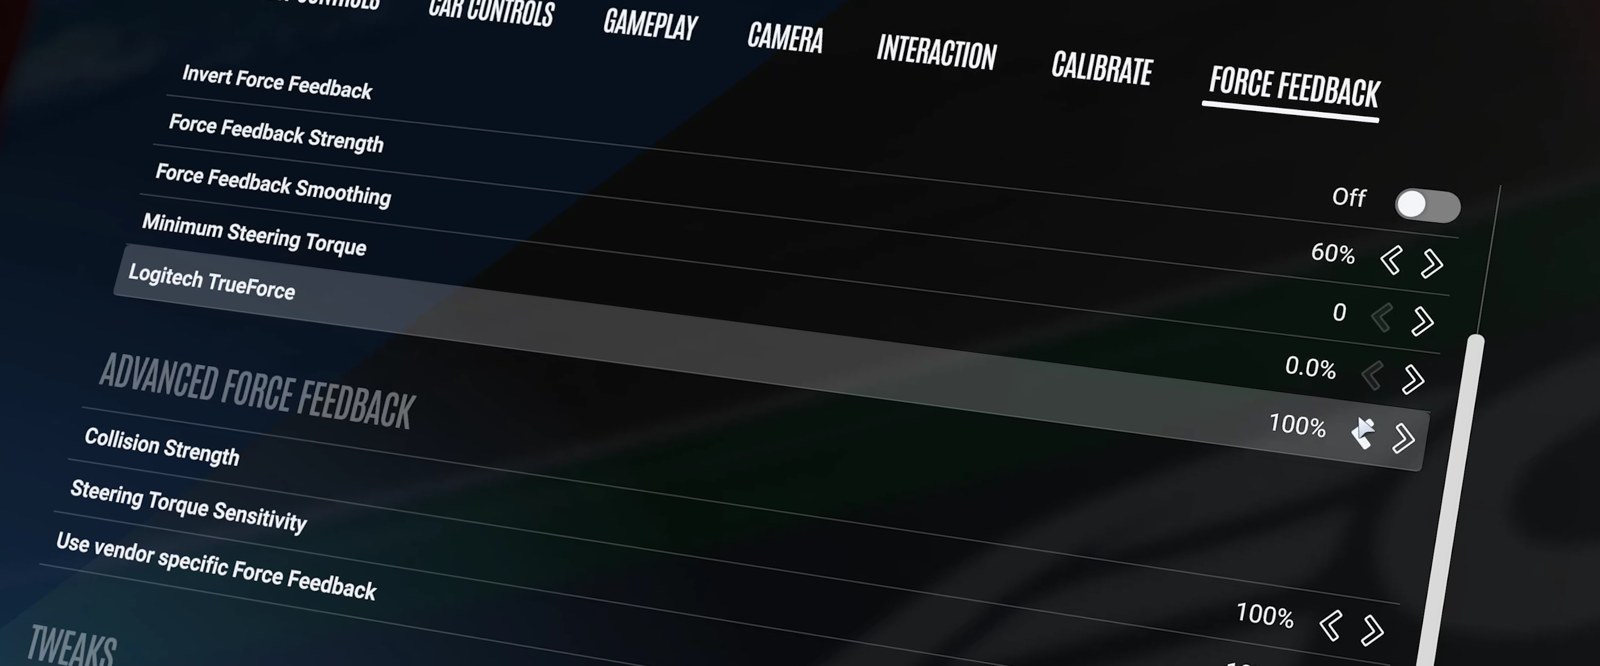
Moving the seat doesn’t change the field of view the triple screen tool calculated. It only changes where you’re sat in the game, much like adjusting the seat in a real car. Pick a reference point on the dashboard, then move the seat until the virtual wheel lines up with your real one.
Final thoughts
The wheel is next, and our LMU wheel settings page covers the force feedback. The LMU stuttering and FPS fix page is where to look if the game starts to stutter. If you’re still choosing panels, our 1080p vs 1440p for triples page and the monitors guide will help, and the monitor stands guide covers getting the angle right physically.
Whenever anything on the rig moves, measure again and put the new numbers into the tool. Alignment is the never-ending commitment you make to triples! Good luck and let me know how you get on in the comments!
Related Articles
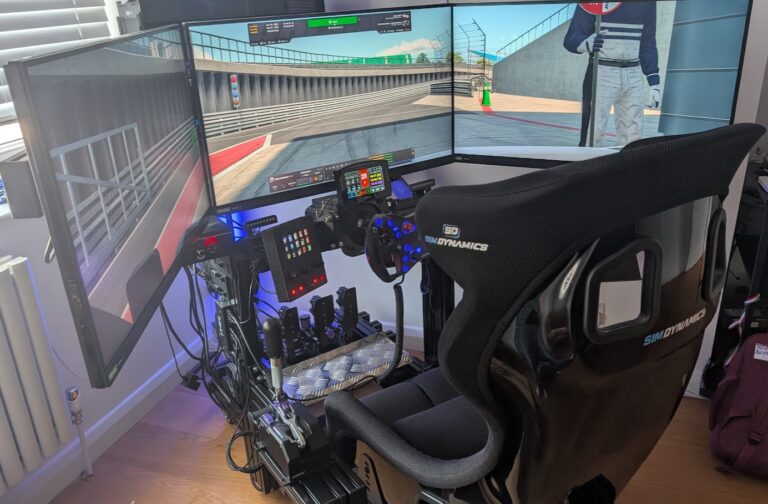
How to Set Up Triple Screens in Le Mans Ultimate (LMU)
iRacing VR Settings (2026): Meta Quest 3, PSVR2, Pimax and Valve Index
Assetto Corsa VR Settings 2026: Pimax, Quest 3, PSVR2 & More
Forza Horizon 5 Wheel Settings: FFB for Logitech, Thrustmaster and Moza

EA SPORTS WRC Fanatec Settings for the CSL DD and ClubSport DD+
EA SPORTS WRC Moza Settings: Pit House and In-Game FFB
Topic: Le Mans Ultimate