
I’m a sim racer and amateur racer with a passion for Motorsport, good racecraft and the technical and setup aspect of sim racing.
In my previous post, I mentioned that the Dream Air just… works – you can somewhat reliably go straight into iRacing and just race after you’ve activated the headset. But out of the box it isn’t quite race-ready for iRacing, so I’ve spent more time tweaking my settings to a reliable baseline.
My caveat before we begin: Pimax headsets have always been power hungry – they’re high-specification units. These settings are on my 4090. I’m reasonably certain they’d be completely usable on any 40-series GPU with some light tweaking in iRacing – but in pursuit of a reliable, stutter-free experience, here’s how I got on.
Quick Navigation
Why the Dream Air needs tuning | Runtime: use Pimax OpenXR | Pimax Play: my baseline | iRacing’s VR settings | The levers that do the work | Less GPU? What to turn down | Common gotchas
Why the Dream Air needs tuning for iRacing
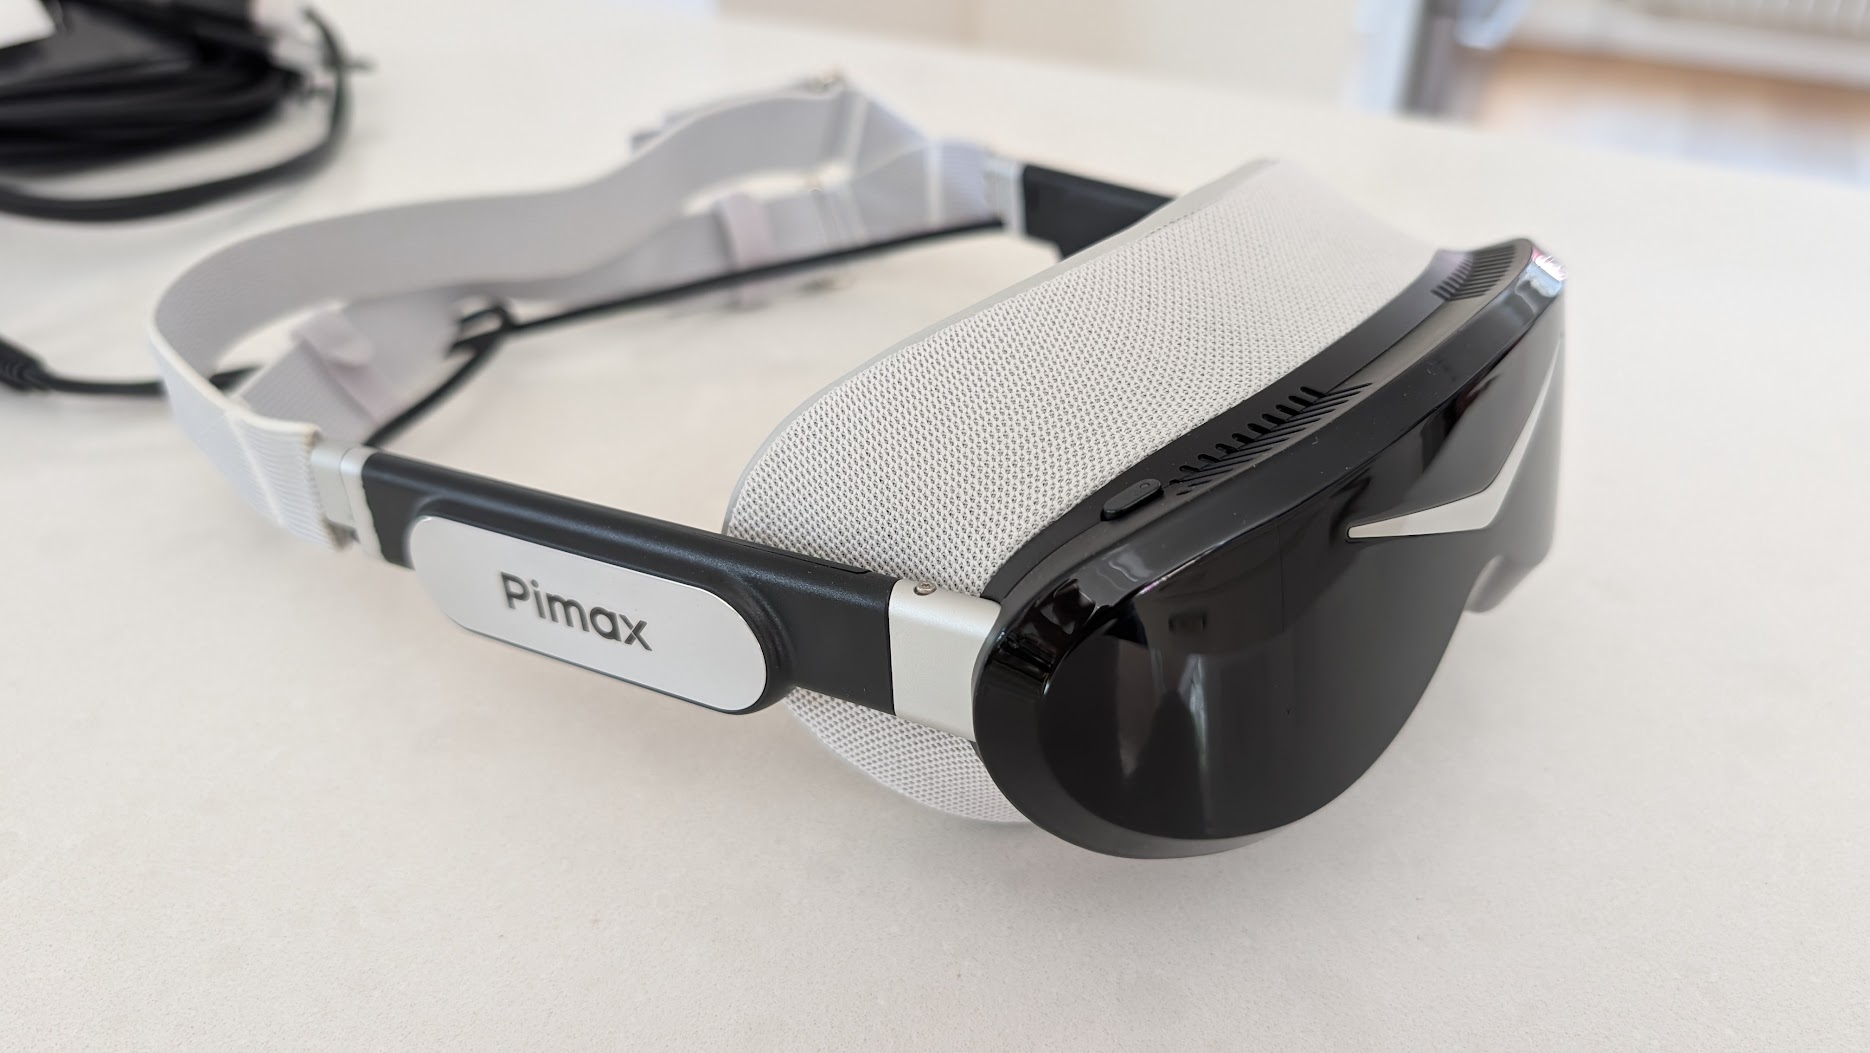
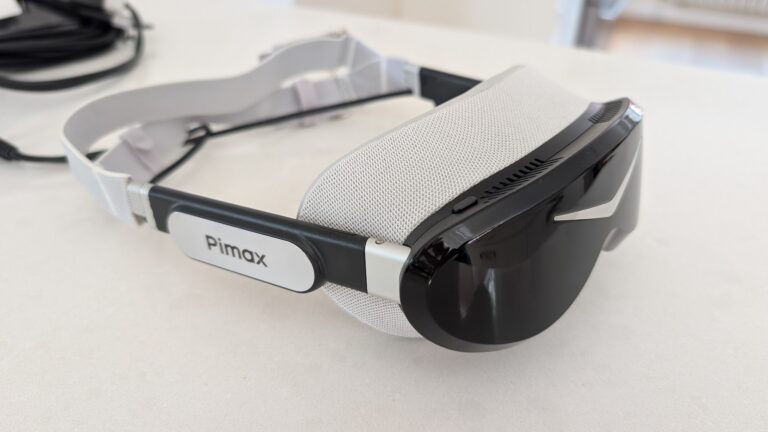
The Dream Air is a lovely thing to look through. Sony micro-OLED panels, proper blacks, and a picture that really pops. But it’s a high-specification headset, and a high-specification headsets ask a lot of your GPU. Straight out of the box you can activate it, jump into iRacing and drive – it really is that quick to get going – but “it runs” and “it holds a full race start without a stutter” are two pretty different things.
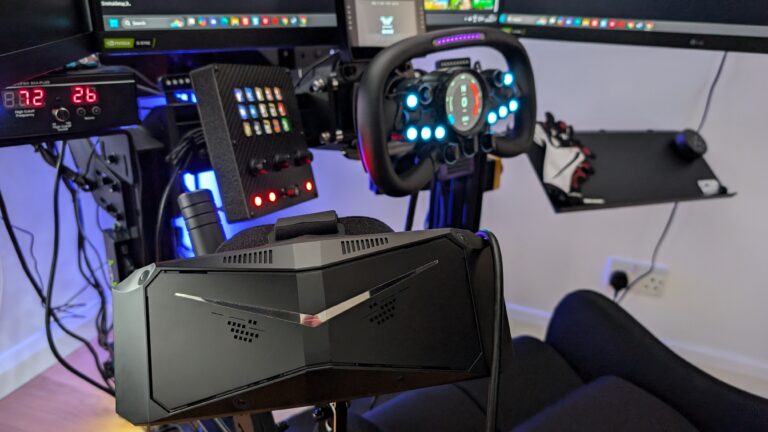
Here’s the result of my work getting everything reliable, stutter free and reace ready. I’m not chasing knife-edge numbers, and I’m definitely not trying to melt my GPU connector for a screenshot. I just wanted a baseline I could sit down to on any given evening and trust – one that handled a rolling start with a full grid and didn’t judder when the field bunched into turn one.
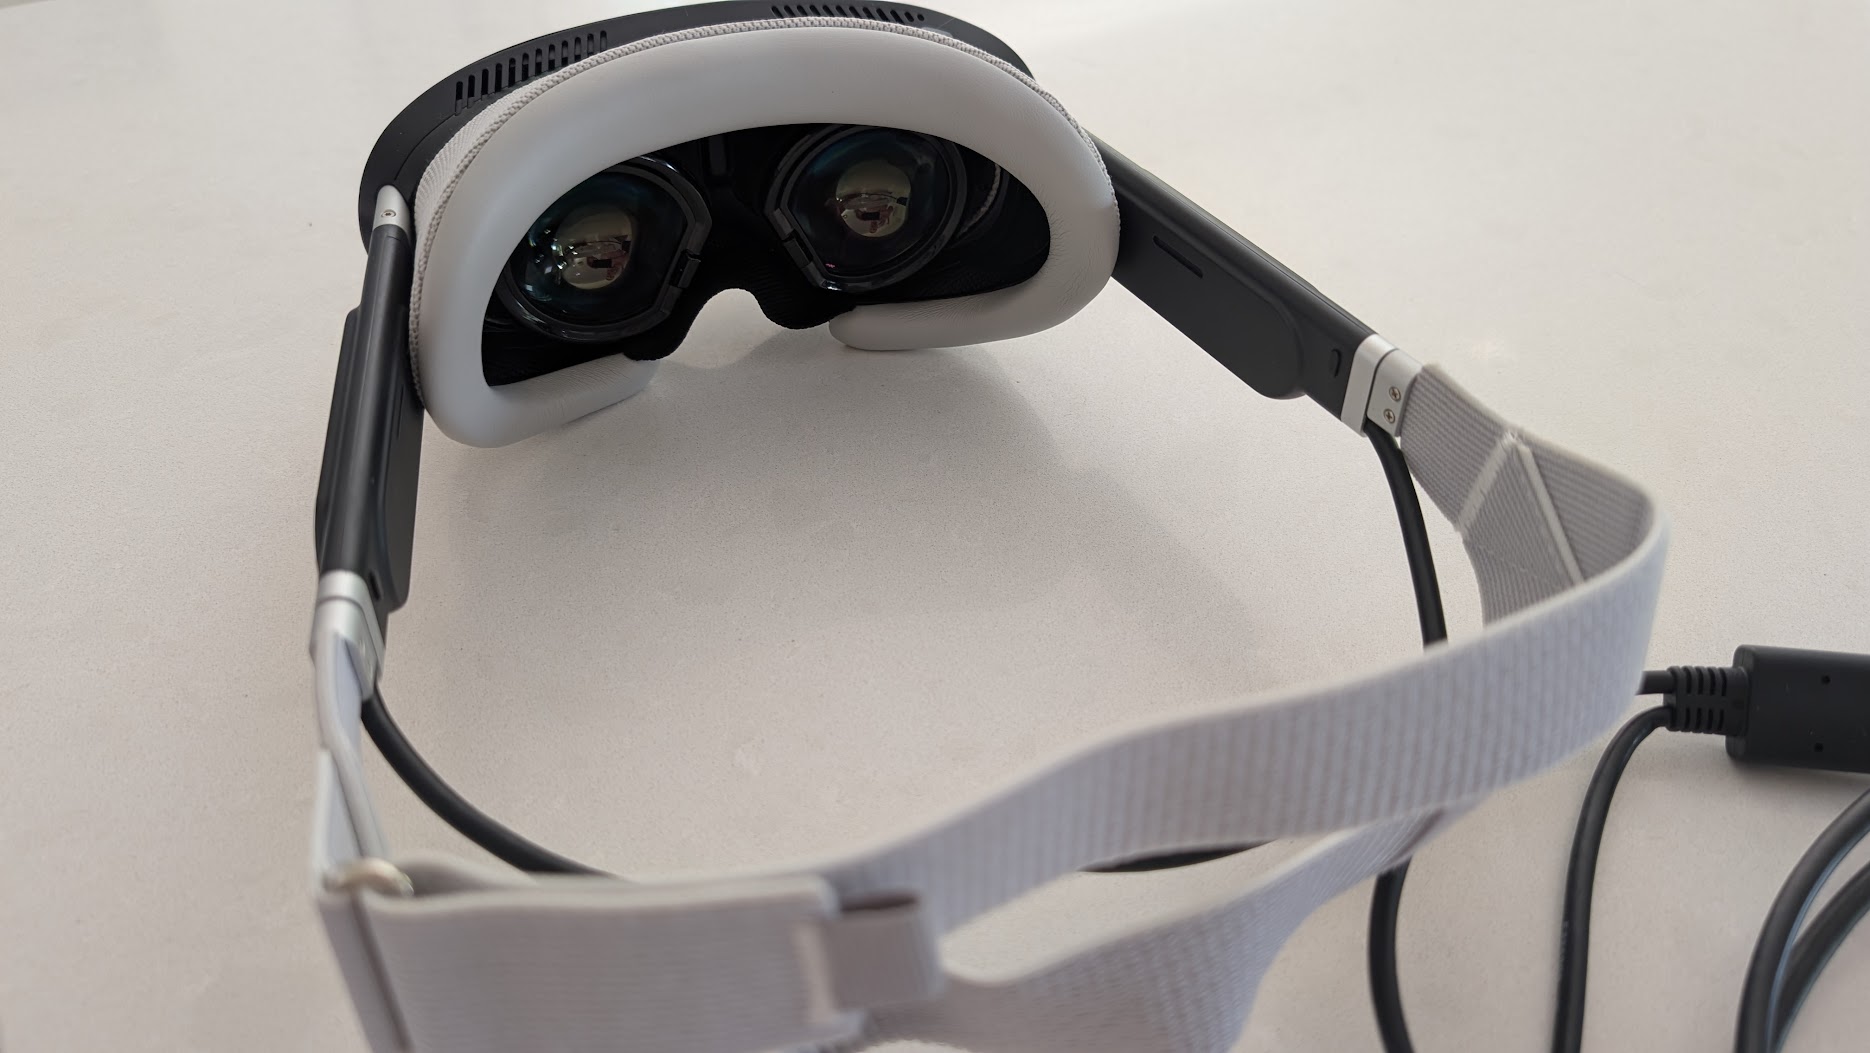
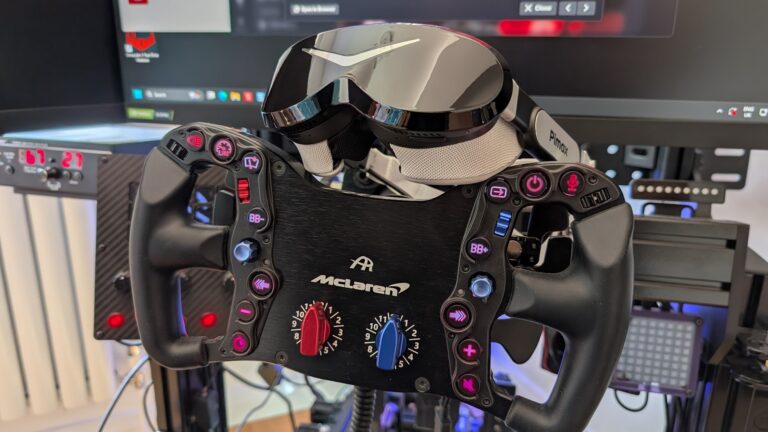
This is the headset the rest of this is about, if you’re weighing one up:
Runtime: use Pimax OpenXR
Before you touch a single quality slider, sort out the runtime. There are two ways iRacing can talk to the Dream Air: through SteamVR’s compositor, or through Pimax’s own OpenXR runtime. Pick Pimax OpenXR. It renders leaner – you’re not paying the overhead of SteamVR sitting in the middle of the pipeline – and even on a 4090 that saved overhead is headroom you should take advantage of.
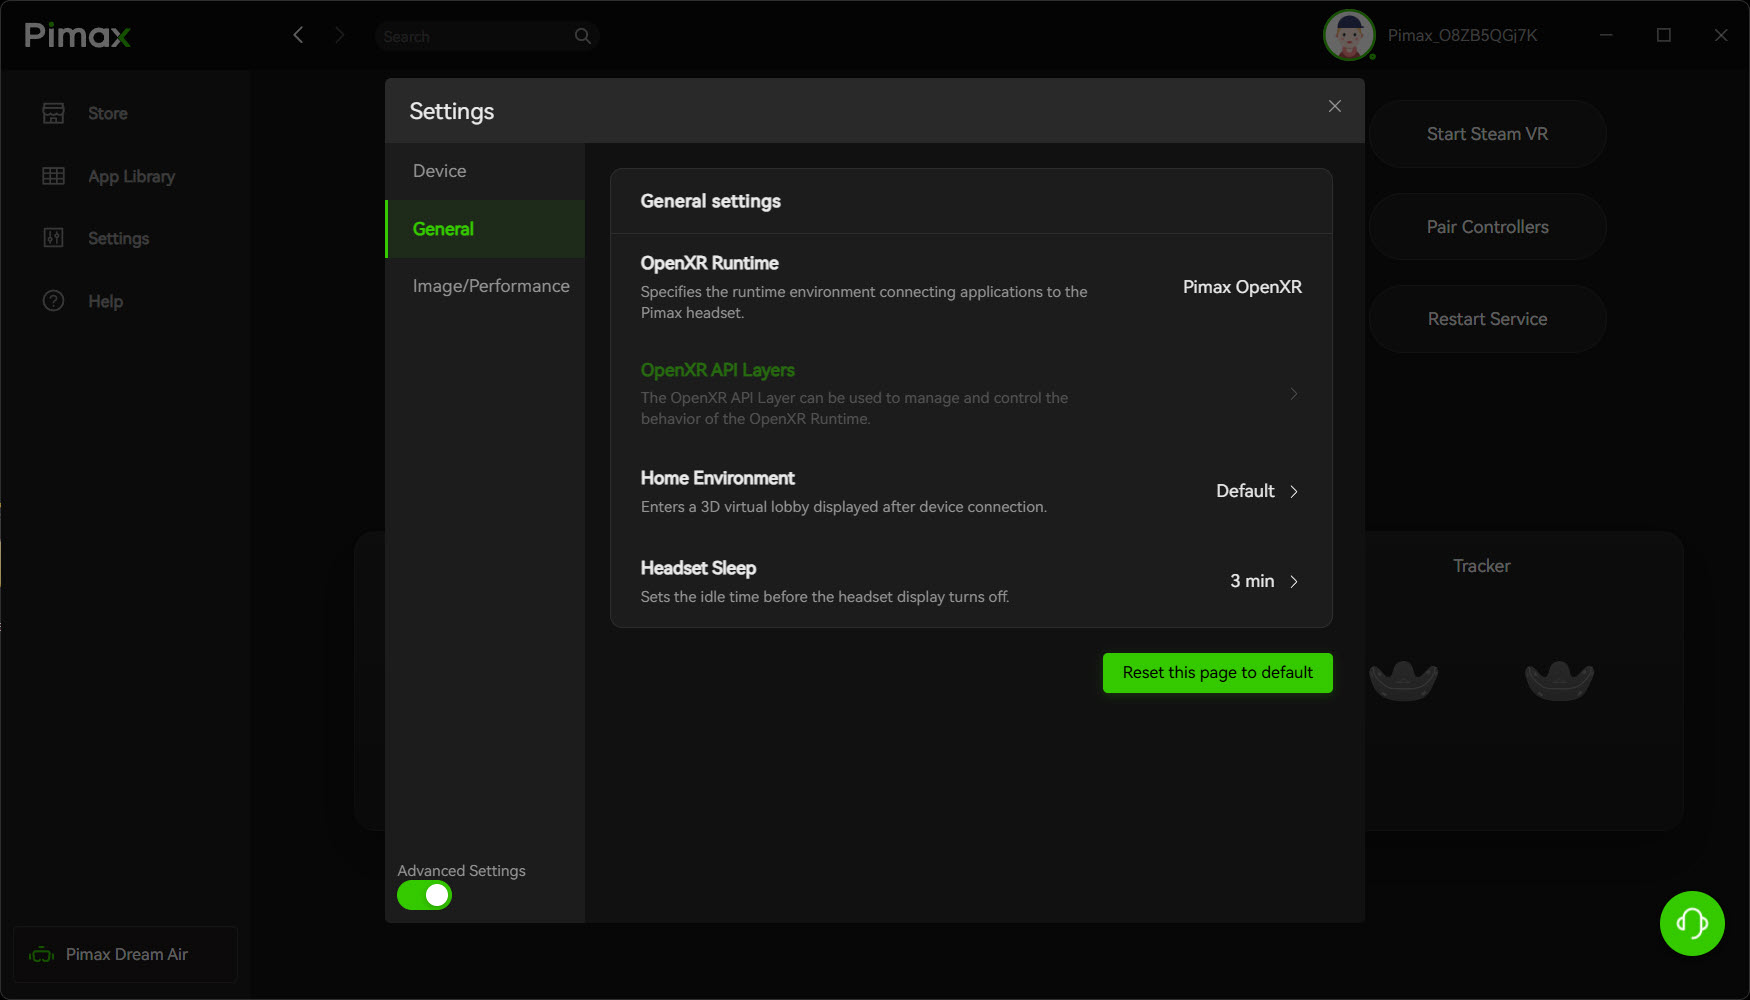
To set it: open Pimax Play, go to General, and set the OpenXR Runtime to Pimax OpenXR as the default. That’s it. Apparently, this setting can silently flip back to SteamVR after a Pimax Play update, so if a session suddenly feels heavier than it did last week, go check your Pimax Play settings.
Now, an important note, because there’s a common bit of bad advice doing the rounds: you do not uninstall SteamVR. Leave it installed. It sits quietly in the background doing the Lighthouse base-station tracking, which my Dream Air version relies on. Running Pimax OpenXR as the runtime doesn’t mean ripping Steam out – it means choosing the leaner path for the actual rendering while SteamVR carries on handling tracking. Two jobs, two pieces of software, both stay put.
Pimax Play: My Baseline Settings
Get Pimax Play’s settings right first, then touch iRacing. Here’s where I’ve landed on the 4090, and I’d start any 40-series card from roughly the same place.
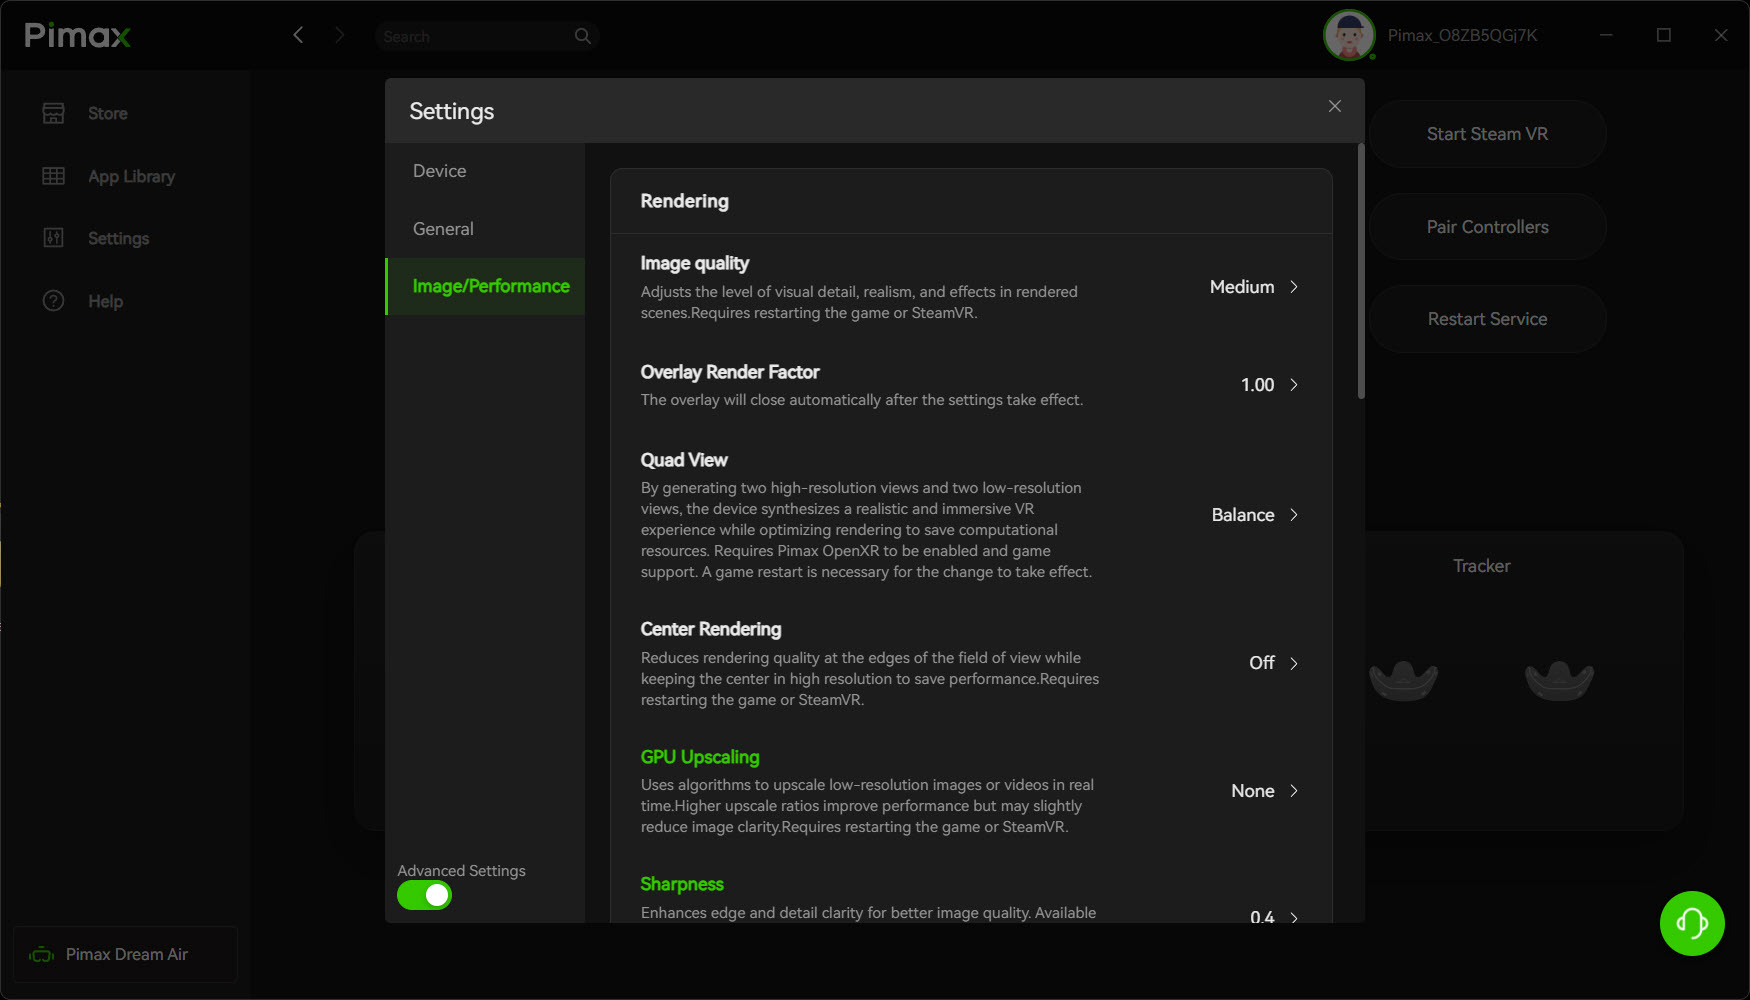
Under “Image and Performance”:
- Image Quality: Medium. This is a Low / Medium / High preset. Medium is my 4090 baseline – it holds up in a busy field and looks great. If you’ve got frametime to spare, High is there for you to test.
- Quad View: Balance. Quad View Balance, working with the eye tracker, is the dynamic foveated rendering (DFR) on the Dream Air. It renders full detail where your eyes are actually pointed and drops the periphery unless that’s where you’re looking. Turn it on. If you need more headroom, Performance mode leans on it harder.
- GPU Upscaling: None. You don’t want an upscaler stacked on top of the render.
- Sharpness: 0.4. Enough to crisp things up without chasing shimmer on distant kerbs.
- Smart Smoothing: Off.
Then, head to the Device tab. Set the refresh rate at 72Hz to get started- that’s my baseline, and it’s no compromise (in my opinion). On these micro-OLED panels 72Hz feels closer to 90, there’s no strobing and no eye strain, and it hands you a chunk of frametime back to spend elsewhere. Again, more headroom. It held a full 20 grid race start for me with no stutter, which is exactly what we’re looking for. If you’ve got room, say a 50xx series GPU, 90Hz is there for the taking. Brightness I keep at 90, and Eye Tracking stays On and calibrated because the DFR leans on it.
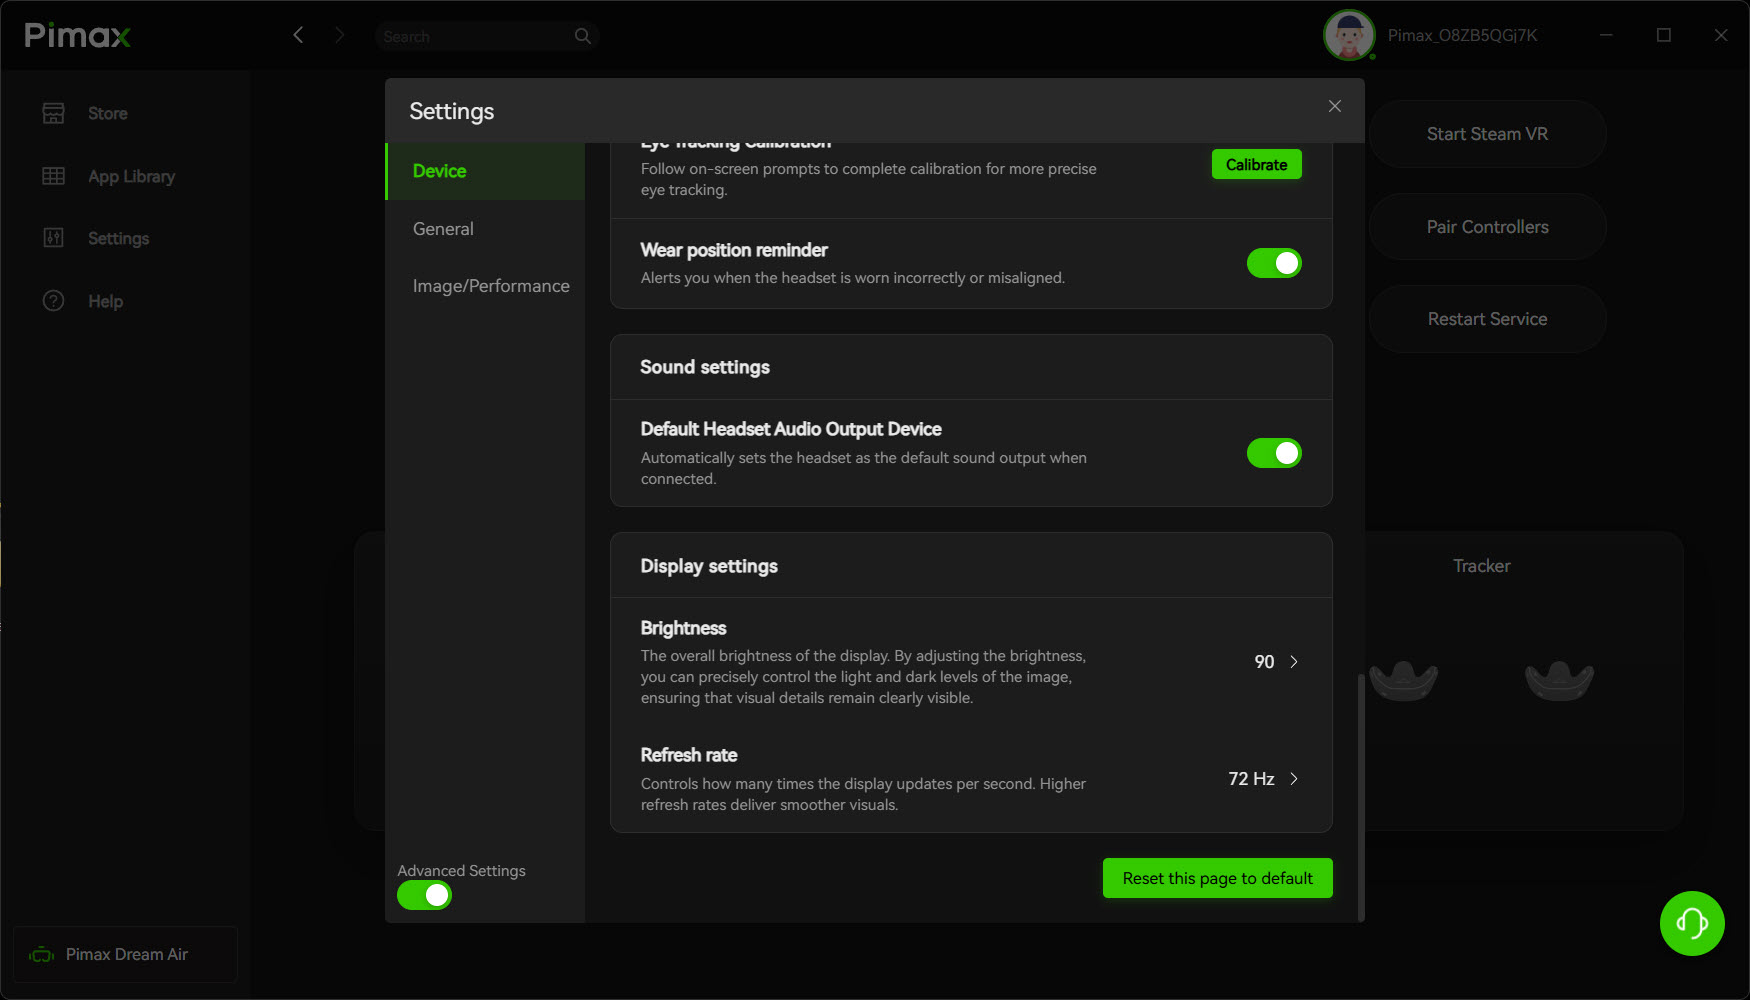
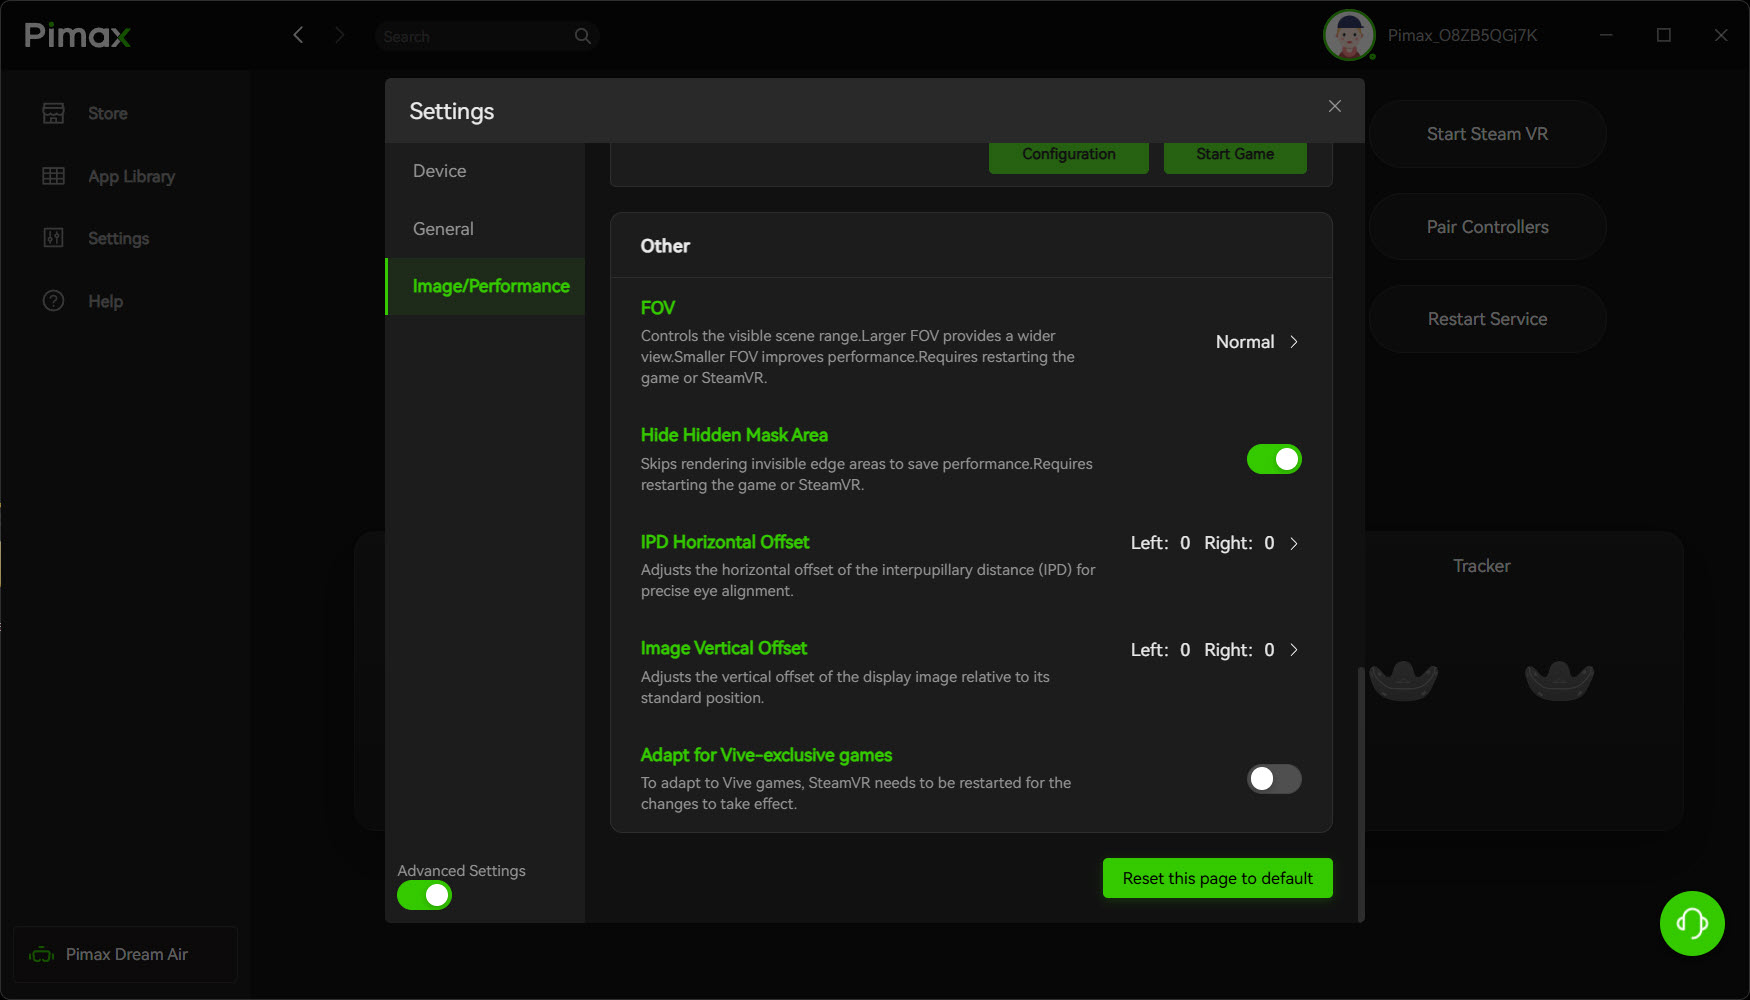
There are two small extras in the FOV settings. FOV, I leave on Normal – I didn’t need to crop it. And Hide Hidden Mask Area goes On, which is a small performance saver that costs you nothing visually. Set both and forget them.
iRacing’s VR settings
With Pimax Play sorted, boot iRacing. First job is the runtime again, from iRacing’s side this time: set the VR mode to OpenXR. This is what points iRacing at the Pimax runtime rather than SteamVR’s, and it’s what lets the sim talk to the eye tracker directly. Get this wrong and none of the foveated-rendering saving you set up in Pimax Play reaches the game.
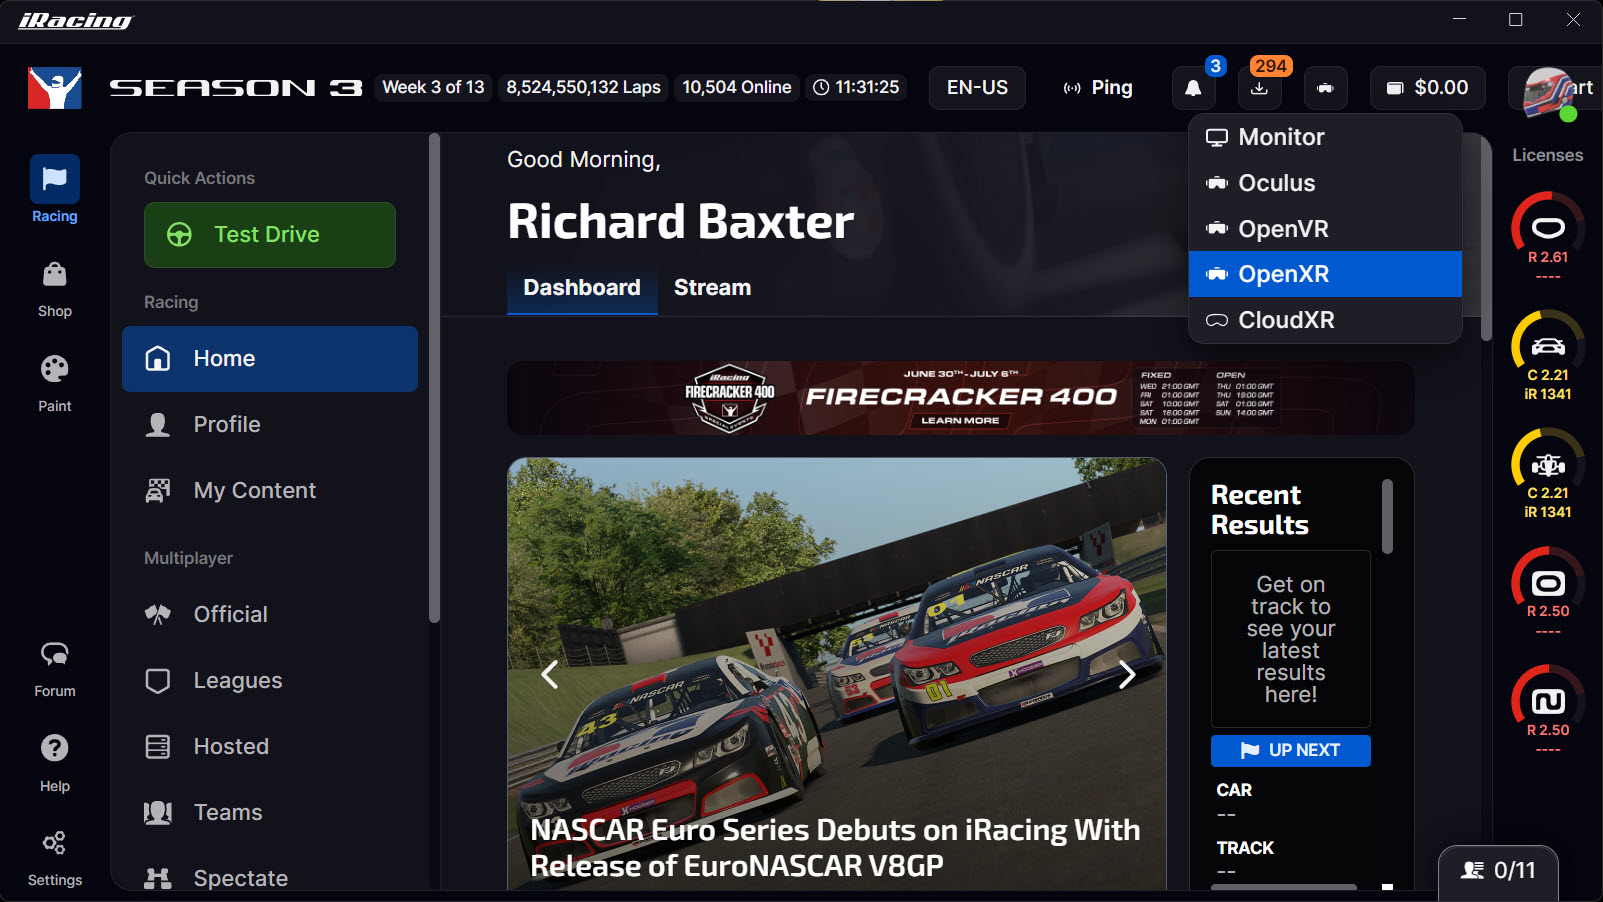
That little dropdown points iRacing at the Pimax OpenXR runtime. The DFR itself is a two-part handshake, though, and this is the half that lives inside iRacing: in the sim’s VR display settings, set VR Mode to Foveated and switch Allow Eye Tracking on. That’s the game engine telling the runtime it supports eye-tracked quad-views rendering, and it pairs with the Quad View Balance you set back in Pimax Play – both halves have to be on.
Pimax lay out the exact same sequence in their own iRacing DFR guide: eye tracking and QuadViews on in Pimax Play, then Foveated and Allow Eye Tracking on in iRacing. With both running, the sim renders full detail exactly where you’re looking and quietly drops the rest – invisible in the cockpit, but you’ll watch the frametime fall off in the right direction. It’s a fair chunk of GPU back for effectively no visual cost.
The one place a 4090 and a 5090 part ways is mirrors. Three real rear-view mirrors look glorious but, cost a fortune in frame preformance. On my 4090, I run the virtual mirror, or a single real one, and I don’t miss the other two in a race. Test it and be honest with yourself about what it costs – it’s an easy setting to leave on out of habit and then wonder where your headroom went.

The levers that do the work
If you strip this whole guide back, two of my settings are carrying most of the weight. The first is the DFR – Quad View Balance in Pimax Play paired with Foveated in iRacing, which lean on the eye tracker. That’s the single biggest saving on the Dream Air for performance. Get that working and you’re most of the way there. The second is running at 72Hz. Dropping from 90 to 72 buys you real frametime on the heavier tracks, and on micro-OLED you barely register the difference. Between those two, a 4090 has enough in hand to hold a race start with ease.
Now, the FOV crop. A lot of the Dream Air advice online treats cropping the vertical FOV as the biggest lever going, and in fairness it does hand back a decent slice of your frame budget – you don’t use the top and bottom of the view in a race car, you’re looking through a windscreen at an apex. But I didn’t need it. On my 4090, with the DFR doing its job and 72Hz giving me the headroom, the baseline held without touching the crop, so I left FOV on Normal. Treat it as an optional compromise rather than a default step – if you’re chasing more headroom, or you’re on a lighter 40-series card and want a bit more in reserve, that’s when you reach for it. For a reliable baseline on a 4090, it stays off and works perfectly.
Less GPU? What settings to turn down in iRacing to improve framerate
Everything above is on my 4090. I’m confident it carries across to any 40-series card, because the two things doing the heavy lifting – the DFR and 72Hz – work just as well on a 4070 or 4080. But a lighter card has less in reserve, so on a busy grid you’ll want to pull a few things back in iRacing’s graphics options. Here’s the order I’d do it in, biggest saving first:
- Mirrors first. Drop from real cockpit mirrors to a single one, or just the virtual mirror. Every real mirror re-renders the whole world behind you – it’s the single most expensive thing on the page.
- MSAA from 4x to 2x. At the Dream Air’s pixel density you can barely see the aliasing anyway, and 4x is heavy on memory bandwidth. This is the biggest pure-GPU win for the least visible loss.
- Quad View from Balance to Performance. Lean harder on the foveation. With the eye tracker doing its job you won’t notice the drop out in the periphery, but the GPU will breathe.
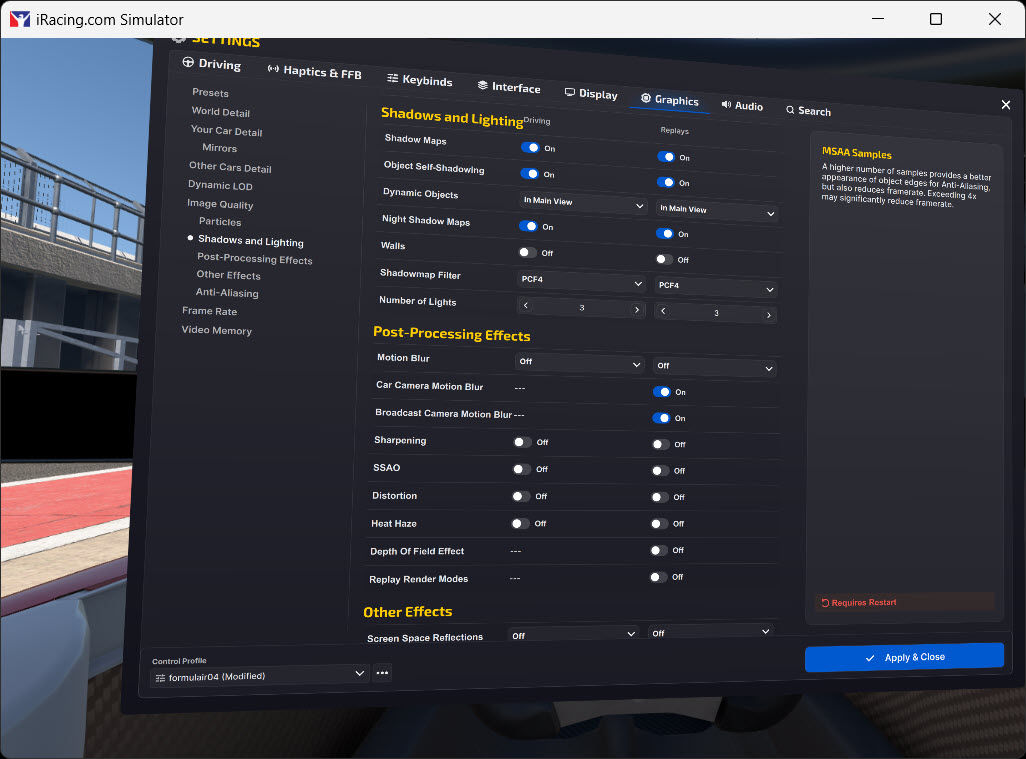
- Shadows. Turn off Object Self-Shadowing and Night Shadow Maps, and drop the Number of Lights – but keep basic Shadow Maps on, or the cars look like they’re floating.
- Particles to Medium, Full Resolution off. Barely shows in the dry, but it’s exactly where a lighter card falls apart in rain and spray.
- Shader Quality, and Cars and Objects detail, from High to Medium. A gentler last step, and dropping Cars also eases the CPU when the grid is full.
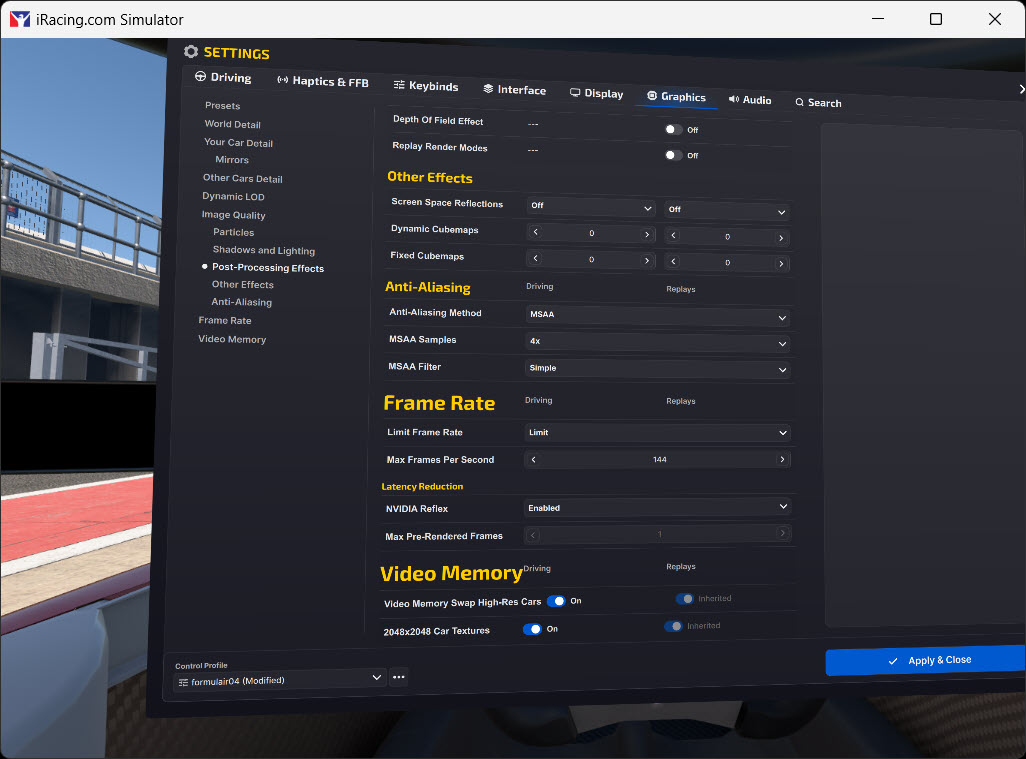
One thing I’d leave alone: 2048 car textures. That’s a video-memory setting, not a rendering load, and every 40-series card has plenty of VRAM for it. And if you haven’t already, turn off grandstands, crowds, foliage, screen-space reflections and the post-processing effects (SSAO, motion blur and the rest) – they cost you frametime for almost nothing in a race. That’s most of my own graphics options, for what it’s worth: quality where I look, off where I don’t.
Remember – start simply and ramp up the detail settings to see what sticks.
Common gotchas with Pimax Play
These are the things that’ll have you swearing at a black screen ten minutes before a race – the ones worth knowing before they catch you out:
- The runtime can reset after a Pimax Play update. As I mentioned above, an update can quietly flip the OpenXR runtime back to SteamVR. If a session feels heavier than it should, re-check Pimax Play, General, and set it back to Pimax OpenXR.
- Black screen on launch. Plug the DisplayPort and USB straight into the motherboard on the highest bandwidth USB port you can find – a red port on my MSI montherboard means 20Gb/s of USB3.0 bandwith. You’ll never get that working well even on a powered hub – it’s totally unnessecary latency. never through a hub. Direct on the board, on the highest-bandwidth USB bus you’ve got, clears up the large majority of the “it won’t display” reports.
- Recenter drifts after the PC sleeps. Re-run the play-space setup after a wake. Ten-second fix, but it catches everyone once – map the recenter key binding to an easily found button on your steering wheel.
That’s where I’ve landed. It’s not the last word in squeezing the Dream Air – there’s more on the table if you want to chase it – but it’s a baseline I trust to hold a full race start, evening after evening. Which is all I was after. I’d love to see how these run on a 5090 but for now, my gaming PC seems to be keeping up with Pimax’d developments.
Buying one? Our reader codes at pimax.com: simracingcockpit for 3 per cent off any Pimax gear, or simracingcockpit25 for $25 off an order.
If you want the full picture on the headset itself before you commit, my Pimax Dream Air review covers what it’s like to live with on a sim racing setup. For the wider Pimax settings picture across every sim, the Pimax settings tool is the place to start, and if you’re still weighing up whether your GPU is up to it, the gaming PC guide lays out where the money matters.
Pimax Dream Air Settings for iRacing: My Baseline
Pimax Dream Air Review: A Sim Racer’s Verdict
Best Pimax VR Settings for iRacing in 2026: A Complete Guide
Best VR Headsets for Gaming 2026: PC VR vs Standalone Compared
Best Pimax VR Settings for Assetto Corsa Evo (v0.6, May 2026)
VR Sim Racing Games in 2026: What Works on a Pimax (And What Doesn’t)
Topic: VR Headsets for Sim Racing