
I’m a sim racer and amateur racer with a passion for Motorsport, good racecraft and the technical and setup aspect of sim racing.
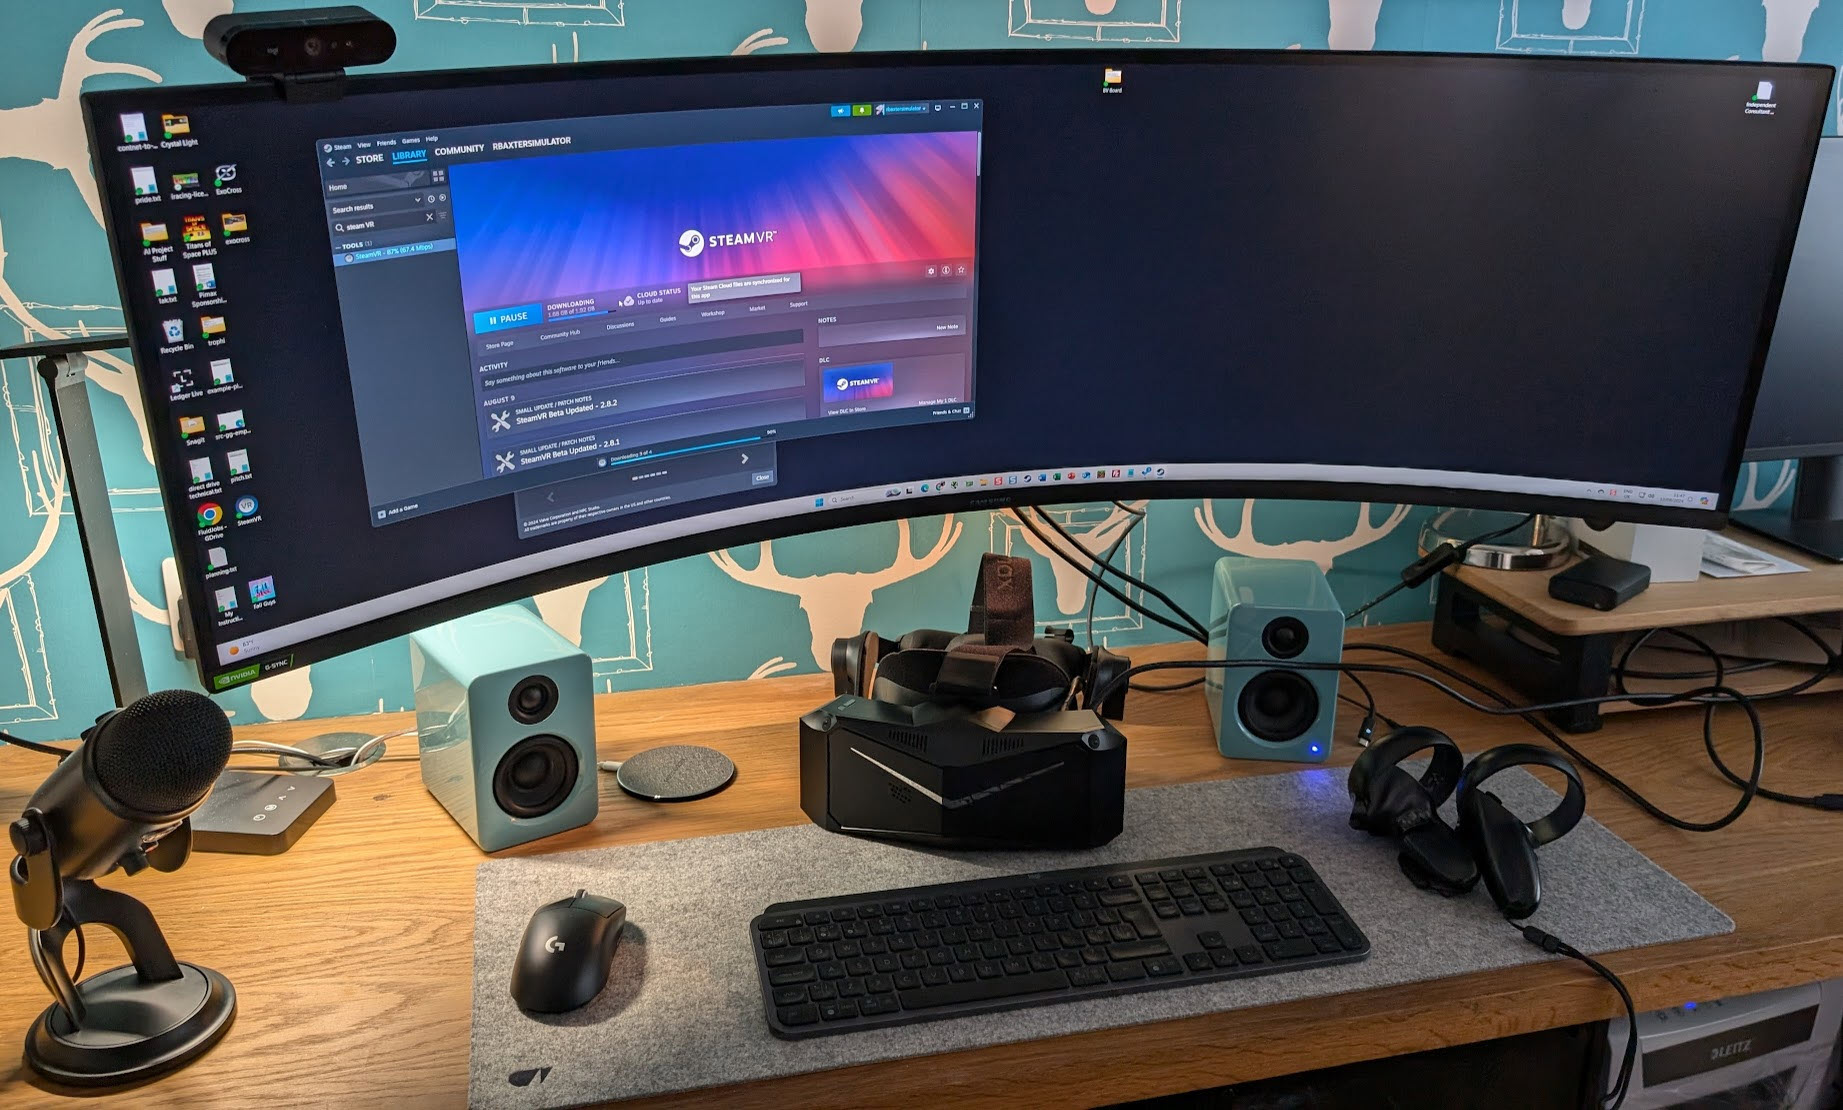
Featured image: the Pimax Crystal Light on my desk
You’ve got a Pimax, you play Assetto Corsa through Content Manager, and you want to drive it in the headset. I’m on the Dream Air these days, running Pimax Play 2.0. AC speaks OpenVR and Pimax’s own runtime is Pimax OpenXR, so the first job is picking what sits between the two. Start with OpenComposite into Pimax OpenXR, which keeps SteamVR out of the chain and is the route Rapty’s guide recommends for a Pimax. Plain SteamVR means no files to swap, and SBoys3’s SteamVR driver is a third way in.
Pimax discount codes: use SIMRACINGCOCKPIT for 2% off, or SIMRACINGCOCKPIT25 for $25 off, at pimax.com.
Quick Navigation
Jump directly to what you’re looking for:
How does AC run in VR on a Pimax? |
Pimax Play |
OpenComposite, SteamVR or SBoys3? |
Content Manager |
Custom Shaders Patch |
AC’s own video settings |
Should you cap the frame rate? |
Fine-tuning
How does Assetto Corsa run in VR on a Pimax?
Whether a sim runs optimally in VR now has little to do with the brand of headset and almost everything to do with the runtime sat between the headset, your PC and the game. An OpenXR runtime is the headset maker’s software that hands a game’s frames to the headset. On a Pimax that runtime is Pimax Play using Pimax OpenXR: Pimax’s own flavour of OpenXR’s runtime. AC doesn’t speak OpenXR, though. It talks OpenVR, which is Valve’s VR interface, and it has done since the v1.13 update in March 2017 (before that, it only supported the Oculus Rift).
So there are three ways from AC to a Pimax. SteamVR takes AC’s OpenVR calls as they are, with Pimax Play running the headset alongside it. SBoys3’s native SteamVR driver does the same job without the Pimax Play runtime in the middle. OpenComposite is the third, and it’s a translation layer that stands in for OpenVR and passes AC’s calls on to Pimax OpenXR, so SteamVR isn’t needed at all. Since late September 2026 the Custom Shaders Patch (CSP) previews on Patreon have added an experimental native OpenXR mode in Content Manager. The public recommended build, CSP 0.2.11, doesn’t have it, which means that on public CSP, OpenComposite is still the way into OpenXR.
Foveated rendering keeps full detail in the middle of the view and less towards the edges, so the GPU does less work. Pimax Play’s Quad View needs a game that supports quad views (Pimax Play’s own description reads “Requires Pimax OpenXR to be enabled and game support”). AC renders two ordinary stereo views and isn’t on any supported list, so Quad View does nothing for it. On the AC side, foveated rendering comes from CSP’s Nvidia VRS (Variable Rate Shading) instead, which has been in CSP since 0.1.78 and needs an NVIDIA 16xx, 20xx or newer card.
Pimax Play settings
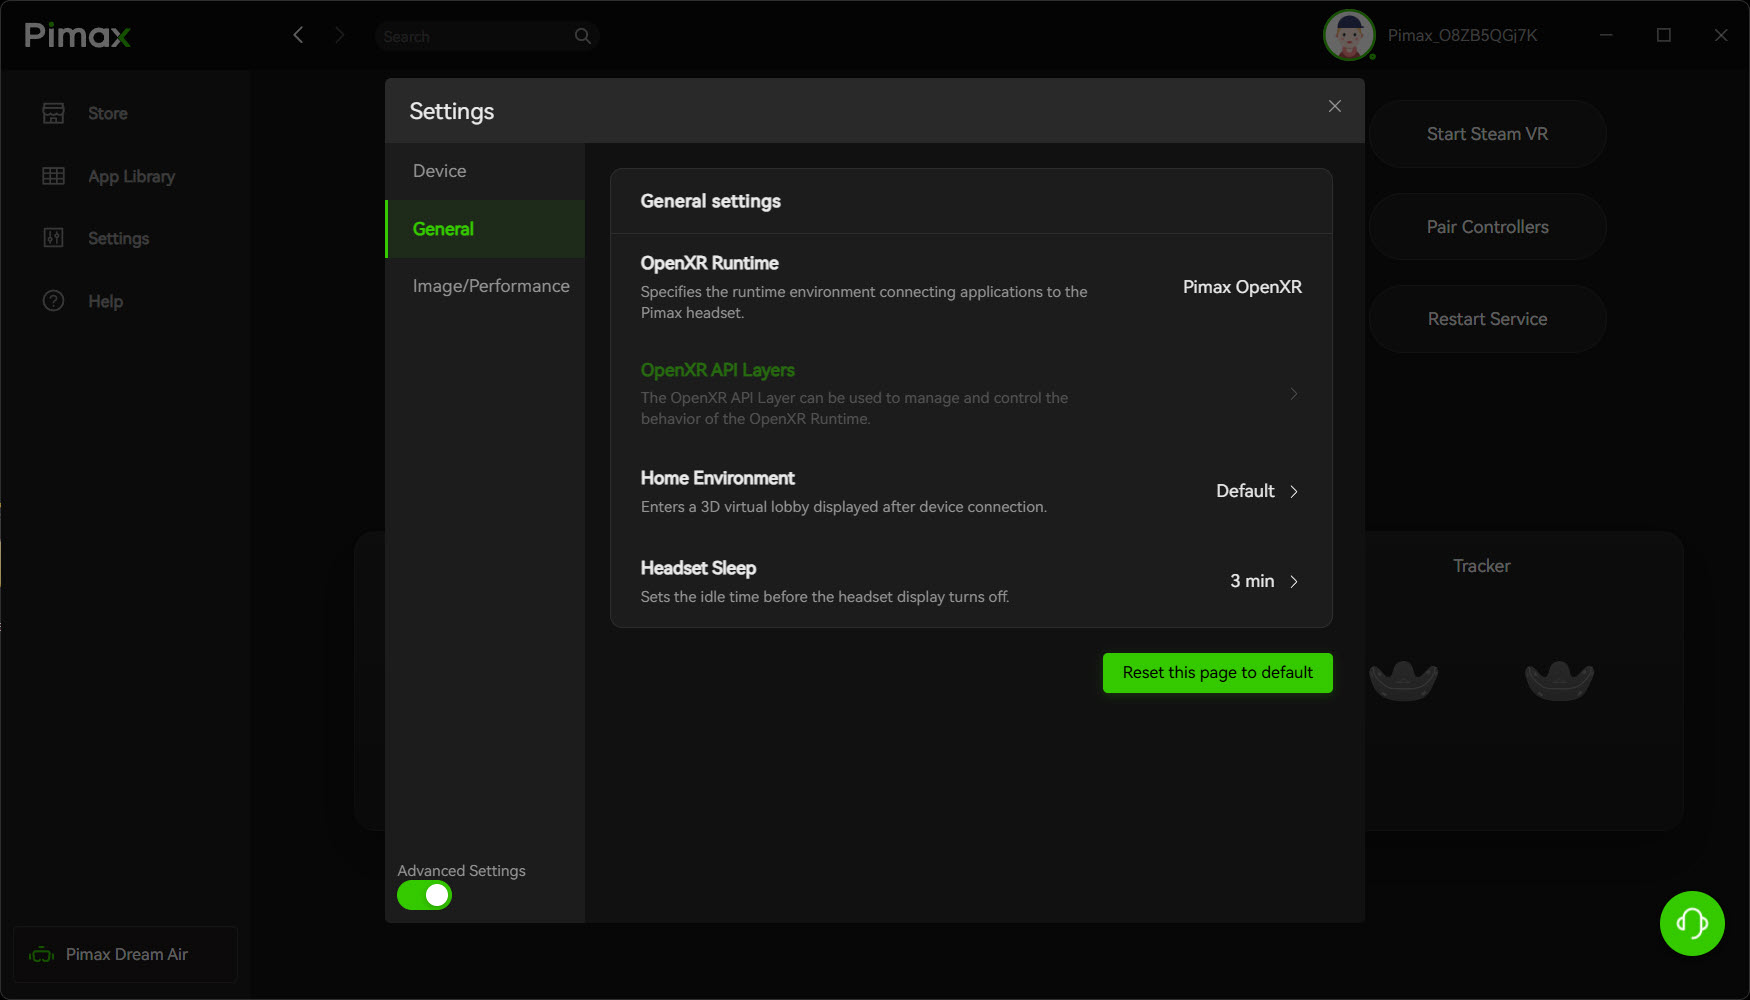
The current version of Pimax Play is 2.0.4, released on 20 September 2026 and rolled out gradually over the following two weeks. The settings live in Pimax Play’s Settings window with the Advanced Settings toggle switched on (it’s bottom left), and they’re split into Device, General and Image/Performance. Start in General, where the OpenXR Runtime setting only matters on the OpenComposite route and for the OpenXR mode in the CSP previews:
- General > OpenXR Runtime: Pimax OpenXR (for the OpenComposite route)
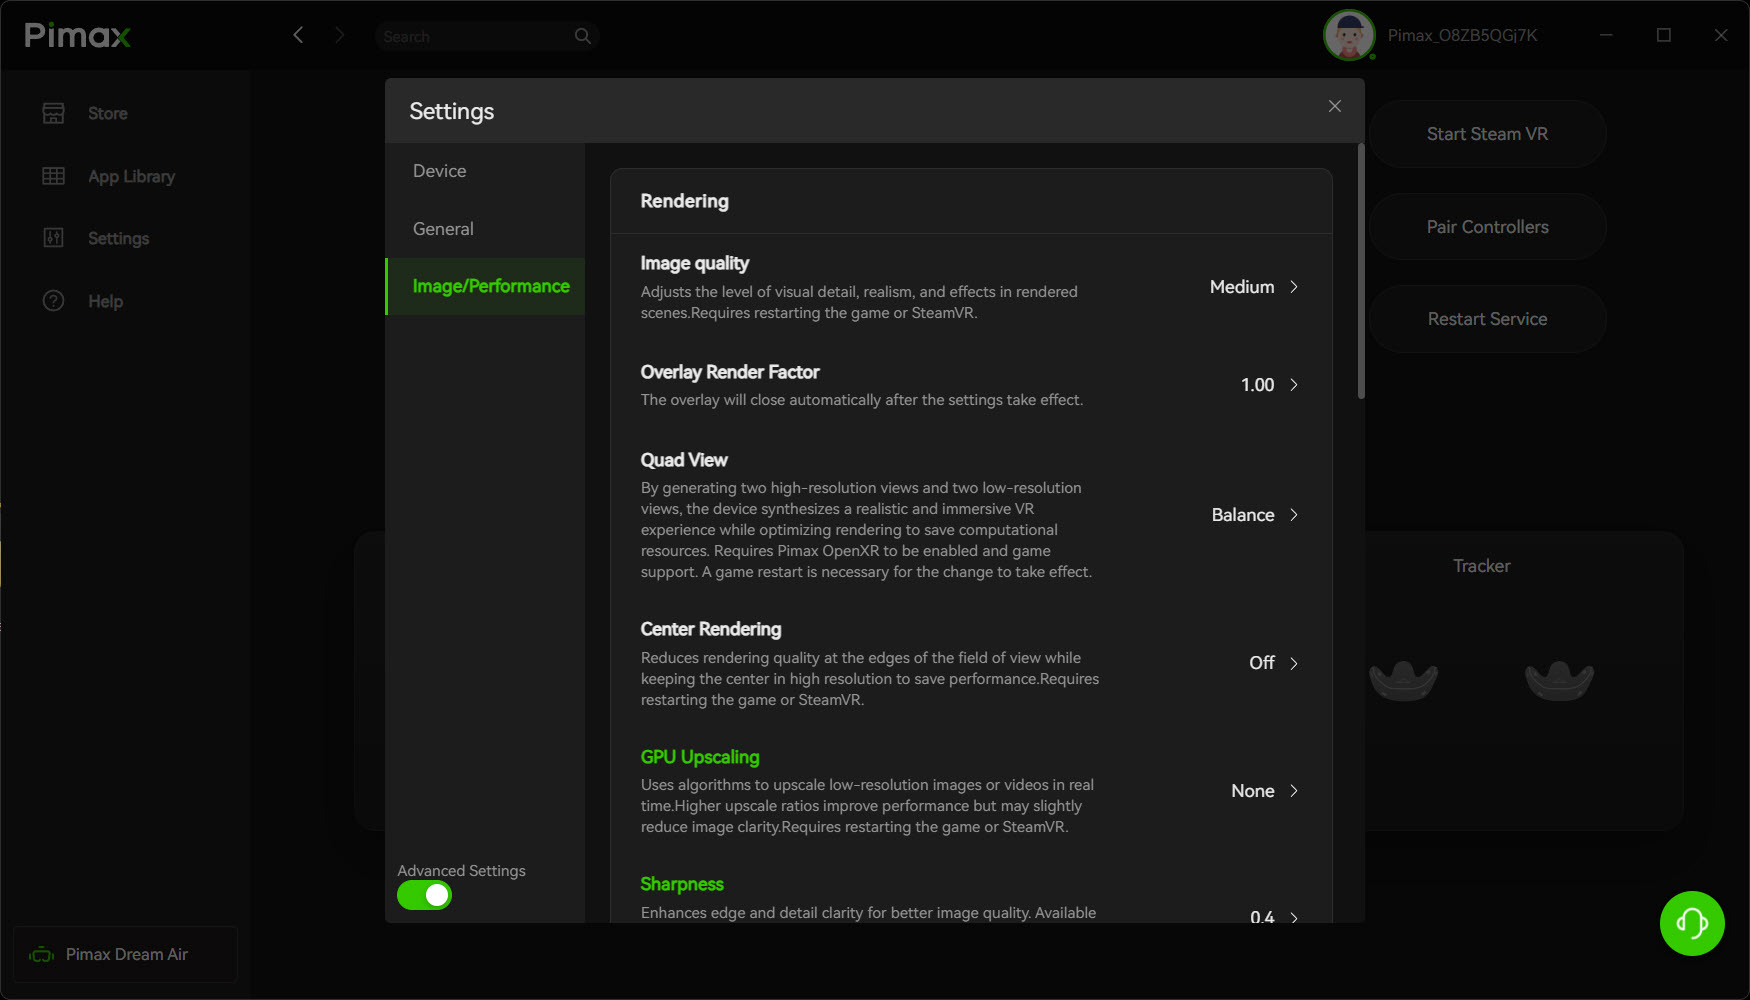
I set up my Pimax Play baseline on the Dream Air for iRacing (a quad-views game), not for AC. Center Rendering is Pimax’s own foveation, and it doesn’t need the game to support quad views. It lowers the rendering quality at the edges of the view and keeps the centre in high resolution. A Pimax blog says AC can use Pimax’s eye-tracked Dynamic Foveated Rendering through Pimax Play, although it doesn’t name a setting or a route. Nothing confirms it gets through to AC by way of OpenComposite.
Rapty’s guide is firm that you only run one foveation method, so with CSP’s VRS switched on, leave Center Rendering off – mine is off anyway. Image quality needs a restart of the game or SteamVR before it takes effect. Sharpness can’t be used together with GPU Upscaling. Pimax Play 2.0.4 fixed a bug where switching sharpening on could cause an unexpected drop in frame rate. Set the Rendering section from the top down:
- Image/Performance > Image quality: Medium on my Dream Air (restart the game or SteamVR after changing it)
- Image/Performance > Quad View: no effect in AC (it needs a game that supports quad views)
- Image/Performance > Center Rendering: Off on mine, and off whenever CSP’s Nvidia VRS is on
- Image/Performance > GPU Upscaling: None on mine
- Image/Performance > Sharpness: 0.4 on mine (it can’t be used with GPU Upscaling)
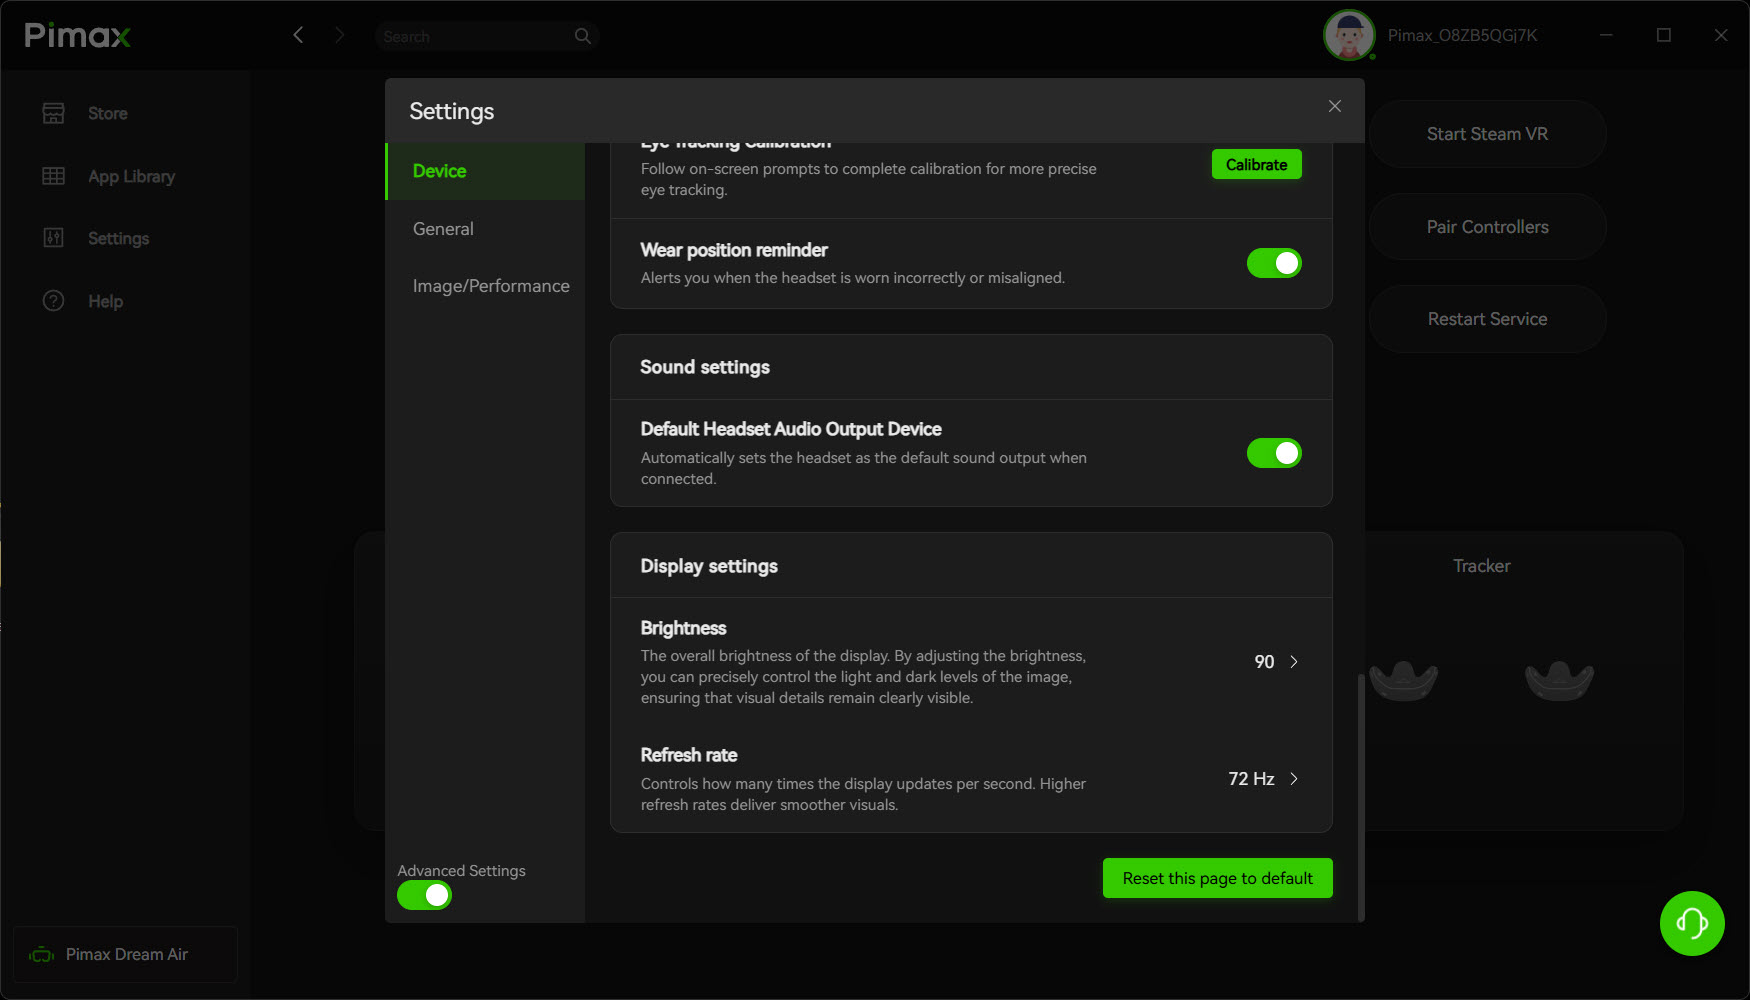
The refresh rate lives on the Device tab. The Sony panelled Dream Air, the Dream Air SE and the Crystal Super all run at 72 or 90 Hz, and the Crystal Light adds 120 Hz. Set the refresh rate at 72Hz to get started – that’s my baseline, and it’s no compromise (in my opinion). If you’ve got room, say a 50xx series GPU, 90Hz is there for the taking. Brightness sits at 90 on my Dream Air, so the Device tab reads:
- Device > Refresh rate: 72 Hz on my Dream Air
- Device > Brightness: 90 on mine
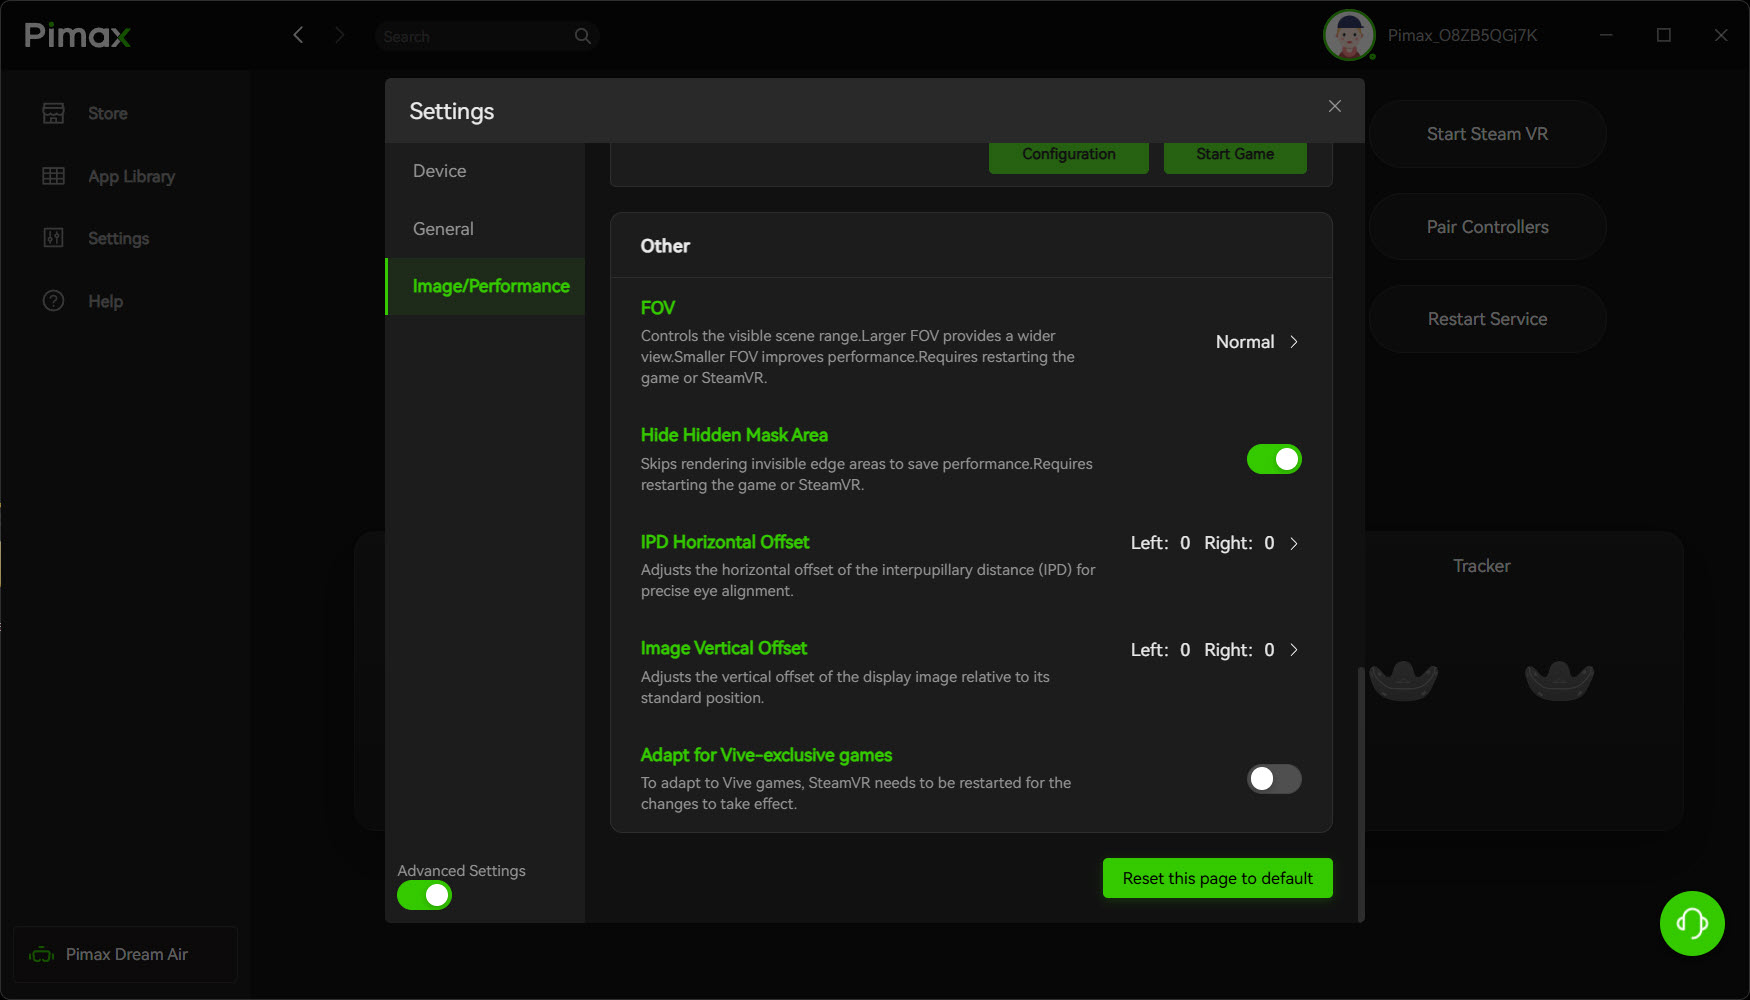
Under Other, Pimax’s own description of FOV says a smaller one improves performance. FOV, I leave on Normal – I didn’t need to crop it. Hide Hidden Mask Area skips rendering the edges of the image you’d never see anyway. CSP’s Corners masking optimization, further down, does a similar job. Mine are set like this:
- Image/Performance > FOV: Normal on mine (a smaller FOV improves performance)
- Image/Performance > Hide Hidden Mask Area: On (skips rendering the edges you can’t see)
OpenComposite, SteamVR or SBoys3?
All three routes have Content Manager’s Rendering Mode set to OpenVR, and the difference is what sits behind AC’s OpenVR call. Try OpenComposite into Pimax OpenXR first, because Rapty’s guide marks it as the recommended route for a Pimax (the OpenComposite project itself is more modest, and only says it “can potentially get slightly better performance”). If you’d rather not swap a DLL, go with plain SteamVR, and try SBoys3’s driver if neither suits you.
OpenComposite into Pimax OpenXR
OpenComposite stands in for AC’s openvr_api.dll and passes AC’s calls straight to Pimax OpenXR. The per-game install goes into AC’s system\x64 folder, not AC’s root folder, and it takes six steps:
- Download the 64-bit OpenComposite DLL (OpenXR branch) from the OpenComposite project
- Go to steamapps\common\assettocorsa\system\x64
- Rename openvr_api.dll to openvr_api_original.dll
- Copy the downloaded openvr_api.dll into the same folder
- Content Manager > Settings > Assetto Corsa > Video > Rendering Mode: OpenVR
- Pimax Play > Settings > General > OpenXR Runtime: Pimax OpenXR
To undo it, delete the new openvr_api.dll and rename openvr_api_original.dll back to openvr_api.dll (that’s straight from Rapty’s AC VR guide). The per-game swap usually has to be redone each time AC updates, according to OpenComposite’s own README. If that gets old, the OpenComposite Launcher does the job system-wide – you run it, click “Switch to OpenComposite”, and run it again whenever you want to update. Two older tools still turn up in guides, and they’re best left alone. PimaxXR has been abandoned by its developer and superseded by Pimax Play’s own OpenXR, and OpenXR Toolkit’s support ended in 2024, with its developer recommending against installing it.
SteamVR
SteamVR is the simplest of the three to set up. Pimax’s own FAQ says the Dream Air runs with SteamVR through Pimax Play, and Pimax Play’s home screen has a Start Steam VR button for exactly this. Here’s the order:
- Connect the headset to the PC and start Pimax Play
- Install SteamVR from Steam and start it (Pimax Play’s Start Steam VR button does it)
- Content Manager > Settings > Assetto Corsa > Video > Rendering Mode: OpenVR
SBoys3’s SteamVR driver
SBoys3’s CustomHeadsetOpenVR is a native SteamVR driver, and it runs your Pimax as a SteamVR device in place of the Pimax Play runtime. Version 1.3.0, released on 7 September 2026, added support for all Pimax headsets and for Pimax’s OpenVR foveated rendering, although Pimax’s own guide (from June 2026) still names only the Sony panelled Dream Air and the Dream Air SE. Next Level Sim Gaming, who is a Pimax ambassador, ran AC with Pure 3.50 on his Dream Air through SBoys3 and got 82.3 FPS in the rain at the Nordschleife and 90 FPS in the day at Spa, both at a SteamVR render resolution of 100%. That’s one creator on one PC, so treat it as a rough guide for yours.
There’s a little routine to it, because Pimax’s DRM means you connect your Pimax in Pimax Play first after every PC restart. Once the driver takes over, Pimax Play disconnects, so minimise it and leave it running in the background. Physical IPD can only be adjusted in Pimax Play, so set it before you switch. If you use Pimax EVO, you switch on Open Port Mode in EVO instead and launch the driver from there. The driver has its own app, custom-headset-gui.exe, which is where you set it up. There’s a full walkthrough in our SBoys3 driver guide, and the short version goes like this:
- Set your IPD in Pimax Play first
- Download the latest CustomHeadsetOpenVR release and extract the whole folder from the zip
- Run custom-headset-gui.exe in the CustomHeadsetGUI folder
- Go to the About page and install the driver
- After every PC restart, connect the headset in Pimax Play first, then minimise it and leave it running
- Content Manager > Settings > Assetto Corsa > Video > Rendering Mode: OpenVR
Content Manager video settings
AC’s video settings are in Content Manager > Settings > Assetto Corsa > Video. Most settings have an [i] icon next to them that tells you what the setting does and what it costs in performance, which is worth a look before you change anything. Resolution only sets the size of the window on your monitor and has nothing to do with the image in the headset. There’s no “Pixel Density” in this tab either. The closest setting to it, “Pixels per display”, is for Oculus and Meta headsets only. Limit framerate stays off for now, and I’ll come back to it in the frame-rate section. These values are Rapty’s starting point:
- Rendering Mode: OpenVR
- Fullscreen: On (a small performance help, not a must)
- Resolution: any (it only sets the window on your monitor)
- Virtual synchronization: Off
- Limit framerate: Off
- MSAA: 2x or 4x (8x costs a lot and is rarely worth it)
- Anisotropic Filtering: 16x (no performance cost)
- Shadows resolution: 1024×1024, higher if performance allows
- Smoke generation: use CSP’s smoke instead (Particles FX > New smoke and dust)
- Reflection Resolution: 512×512 to start
- Rendering frequency: two faces per frame (Static causes issues with Pure)
- Rendering distance: 1000 m or more
- Enable post-processing effects: On (off on a low-end PC – it costs a lot)
- Overall Quality and Glare Quality: High
- Depth of field: Off (it only works in replays)
- Motion blur: Off
- Saturation: 100%
- FXAA: On (some CSP features need it)
- Mirror resolution: 256×1024
- Miscellaneous > Exposure: 100% with Pure
Custom Shaders Patch (CSP) settings
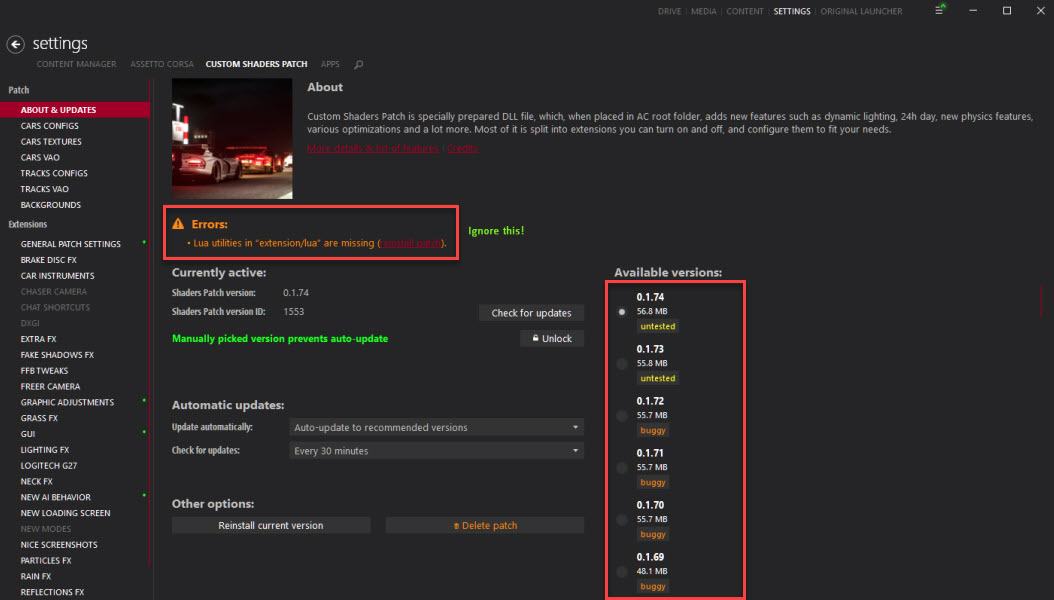
Custom Shaders Patch lives in Content Manager > Settings > Custom Shaders Patch, and About & Updates shows the version you have installed. Builds on acstuff.club are tagged recommended, untested or buggy, and the public recommended build is CSP 0.2.11. My own install in the screenshot below was on an older build (0.1.76-preview136), so check which version you’re on before you match anything to it.
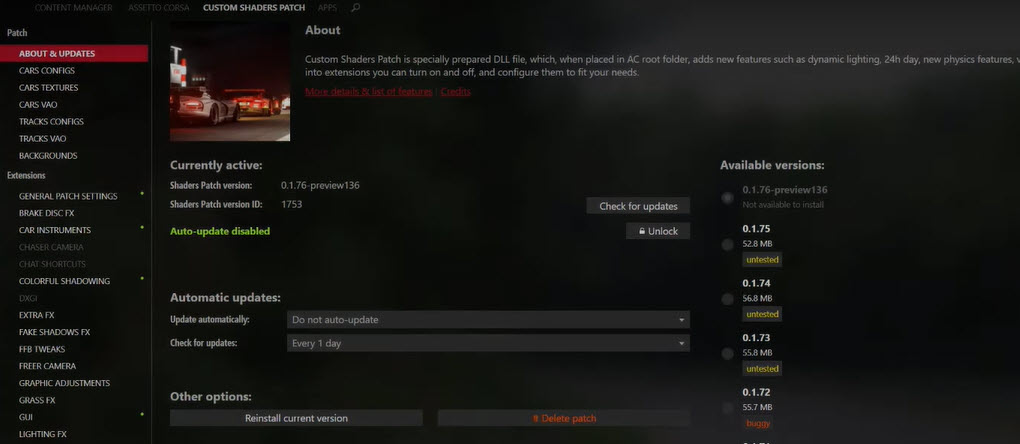
The VR settings sit in a panel of their own. CSP’s changelogs call it VR Tweaks, and Rapty’s 2026 guide shows it as Mode Tweaks: VR or Display mode > VR, so look for any of those three labels. Make sure the extension is Active first. Single Pass Stereo is highly recommended, especially on a slower CPU, because it renders both eyes in one pass, which cuts the CPU’s work significantly. It can stop some Pure shaders from working, though. Work down the panel in this order:
- Active: On
- Single Pass Stereo: On (renders both eyes at once; can stop some Pure shaders working)
- Single YEBIS pass: On if you need it (post-processing once for both eyes; can affect glare)
- Nvidia VRS: On (NVIDIA 16xx, 20xx or newer; needs Single Pass Stereo)
- VRS preset: Custom
- VRS rate: High performance (Highest performance if you need every frame)
- VRS detailed area: Balanced
- Corners masking optimization: On
- Custom VR HUD rendering: On
AMD cards can’t use Nvidia VRS at all. The drop in detail is easier to see on Highest performance, which is why High performance is the place to start. Corners masking optimization is the hidden area mesh, and it stops the GPU drawing the parts of the image you can’t see.
Beyond the VR panel, General Patch Settings has a handful of CPU and GPU savers worth switching on. Extra FX and post-process anti-aliasing don’t work in VR at all, so leave both off. Pure is Peter Boese’s graphics and weather mod for AC and CSP. It comes with the Pure and PureVR post-processing filters, and Rapty’s pick of the two for VR is PureVR. Get the Pure install right, too, because an incorrect one can cause major performance problems. With Pure on, CSP’s “Automatically guess white reference point” can make the UI very bright, so switch that one off, and set the rest as below:
- General Patch Settings > New KN5 loader: On
- General Patch Settings > Audio > Decompress Samples: On
- General Patch Settings > Flatten nodes: On
- General Patch Settings > Chunks optimization: Advanced (Basic if it gives you issues)
- General Patch Settings > Apply Hyperthreading fix: On (CSP 0.2.7 / 0.2.8 preview or newer)
- General Patch Settings > Optimize meshes some more, Deduplicate meshes, Upgrade AC textures: On
- General Patch Settings > Deduplicate textures: Off (it can cause graphical issues or crashes)
- General Patch Settings > Limit audio for other cars: Always, on a slower PC
- Extra FX: Off (it doesn’t work in VR)
- Graphics Adjustments > Post processing antialiasing: Off (it doesn’t work in VR)
- Graphics Adjustments > Force low-res drivers for other cars in first person view: On
- Graphics Adjustments > Multiplier for car LODs: 75%
- Graphics Adjustments > Multiplier for track LODs: 80% or more
- Lighting FX > Cars casting lights: 5
- Smart Mirror > Custom render distance: On, 400 m
- Weather FX > Weather style: Pure Gamma (Pure LCS can look better but may cause issues)
- Weather FX > Replace YEBIS with lightweight alternative: On if you need performance
- Weather FX > Automatically guess white reference point: Off
- Pure post-processing filter: PureVR
Assetto Corsa’s own video settings
AC’s own Options > Video holds the same settings as Content Manager’s Video tab, so set them in one place and leave the other alone. You can change world detail in-game too, with the “View & Video Settings” app. Both sit inside AC itself:
- Options > Video: the same settings as Content Manager’s Video tab
- View & Video Settings app: world detail, changed in-game
Should you cap the frame rate?
Rapty’s guide says no, because the headset limits the frame rate itself, so Content Manager’s Limit framerate isn’t needed in VR and stays off. On the Crystal Light, though, I capped AC at 87 FPS, and iRacing too.

If your PC can’t hold the refresh rate, Pimax Play has two tools of its own. Lock Frame Rate to Half Refresh Rate holds the game at half the headset’s refresh rate for a more consistent experience. Smart Smoothing generates in-between frames to cut the stutter when you’re falling short. Here they are alongside Content Manager’s setting and my old cap:
- Content Manager > Video > Limit framerate: Off (Rapty’s guide: the headset limits the frame rate itself)
- Pimax Play > Lock Frame Rate to Half Refresh Rate: for a PC that can’t reach full refresh
- Pimax Play > Smart Smoothing: in-between frames when the PC falls short
- My old Crystal Light cap: 87 FPS
Fine-tuning
Remember – start simply and ramp up the detail settings to see what sticks. If something looks or feels wrong once you’re on track, find the symptom and try the fix that goes with it, one change at a time:
- After an AC update (OpenComposite route): redo the openvr_api.dll swap in system\x64
- VR won’t start on a CSP 0.3.0 preview: try post-processing effects on (a fix from the OverTake preview thread)
- Frame rate collapses after installing Pure: check the install – an incorrect Pure install causes major performance issues
- The UI is very bright with Pure: Weather FX > Automatically guess white reference point: Off
- Glare looks wrong: Single YEBIS pass: Off
- Nvidia VRS does nothing: it needs an NVIDIA 16xx, 20xx or newer card and Single Pass Stereo on
- Frame rate drops with Pimax Play’s Sharpness on, or per-game settings reset: update to Pimax Play 2.0.4
- A DXGI.dll error with ReShade installed: uninstall ReShade (CrayG had to, on a Dream Air)
- The view sits off-centre: map the recenter key binding to an easily found button on your steering wheel
Plug the DisplayPort and USB straight into the motherboard on the highest bandwidth USB port you can find – a red port on my MSI motherboard means 20Gb/s of USB bandwidth. You’ll never get that working well even on a powered hub – it’s totally unnecessary latency.
If you’re running a different headset, the Assetto Corsa VR settings page covers AC without the Pimax layer, and the iRacing VR settings page does the same job for iRacing. There are Pimax settings for Assetto Corsa Evo too, and a Pimax Settings Tool. Still deciding on a headset? My Dream Air SLAM review and Dream Air SE review cover the Dream Air variants, and everything else is in the best VR headsets for sim racing guide.
Good luck, and let me know how you get on in the comments!
Related Articles
Should Sim Racers Wait for the Pimax Crystal Pro, or Buy Today?
Pimax Crystal Pro: Everything We Know So Far
Bigscreen Beyond 2 for Sim Racing: What to Know in 2026
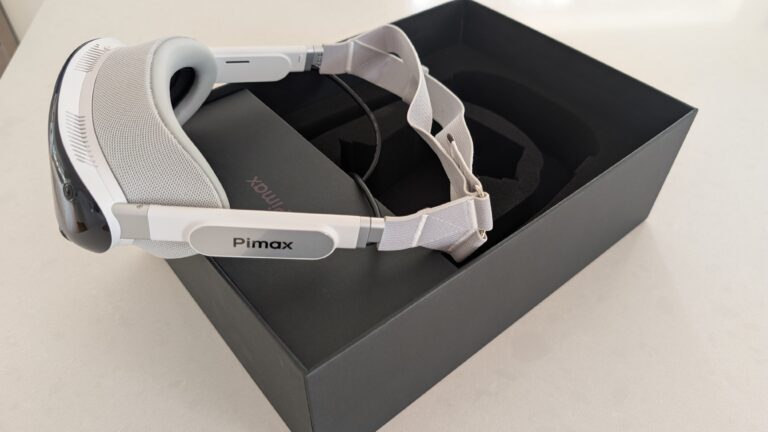
Pimax Dream Air vs Dream Air SE: Which Should a Sim Racer Buy?
SteamVR Base Stations for Sim Racing: Lighthouse vs SLAM on the Pimax Dream Air
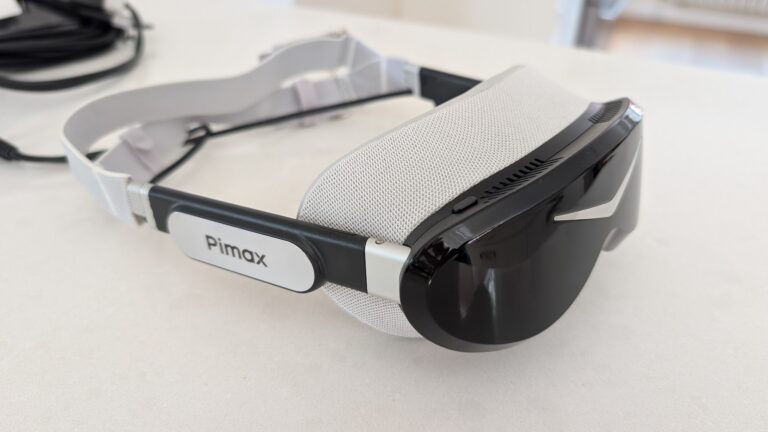
How to Install the SBoys3 Driver on the Pimax Dream Air Lighthouse
Topic: VR Headsets